
Website design can have its particularities across various niches.
This is why we wrote about gym website design, SaaS website design, and today we’re diving into school website design. More similar topics are in progress as well.
These websites might have some special requirements, from special galleries, members access, booking options, and more. So, it’s time to take a look at what makes school website design special.
So, here’s the plan for today:
5 school website designs: inspiration you’ll love
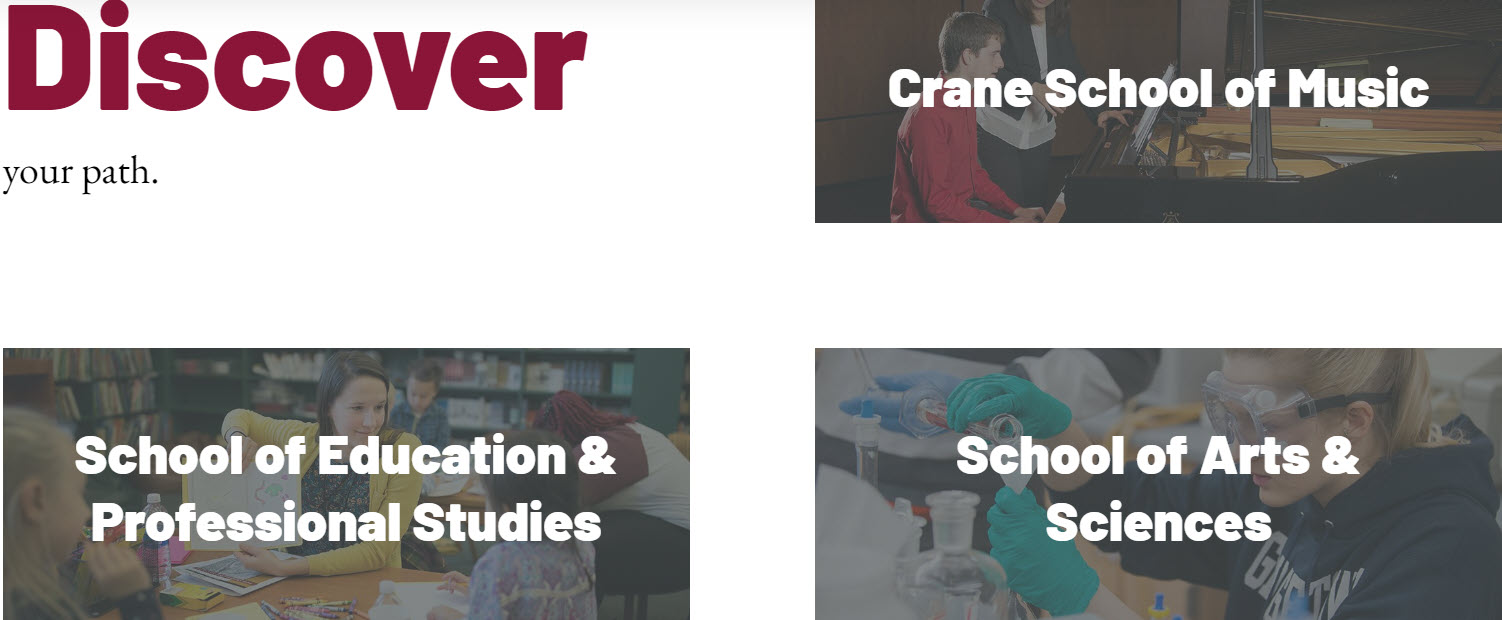
This university has 134 academic programs with a focus on music, education, arts, and sciences.
What we love about the Potsdam website design
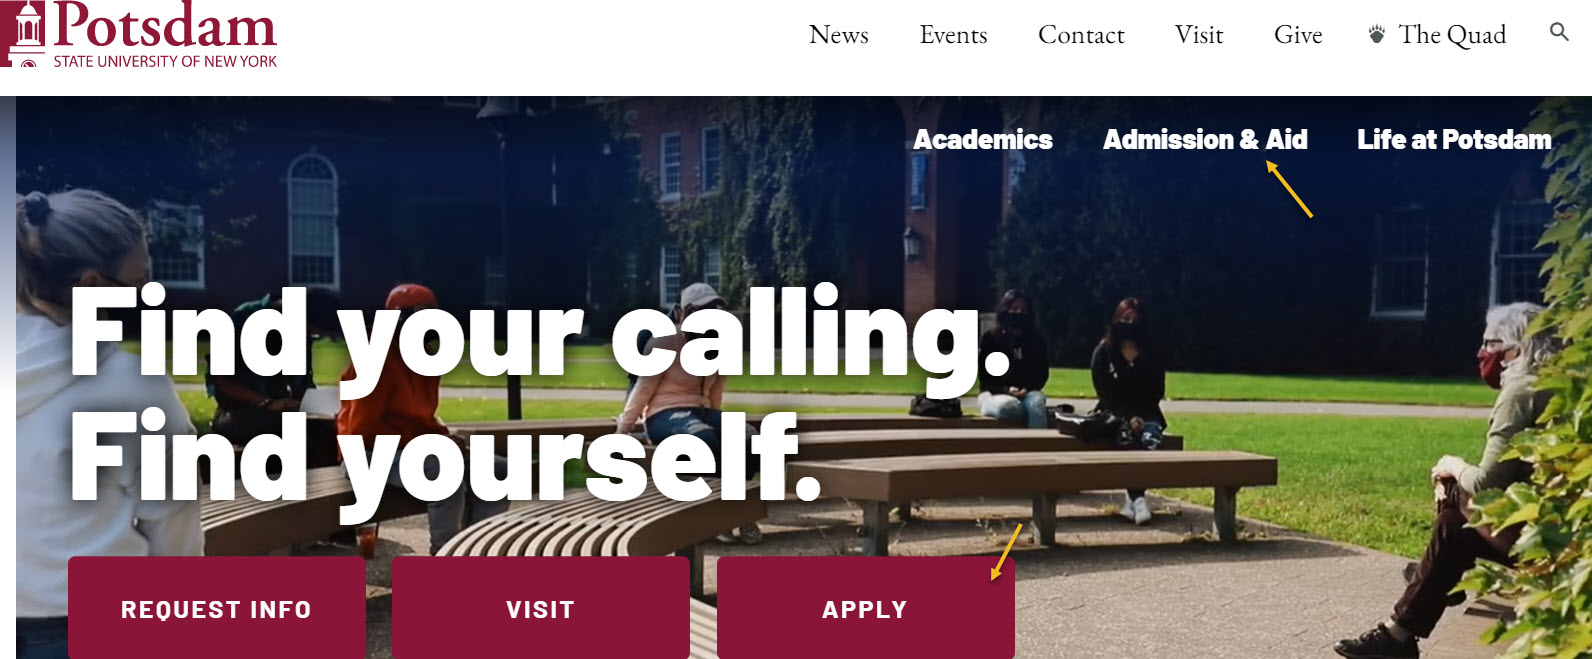
- Color scheme. The website’s color scheme uses dark red an white, and is well represented across the website. The color scheme complements nicely the chosen font family, and the visuals used and their overlays.
- Good copy. Straight from the homepage, the copy speaks to the potential student, trying to attract him to find his calling and path. Adjectives such as “immersive”, “eclectic”, and “uncommon”, as well as verbs such as “explore”, “find”, manage to draw the attention to a potential unforgettable school experience.
- Visuals. Images, videos, and virtual tours are used on the homepage, as well as on other pages, to paint a clear picture of how life really is inside the university.
- Clear website main menu. It has 5 areas: programs of study, admissions, student life, athletic facilities, and about. Each menu has some submenu items. A secondary menu is placed on top of it with a focus on news, events, and login area.
- Good website hierarchy. A clear menu leads to a good website hierarchy. Because the programs of study are essential here, you can access them easily straight from the homepage, as well as from the main menu.
Admission info is also vital. This is why you can access this info easily from the main menu, as well form a very visible call to action in the hero of the homepage.
Tuition and fees info is also easy to find. They also have a Net Price Calculator to view an estimate of the financial aid students might receive at SUNY Potsdam.
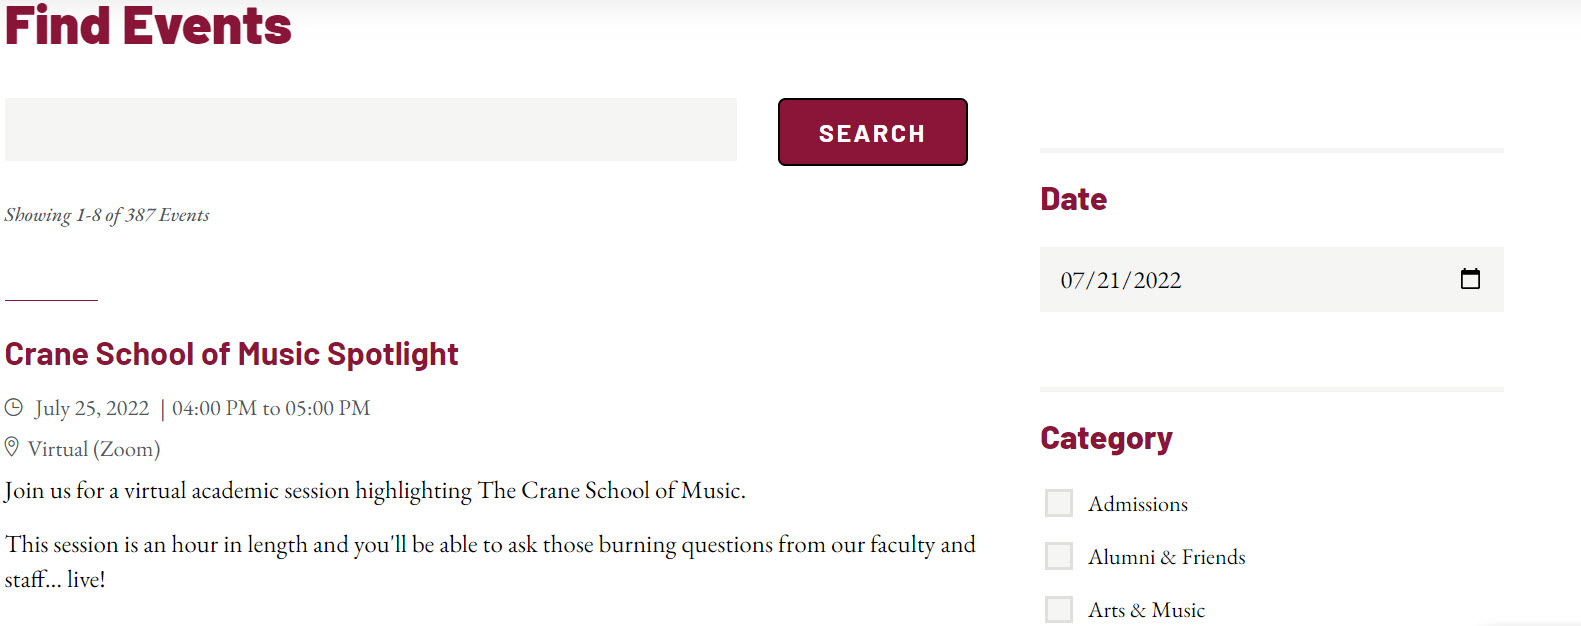
There is also an events page that can be filtered by date, as well as by category, or keyword.
- Live chat option. If you still can’t find what you’re looking for, you can use the live chat option.
That’s a WOW right there “Inspiring generations since 1632”.
If this isn’t social proof, nothing is.
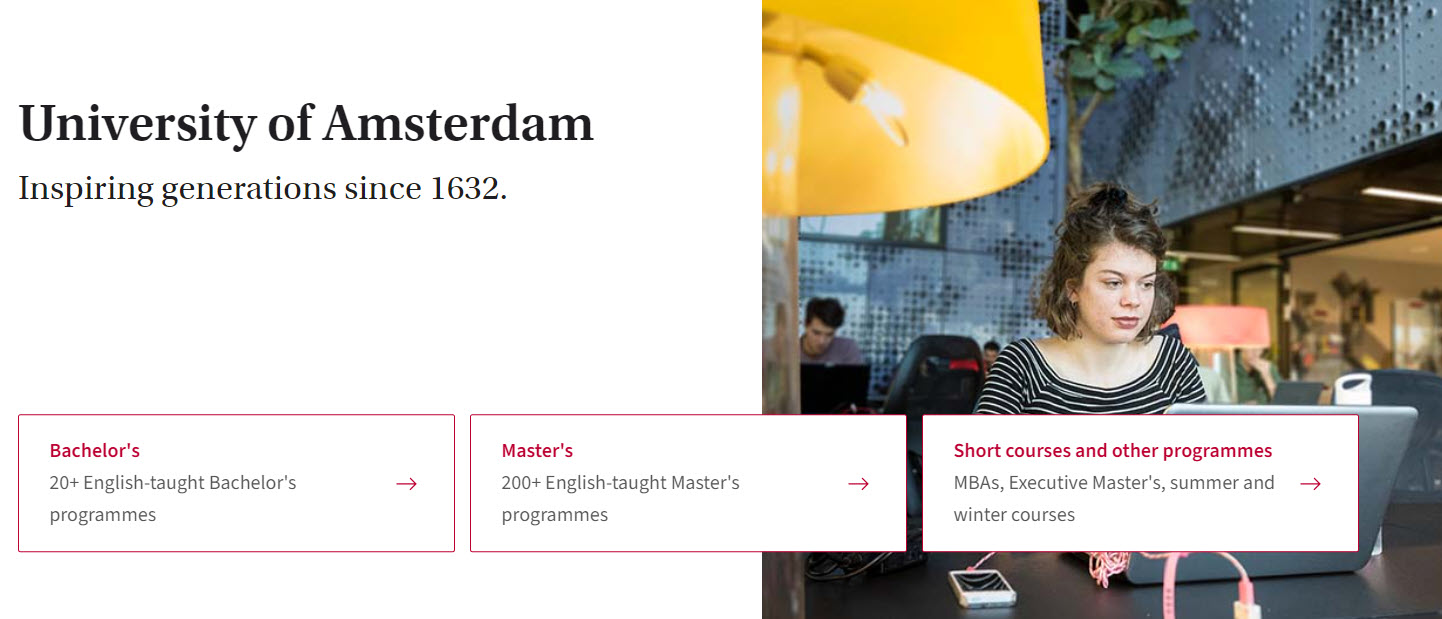
Now, let’s take a look at the website design of the University of Amsterdam.
What we love about the University of Amsterdam website design
- The main types of studies are clear straight from the website’s hero.
- There’s an option to compare various study programs.

- Each program has a list of top benefits, a brochure, an FAQ list, and a presentation video.
- Section dedicated to the Library, where students can browse the catalog.
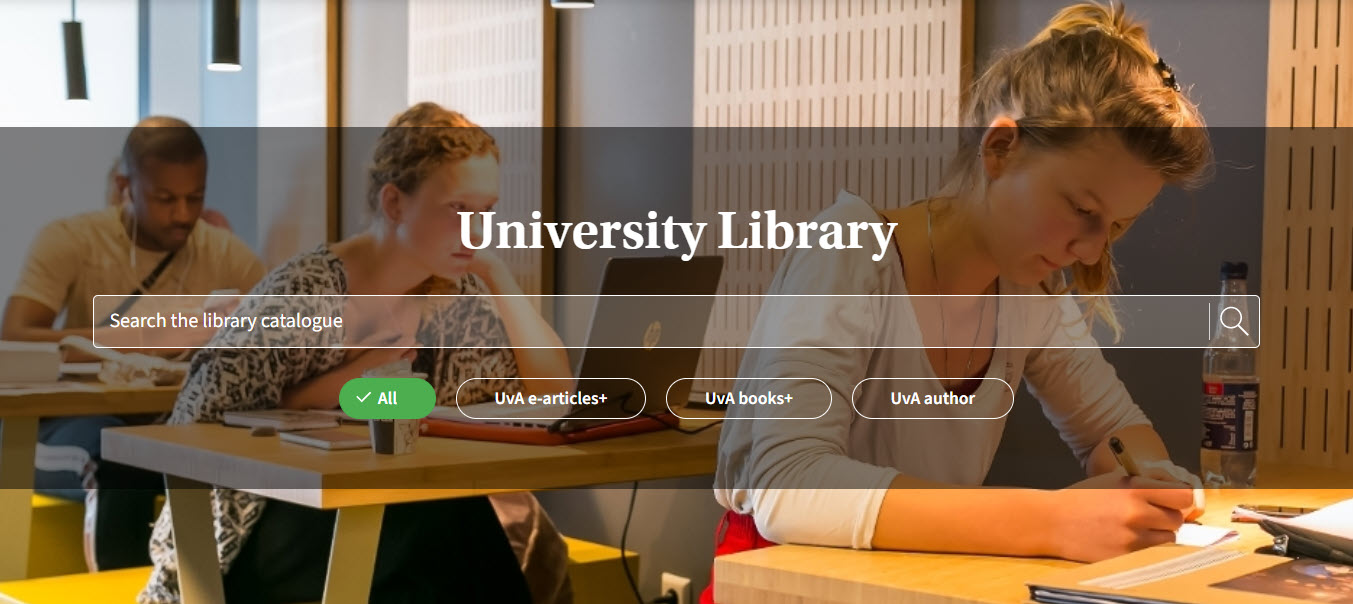
- At the bottom of the homepage there are several shortcuts to research, staff, but most importantly, student’s website. This website provides useful information on specific programs, exam results, study spaces, course registrations, and much more. Here, students can log in and access their timetable, email, and more.
- Dedicated pages for the University of Amsterdam Experts.
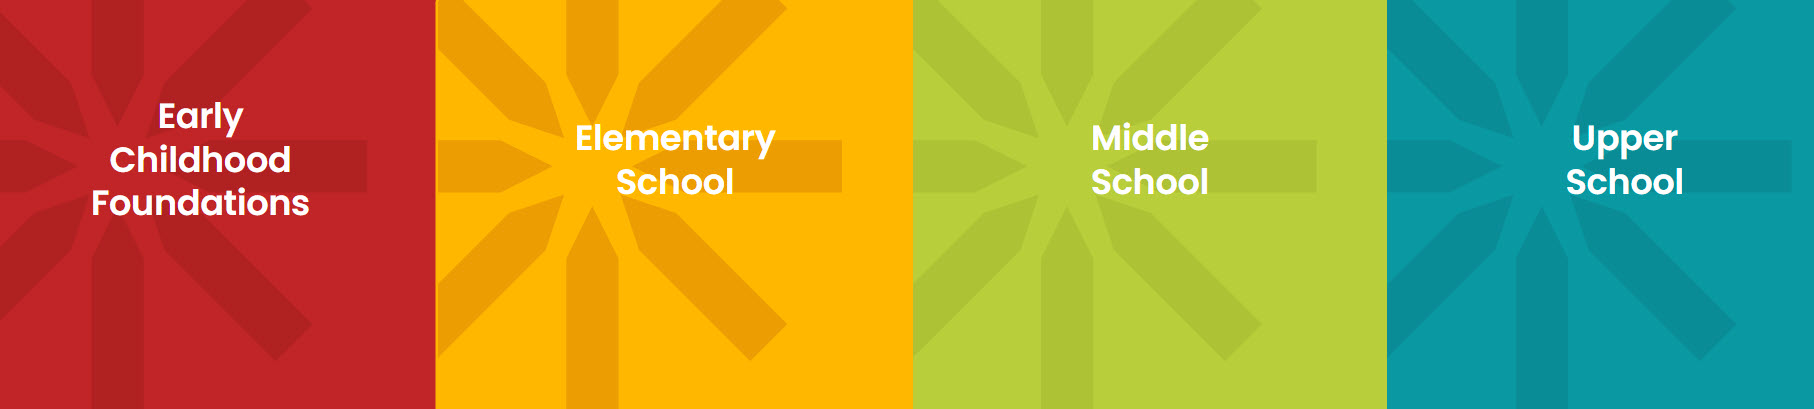
Founded in 1948, this is one of the top schools in the Czech Republic. They cover the studies of kids from preschool to upper-school. Now, let’s take a look at its website a bit.
What we love about the Prague International school website design
- Sticky and straightforward main menu. The admission info per type of school is easily found inside the menu. Pupils and other members of the community can also login to the school’s portal from the main menu.

- The hero has emotional photos of kids playing and learning.
- The study programs are clearly presented below the hero:
- The dedicated pages for each school are well-organized.
Each school has a video presentation, as well as testimonials from former pupils. There is news included, as well as some other social proof (years of experience, number of pupils and teachers, kids nationalities).
What I feel it’s missing here, is a shortcut to the admissions page and the school fees.
- The admission steps are made clear on a dedicated page.
- The school has a virtual tour. It can be accessed inside the Admission page. I would place it on the homepage as well.
- A dedicated page for student life.
- The curricula per each school is presented inside the Learning pages. Now, I would definitely include some of the information on the schools pages as well.
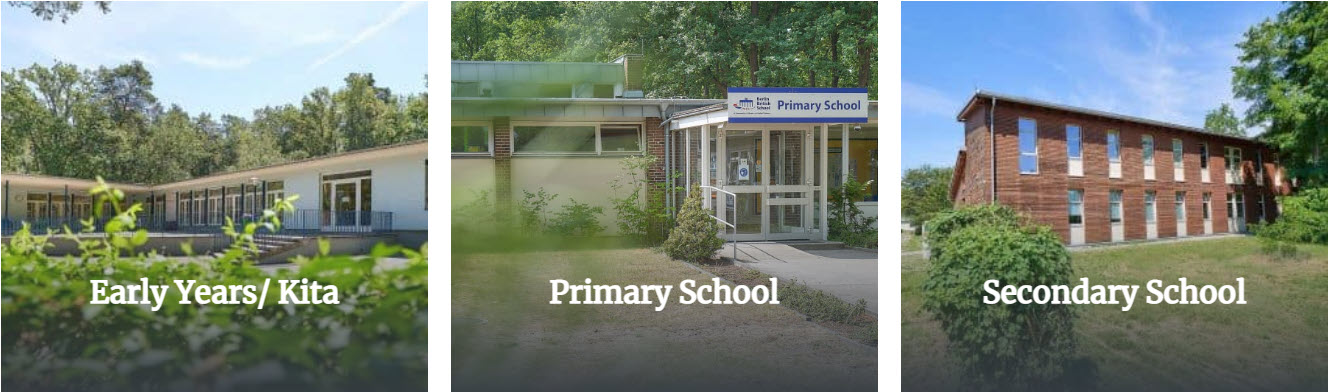
This school has three main schools for early years, primary education, and secondary education.
What we love about the Prague International school website design
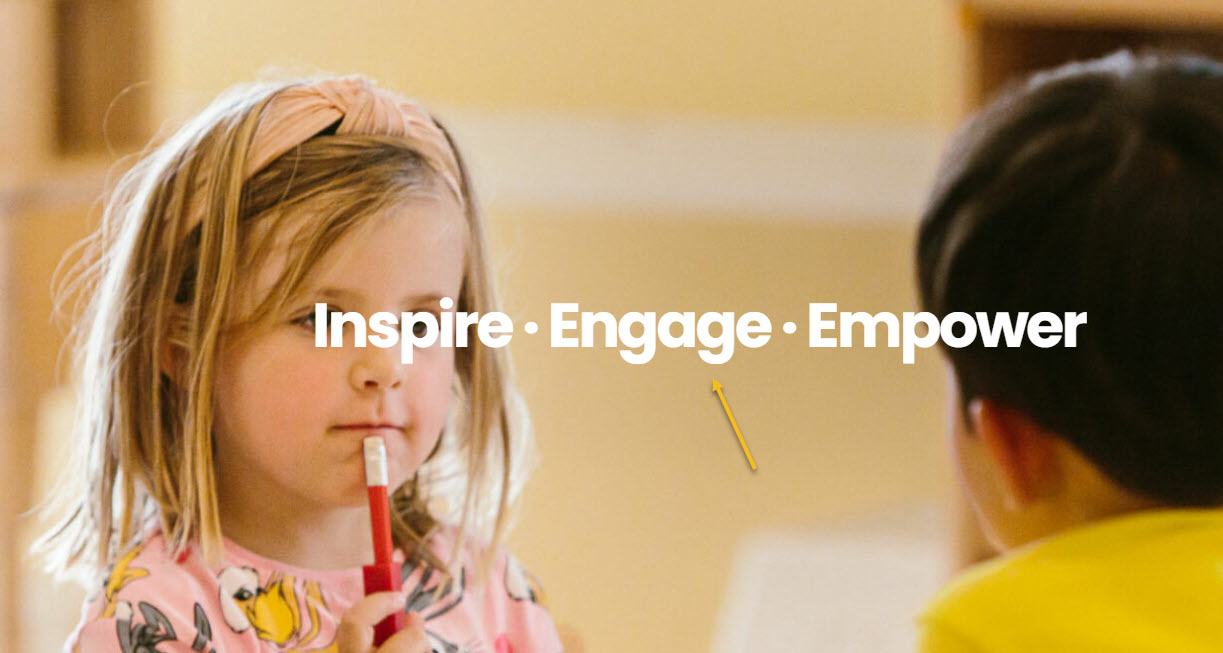
- The hero has a slider of images and videos showing how life is at the Berlin British School. Somehow I feel that a slogan is missing, something to inspire even more, like in the case of the International School of Prague. This is their slogan: “Inspire. Engage. Empower”. Really inspiring, wouldn’t you say?
- The three schools are shown below the hero, and have dedicated pages.
- There is a dedicated page for teachers and staff.
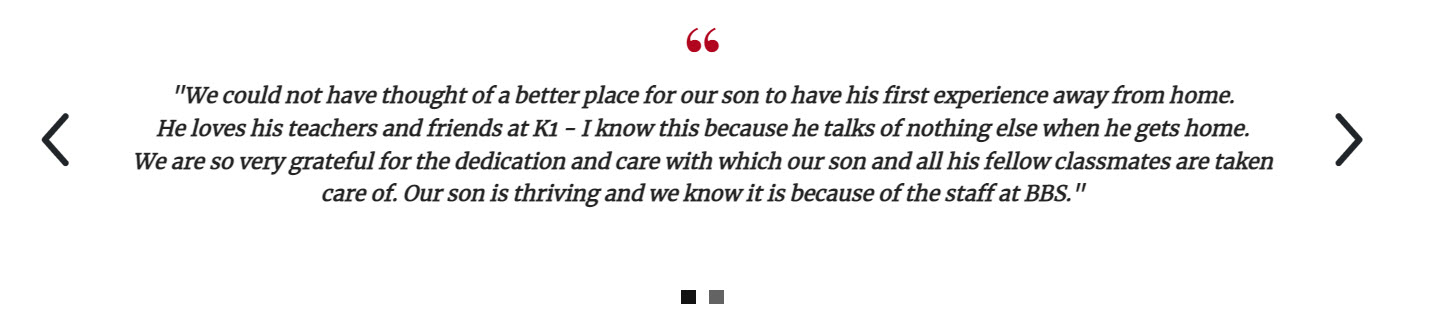
- There is a testimonials section on the homepage.
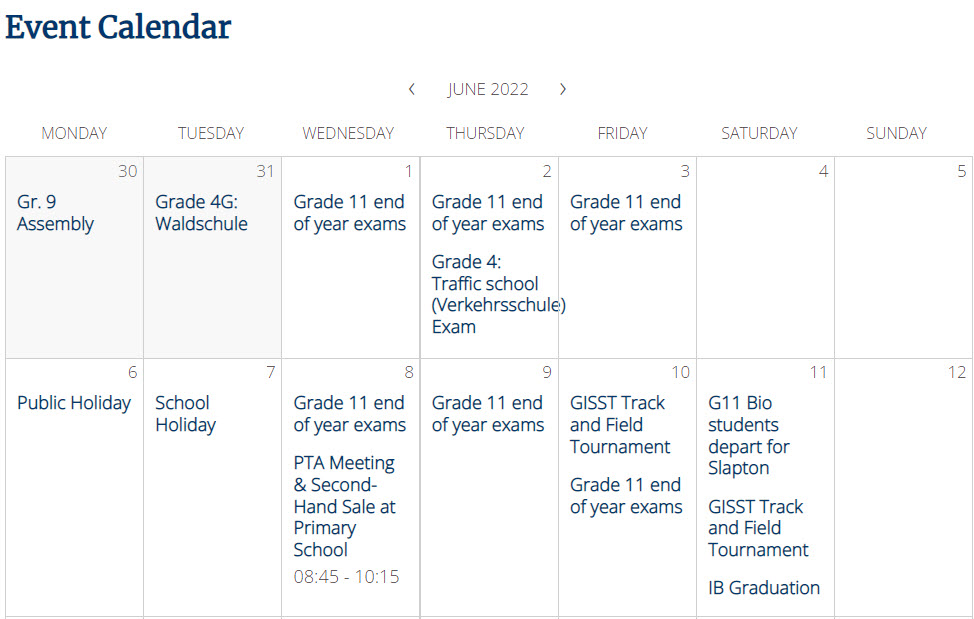
- There’s an event calendar available, accessible from the homepage.
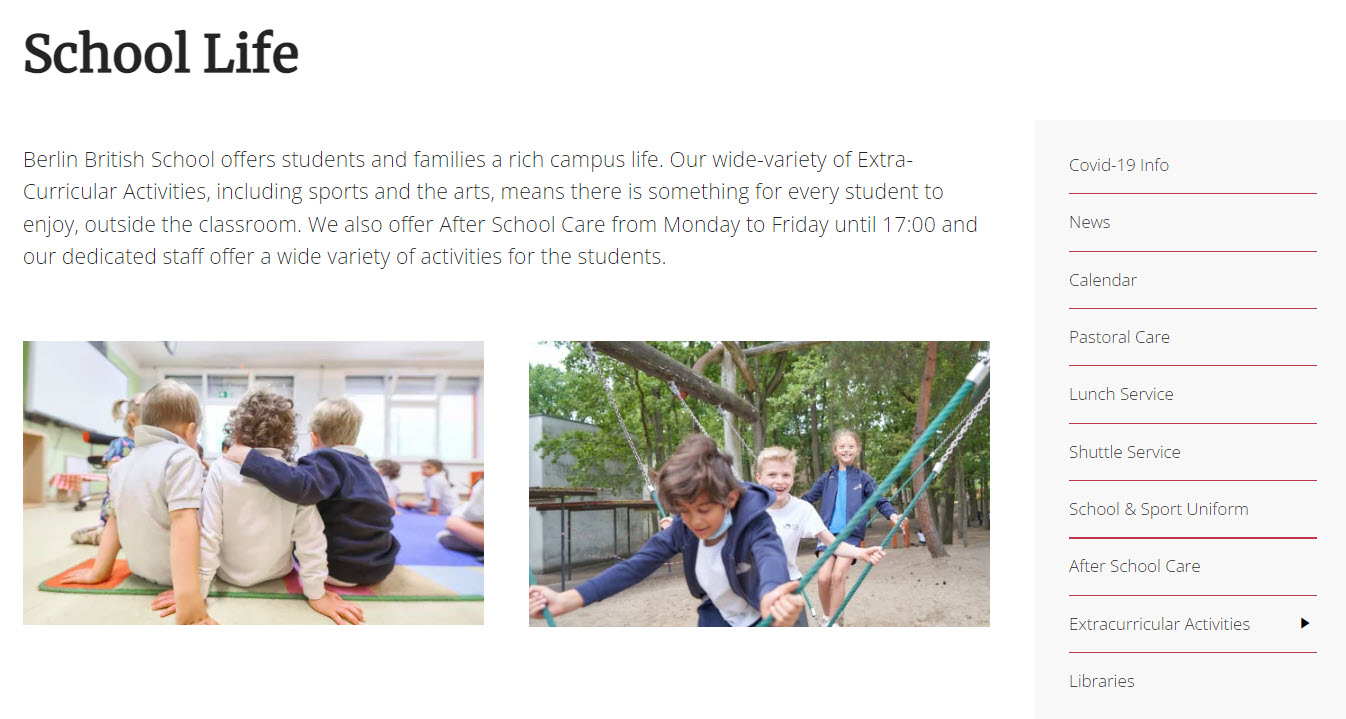
- There’s a dedicated page named “School life” that contains important information on: uniform, shuttle service, lunch service, after-school care, and more.
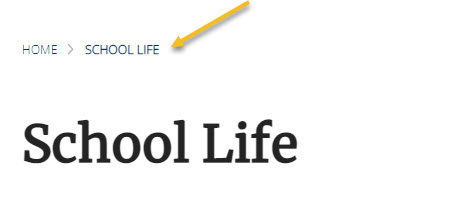
- Using breadcrumbs to improve website navigation.
- School web application for students, teachers, and parents.
What we love about the Berlin International School website design
- Color scheme and illustrations. The color scheme uses blue, orange, and yellow, consistently used across the website, and inside various illustrations. The chosen font complements nicely the illustrations used.
- The study programs are clear from the menu. They are also presented below the hero.
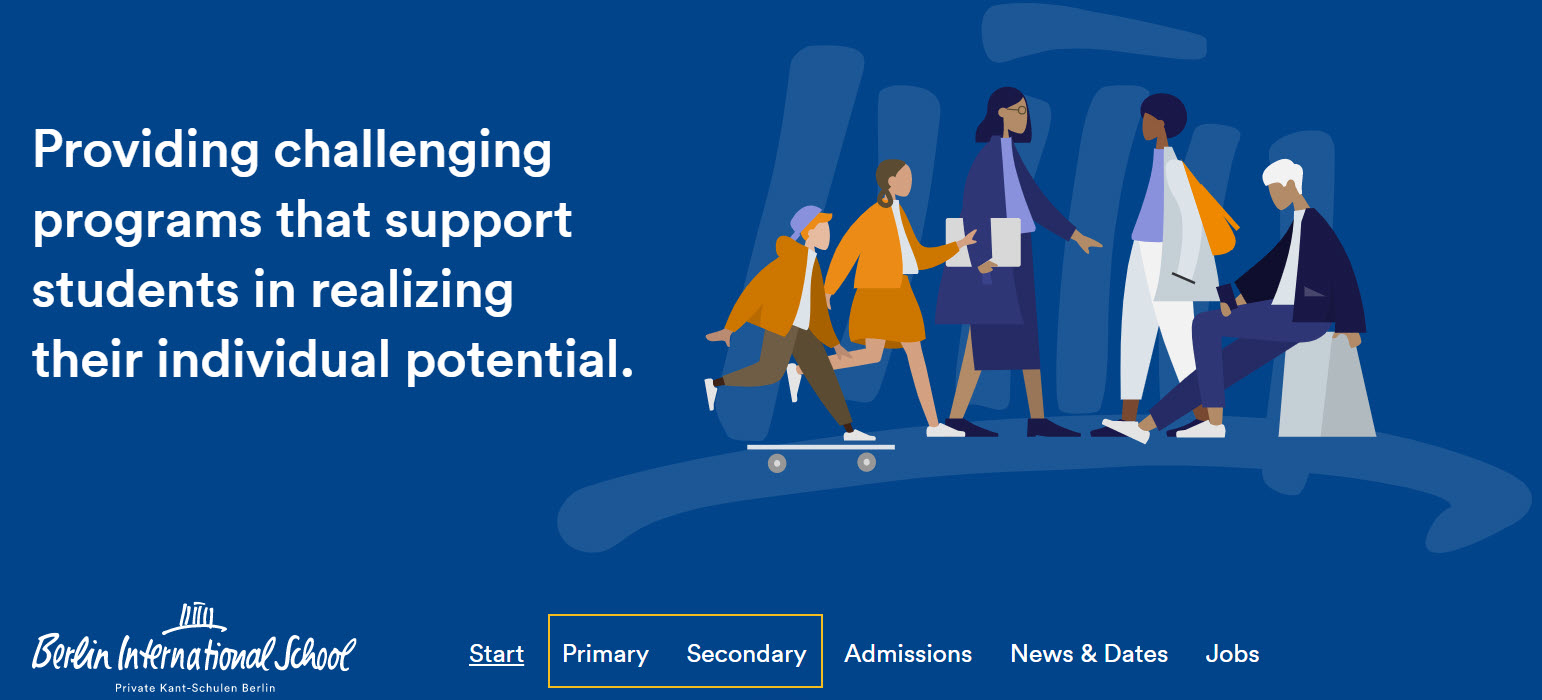
- The program years and the attached diplomas are made clear straight from the homepage.

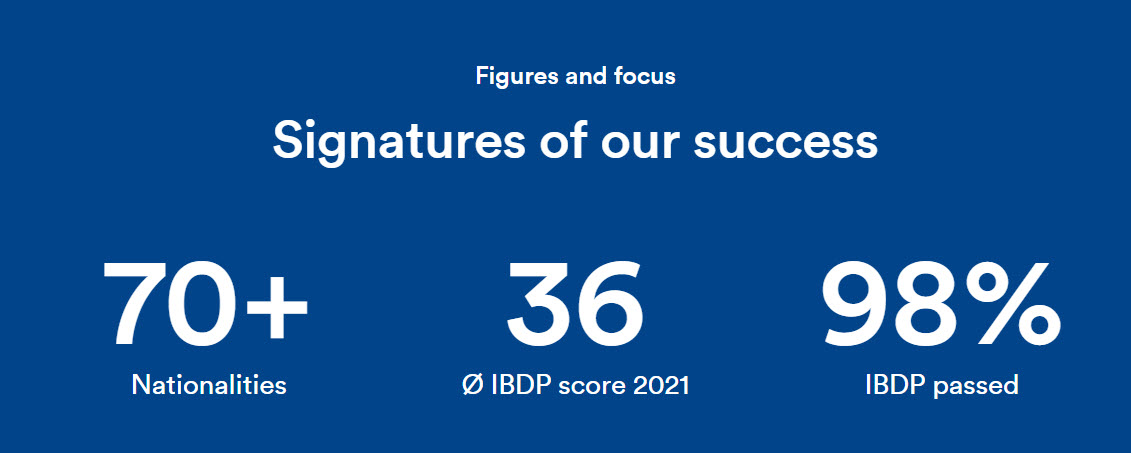
- Social proof. When parents choose a school for their kid, they care about the quality of studies at that particular school, as well as about the exams passing rate. The Berlin International Schools praises a 98% success rate. They also have a 36 IBDP score (the world average is 30).
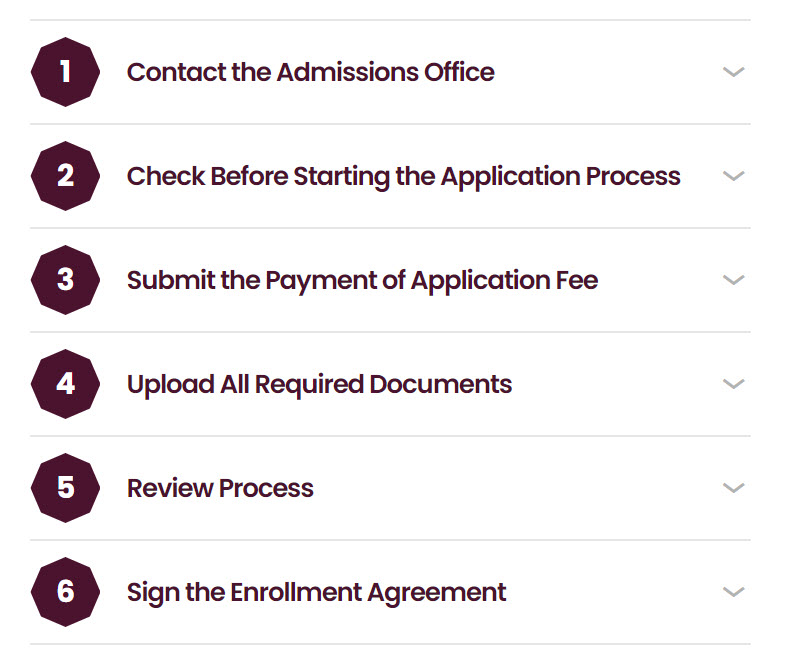
- The admission steps are clear, and presented on a dedicated page. The page can be easily accessed via the main menu.
- Pupils’ login to the school’s portal available.
Best case practices for school website design
Now that we’ve analyzed the website design of 5 schools, let’s wrap up a bit the good practices to follow when it comes to school website design.
- Choose a color scheme that works well with the chosen font and visuals (images, videos, illustrations).
- Have a clear website menu that allows visitors to easily find the study programs as well as admission information.
- Use social proof to prove your expertise and show a history of accomplishments.
- Develop a portal for students where they can access information on timetables, exams, and more.
- Present your teachers and staff information.
- Use images and videos from the school, students activities, so that future students can get a feeling of school life.
- Have a calendar of school events.
- Have a blog or news website section.
- Make school fees information accessible.
- Make contact information clear. A live chat option would be great as well.
School website design: a 30 minutes tutorial
Now, from the technical perspective, here’s what you will need to jumpstart with the school website design:
- Buy the domain name,
- Choose a hosting provider,
- Pick a web design platform such as WordPress, Wix, Webflow, etc.
Now, WordPress is the market leader, powering more than 40% of the websites worldwide and this kinda says it all.
No matter the platform you use, you will be able to design on top of a predefined template (aka demo sites, starter site), or just start from scratch.
For example, here’s the Kubio builder school website template:
Here’s the whole preview.
You can even go here, hover over the starter site, then click on the TRY ONLINE option and start making edits to the template using the Kubio page builder. Kubio is a WordPres page builder that allows you to create a site by drag and drop using content blocks. All in a clear and intuitive interface, without the need of any prior knowledge of web design or coding.
Now, in this exercise I’m going to work inside WordPress, specifically with the Kubio builder. But, most of the know-how you’ll gain from here can be replicated across other web design tools. Once you know how to work inside a tool, the learning curve will be shorter when it comes to working with another one, because you already know the basics.
So, let’s roll.
Meet the WordPress dashboard
After buying a domain name and acquiring a hosting plan, you will need to install WordPress. The process differs from among hosting providers, but it should be straightforward.
When this is done, you will see an interface looking like this:
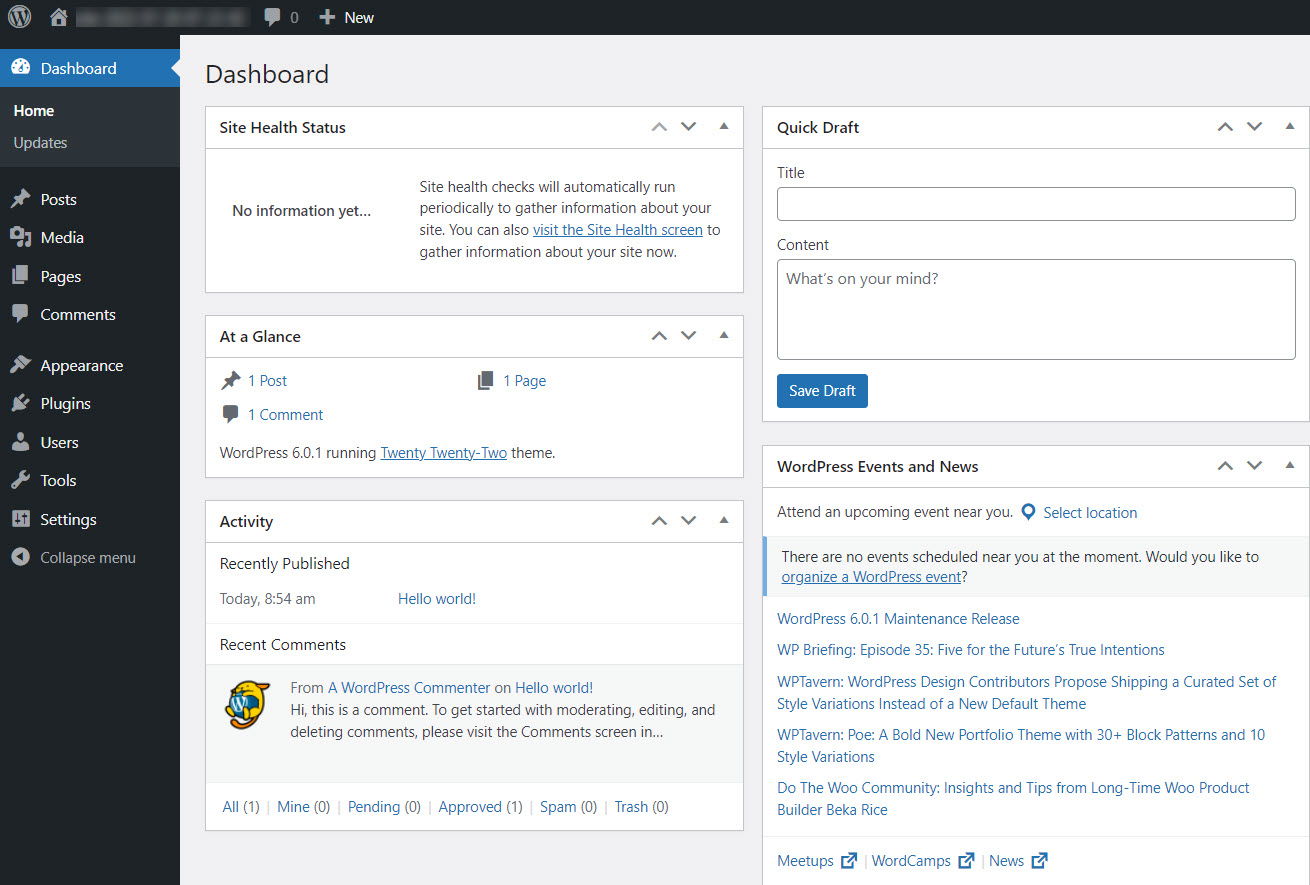
If you look at the menu on the left you will see several options. I’m going to describe some of them briefly below.
- Appearance -> Themes. You will come here to install a WordPress theme. A theme will dictate the overall layout and look of your site. Every WordPress site technically needs to have a theme installed and activated, but this doesn’t mean you need to use your theme’s design. If you use a builder such as Kubio, you can replace the theme’s layout with custom designs. Page builders give you more freedom over design, than themes, everything in a drag and drop visual interface.

When you use WordPress for the first time, you will notice that a default theme is already activated: Twenty Twenty Two. We’ll keep it for now.
- Posts and Pages in WordPress
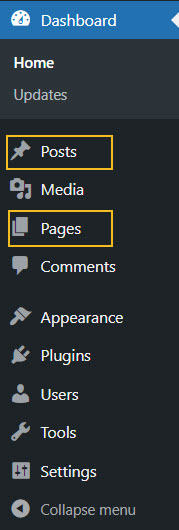
Pages and posts have different functionalities in website design. Pages are used for static content, whereas posts are for more timely content that can get regular updates. For your school website design here are some page ideas: homepage, Admission page, Secondary School Program, School life, etc.
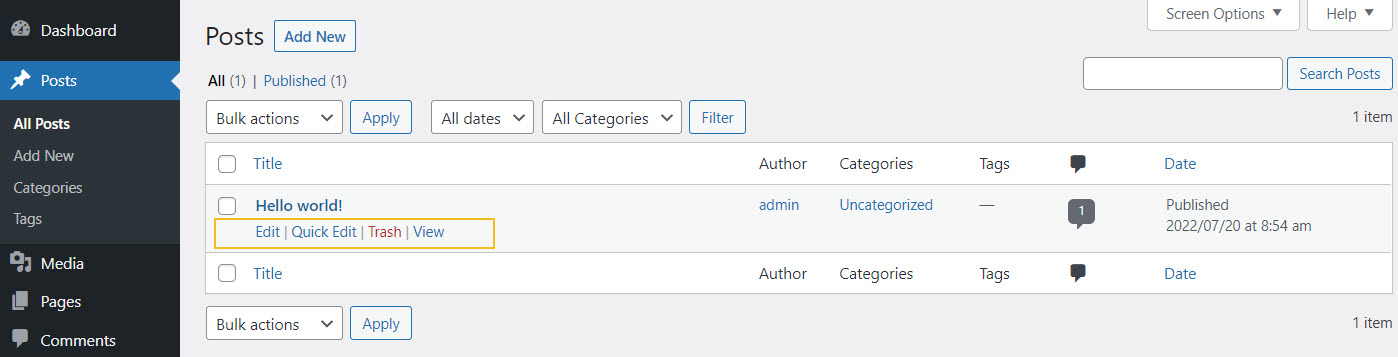
Use the “Add new” button inside “Posts” or “Pages” to add a new post or page.
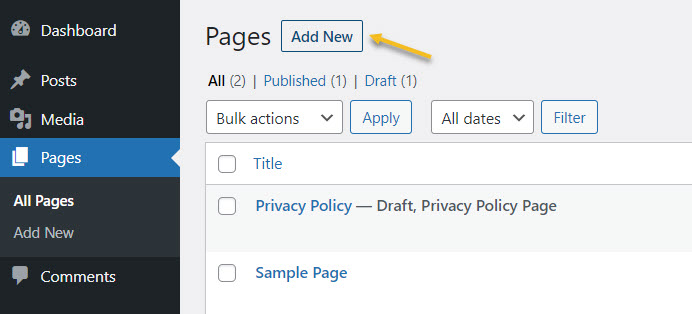
You can always come back here to make edits to previously created pages, as well as to delete them. Just hover over the name of a page or post, to unveil the edit and delete (trash) options.
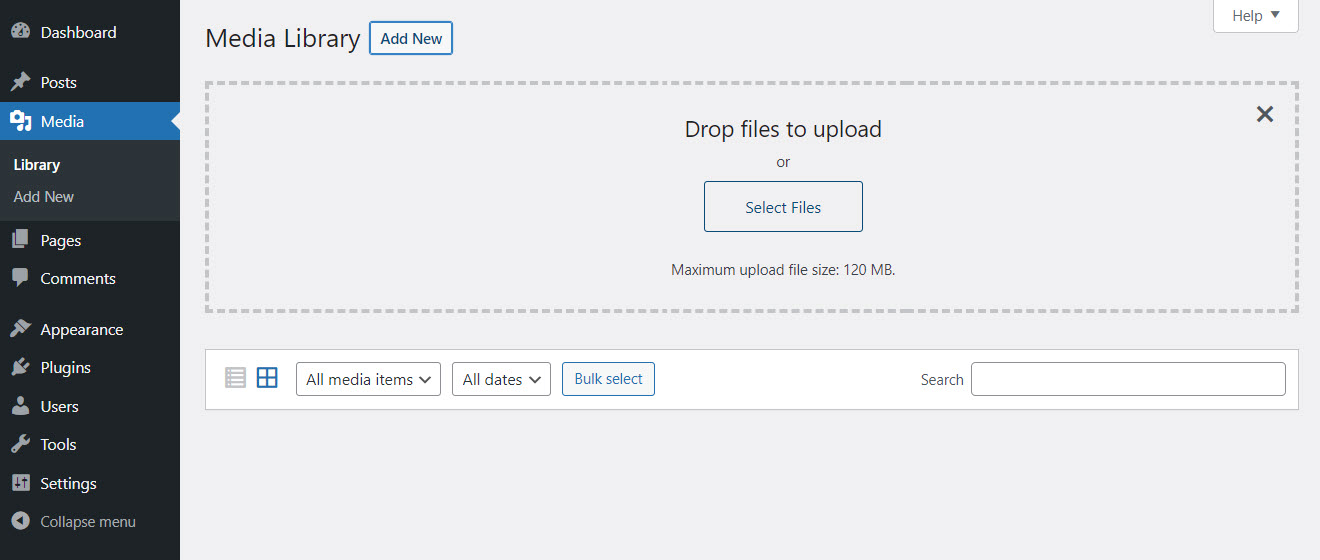
- Media – here you will upload the media you will use inside pages and posts, from images and videos to audio and other files. Use the “Add New” button to add new media items to the library.
- Plugins – here you will add new functionalities to your site. Maybe you need a contact form, or a membership feature, etc. This is where you will find them.
In this case I am going to install the Kubio page builder. Now, what’s the difference between a WordPress theme and a WordPress page builder?
WordPress themes and their features vary from one to another. They can have free plans and paid one, with distinct features inside. Now, in general, here are some basic elements that you can customize with most themes out there:
- Text and visuals,
- Color scheme,
- Typography,
- Layout,
- Menus.
Now, some features are pre-built, and you can’t make changes without any coding knowledge. This means that themes don’t allow much flexibility. You can get locked inside.
This is where page builders come in handy. Most page builders work by drag and drop giving you complete freedom over the website design. A WordPress page builder goes beyond a WordPress theme, and it’s the best option if you really want to create a beautifully-designed website.
For this particular exercise I’m going to go with Kubio builder. Let’s install it.
- Let’s head to Plugins -> Add New.
- Type “Kubio” in the search bar on the right-hand side of the dashboard.
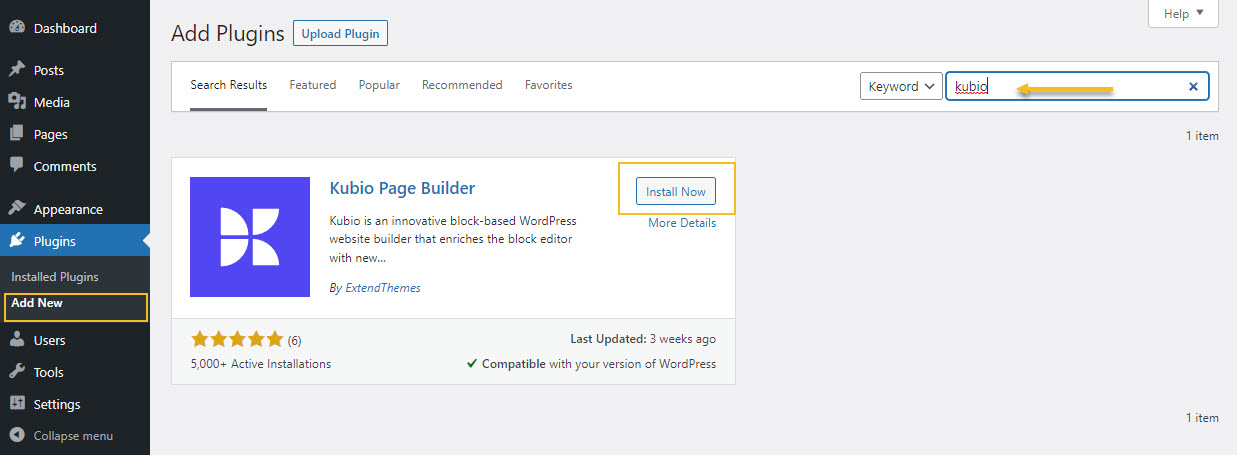
- Go to the Kubio Page Builder card and click on “Install now”
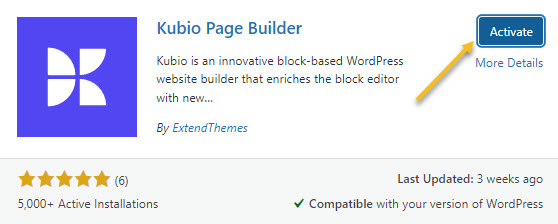
- Activate the plugin.
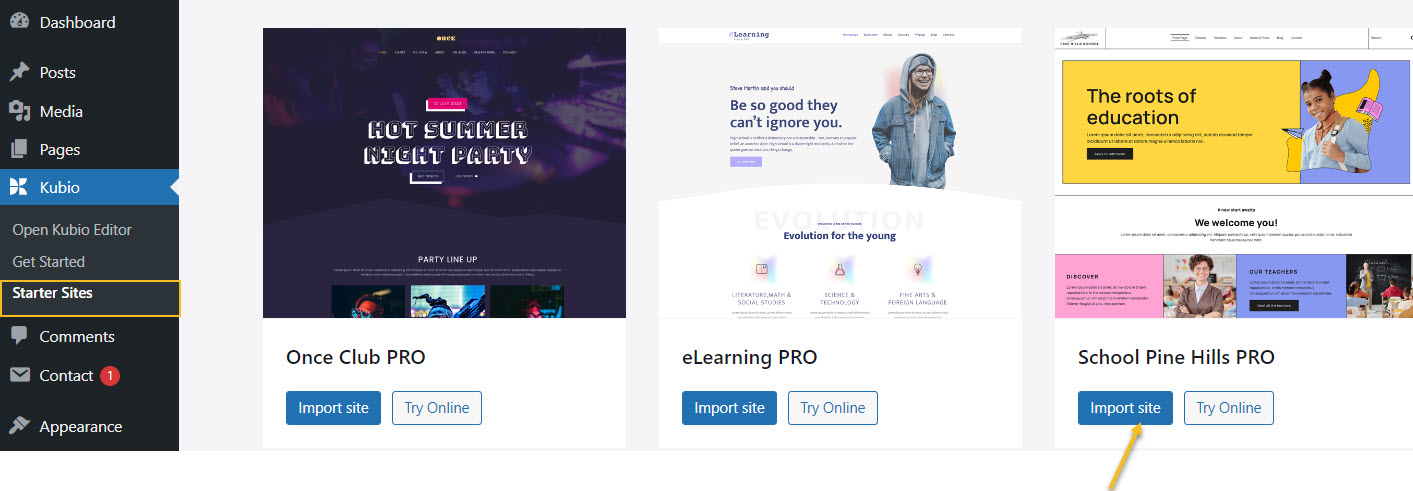
Kubio is a free builder, but there are some features and website templates (or starter sites) that are included in the paid plan. The school starter site is a PRO one. But don’t panic! I’m using the school starter site as an example to show you the capabilities of Kubio. You can create a school website with the free plan as well. The Kubio free plan has tons of features that allow you to create a stunning website as well.
Now, the moment you activate Kubio, you will notice that a Kubio menu will show up inside the menu on the left hand side of the WordPress dashboard.
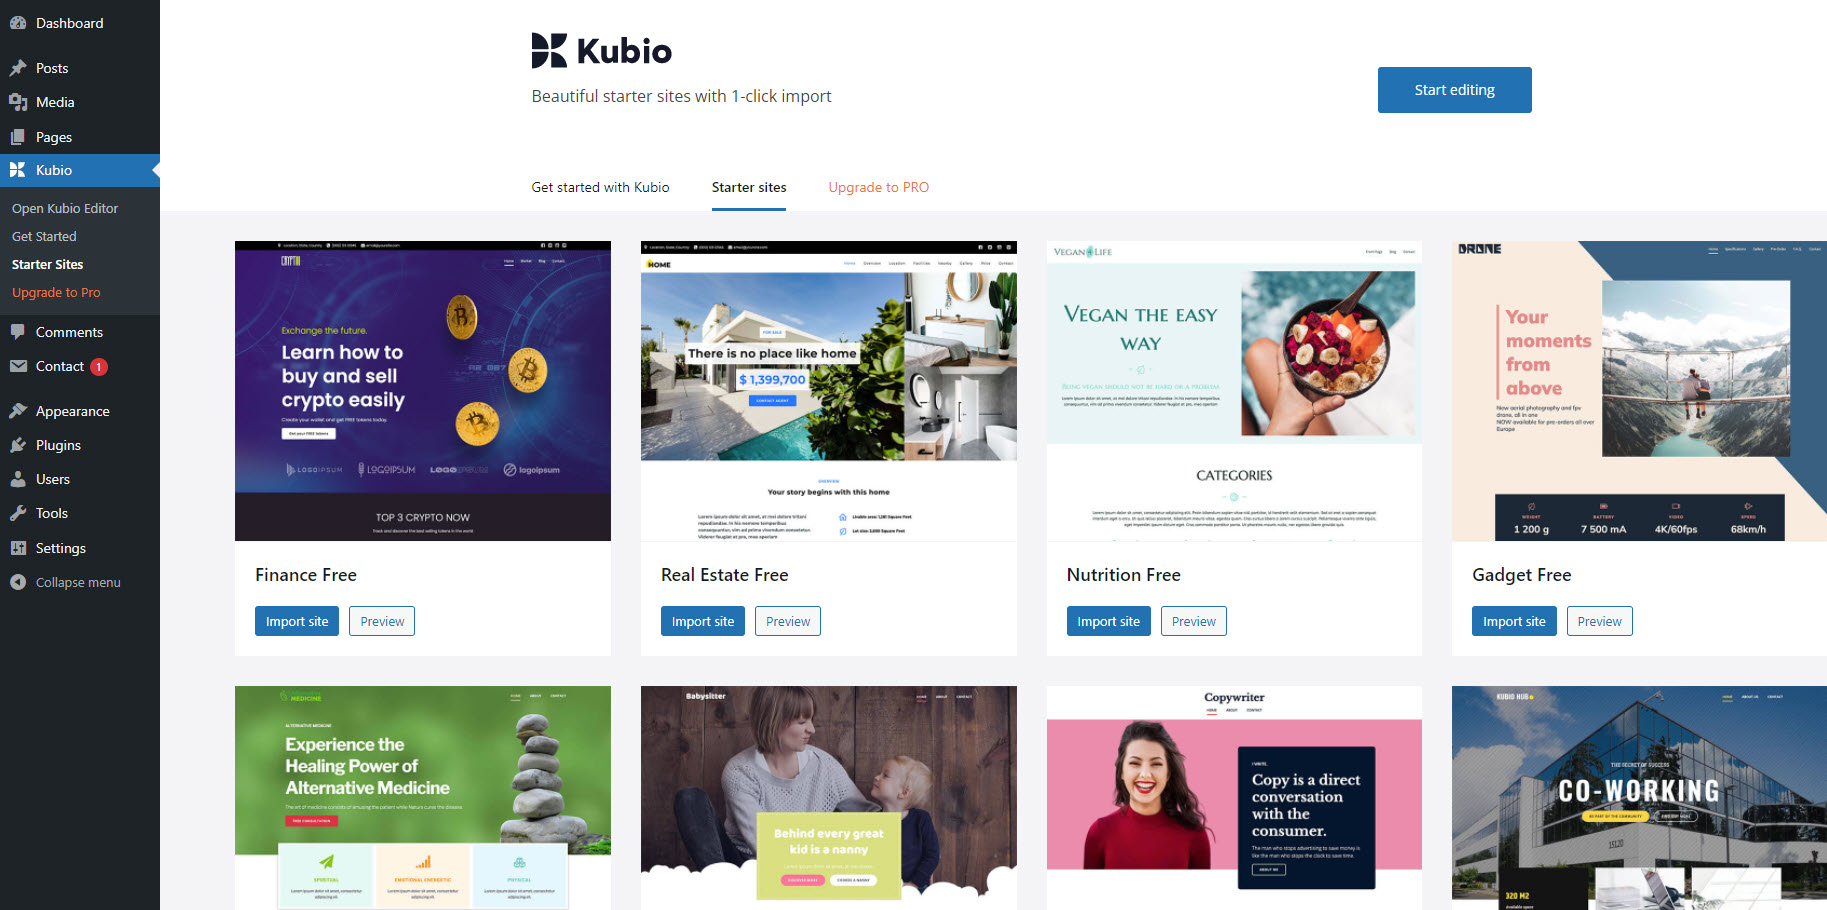
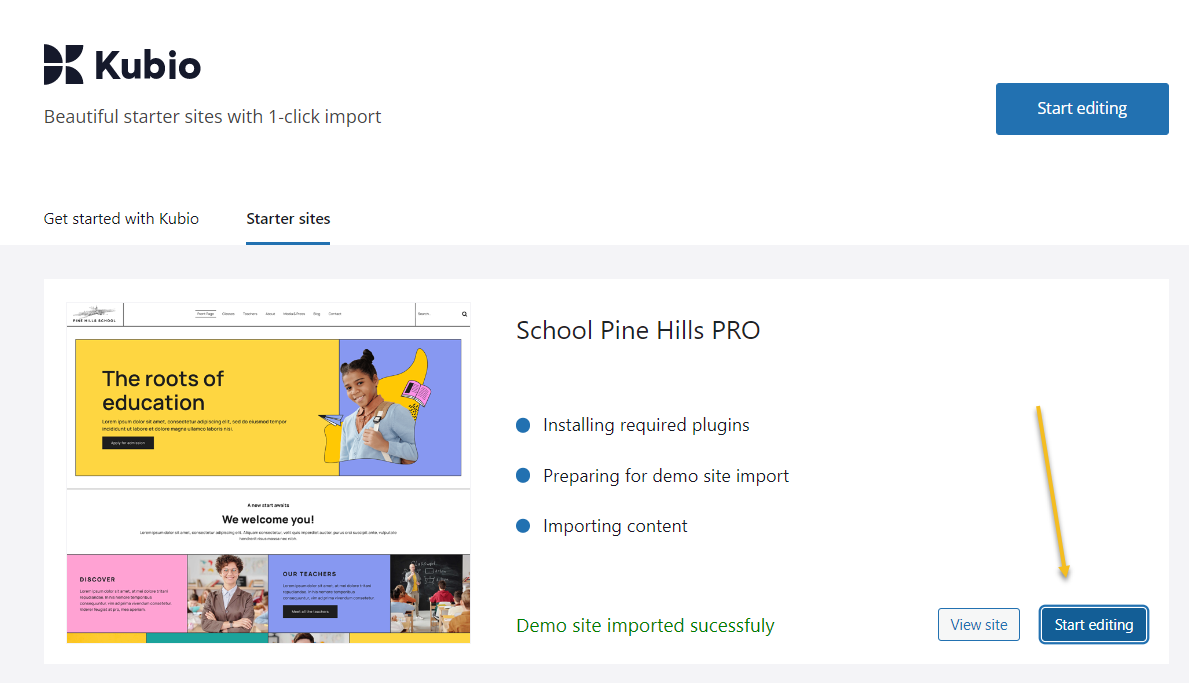
Click on starter sites, then go to the School PRO starter site and click on “Import site”.
Next, click on “Start Editing”.
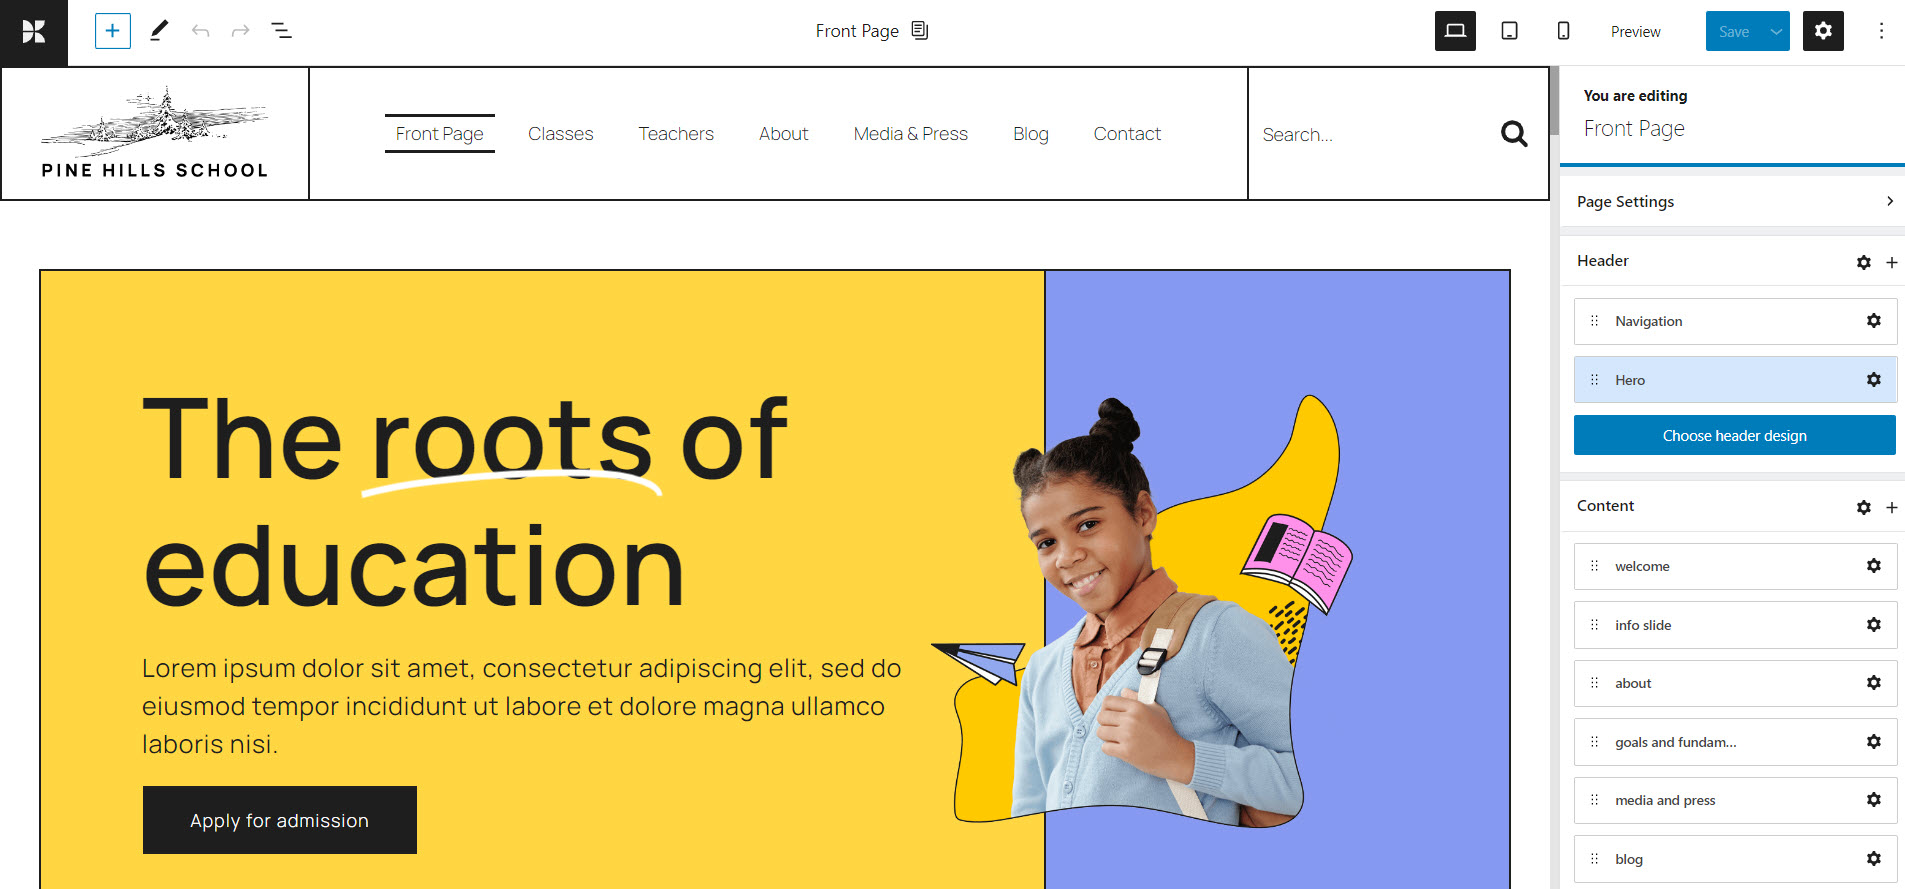
Here’s how the homepage looks like inside the Kubio Editor:
Block-based design in WordPress
The WordPress design experience began to change back in 2018. Now, everything in WordPress is a block: from paragraphs and headings, to galleries and tables. So, each block serves a purpose and can be edited separately. In the Block Editor you just drag and drop such blocks onto the website canvas, then start to style them.
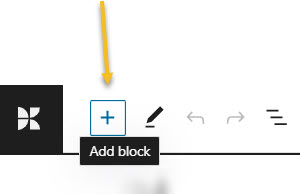
In order to add a block go to the “+” sign in the upper left corner of the interface.
This will open up a block inserter. There are some default WordPress blocks inside. They have black icons. If you use Kubio builder you will notice some extra blocks as well, with blue-green icons. The Kubio blocks are shown first.

You can easily drag and drop them onto the canvas then customize them however you like.
You can locate the “+” sign inside the canvas as well. Just hover between various elements on the site to uncover them. I’ll show you in the next subchapter how this is done.
Now, it’s important that you use only Kubio blocks, because they will have advanced editing options available.
How to customize WordPress blocks
Now, let’s play a bit.
Before proceeding, please watch this short video on the basics of Kubio: how to make work with text and images.
- Adding a block to a page
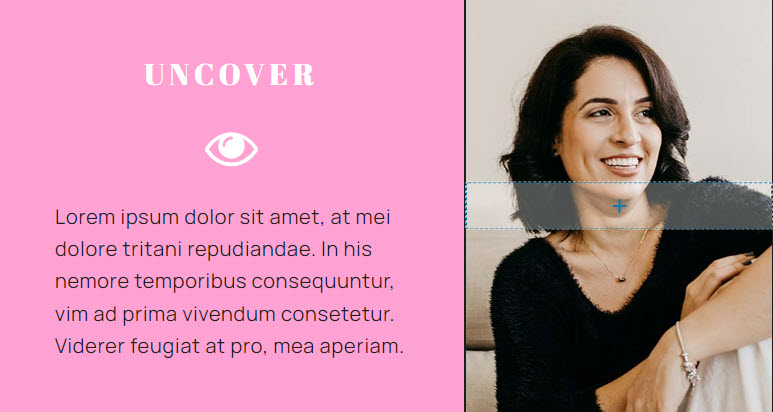
Now, let’s go and add an icon below this heading:
Like I said before, let’s hover near the heading until we uncover a “+” sign, in order to open up the block inserter. Then, let’s look for the Kubio icon block (the one in a blue-green shade).
- Customizing a block inside the editing panel
Now, let’s select the icon and change its shape, color, and alignment.
This means that we will work with the block editing panel on the right hand side. Each block will have its own specific options inside this panel. But a lot of them are common such as: color, spacing, backgrounds, typography. This means that once you get the hang of editing one block, the rest will seem easy-peasy.
In order to change the shape of the icon, let’s go to Icon Properties -> Icon, then click on the three horizontal dots.
A library of icons is now open.
Let’s search for an eye, then click on it in order to add it to the page.
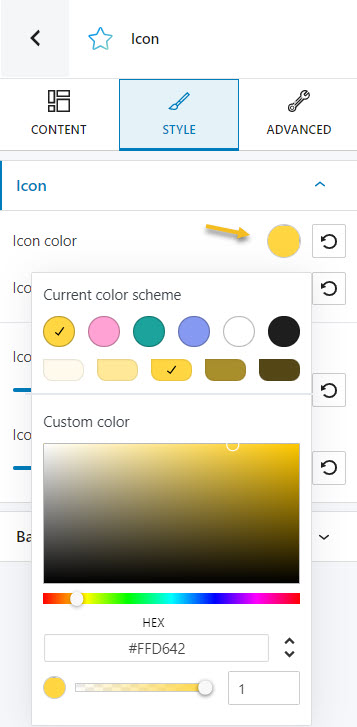
Next, while the icon is still selected, let’s go to “Style” inside the block editing panel and change the color.
Let’s click on the colored circle.
A panel will open up that allows you to pick a color from the current color scheme or gradient from a color, pick a color from a slider, or just type in a desired color code in the “HEX” field. You can also switch to the RGB color mode if it suits you better from the dropdown arrow.
You can also adjust the opacity of your color. The slider offers you values from 0 to 1, 1, meaning there’s no transparency. You can always reset the color to the default value when you select the reset button.
I’m going to choose a shade of black. Next, I’m going to change the icon size from 100 to 50. You can type the size, or use the slider for this.
Next, I need to align the icon to the center. This is done at the “Content” level, inside the block editing panel.
Here’s the end result:
Everything is happening in real time. If you want to go live with the change, just hit the “Save” button in the upper right corner.
- Making text changes
Text mostly comes in two formats in WordPress and Kubio: paragraphs and headings.
You can easily add them as blocks, from the block inserter.
Now, if you want to make changes to existing text, just go ahead and click on it.
Let’s look at the heading in the previous example, and change the text from “Discover” to “Uncover”, and change the alignment to center. The text change happens inline, straight in the website canvas, while the alignment happens inside the block editing panel, at the “Content” level.
All roads lead to the block editing panel. That’s where all the Kubio magic is happening.
But what if you want to change the text-font, its size, or weight? Well, the block editing panel will have the options for those.
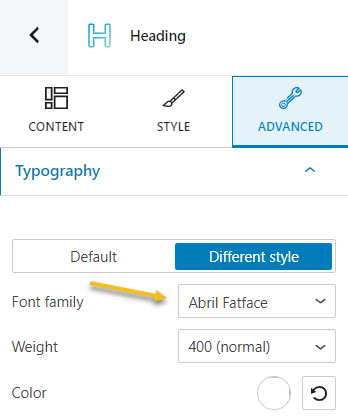
Let’s work with the current heading for now. The typography options can be found either inside the “Style” or the “Advanced” levels in the block editing panel.
Let’s go to Advanced -> Typography.
Here you can make changes to the font family, font weight, color, sizes, line height, and more. You can find more in depth know-how on the typography topic, here.
I’m going to change the font color to white, the font-family to Abril Fatface, then switch the icon color to white as well.
Here’s what we’ve got so far:
- Making background changes
With Kubio you can make background changes to:
- Rows, columns, and sections.
- Certain advanced blocks (carousel, accordion, counter, slider, etc.).
Here’s an advanced article on the topic.
In short, the background options can be found inside the “Style” and “Advanced” menu items inside the block editing panel. You can use as background: solid colors, gradients, images, videos (in PRO), and slideshows (in PRO).
Let’s go to the previous example, and select the column next to the heading. It has a woman picture as a background image.
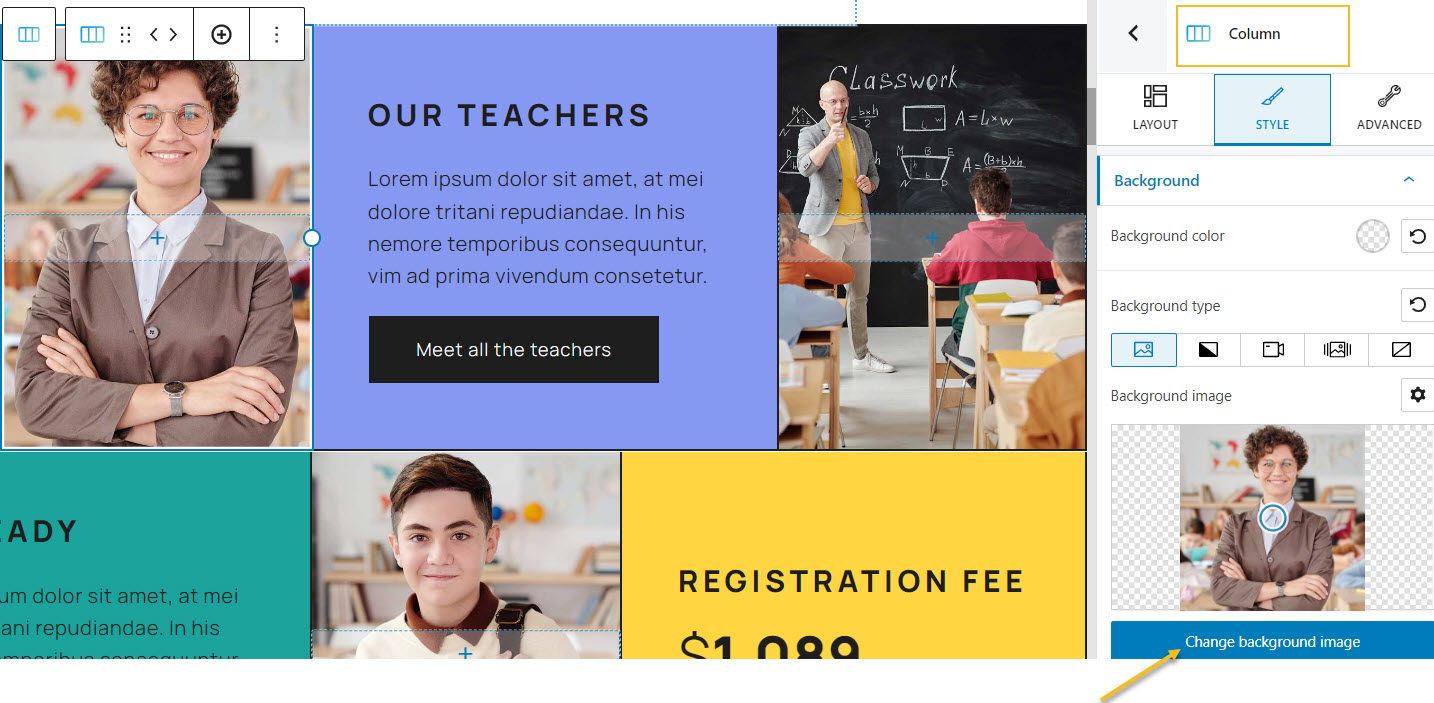
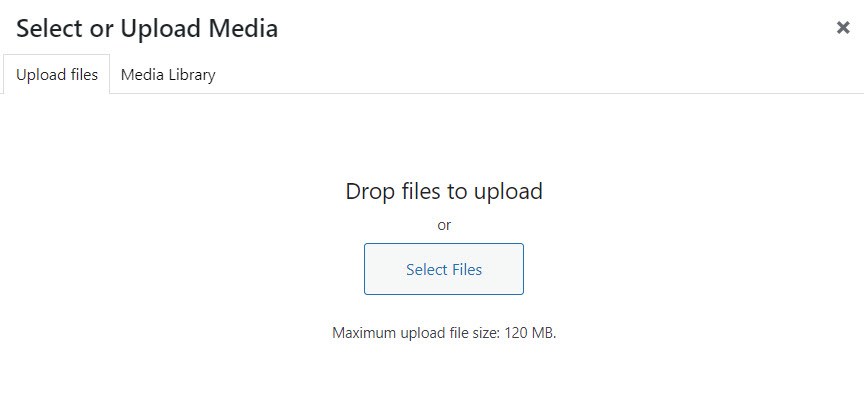
Let’s go inside “Style” and change this background image by clicking on the “change background image” button.
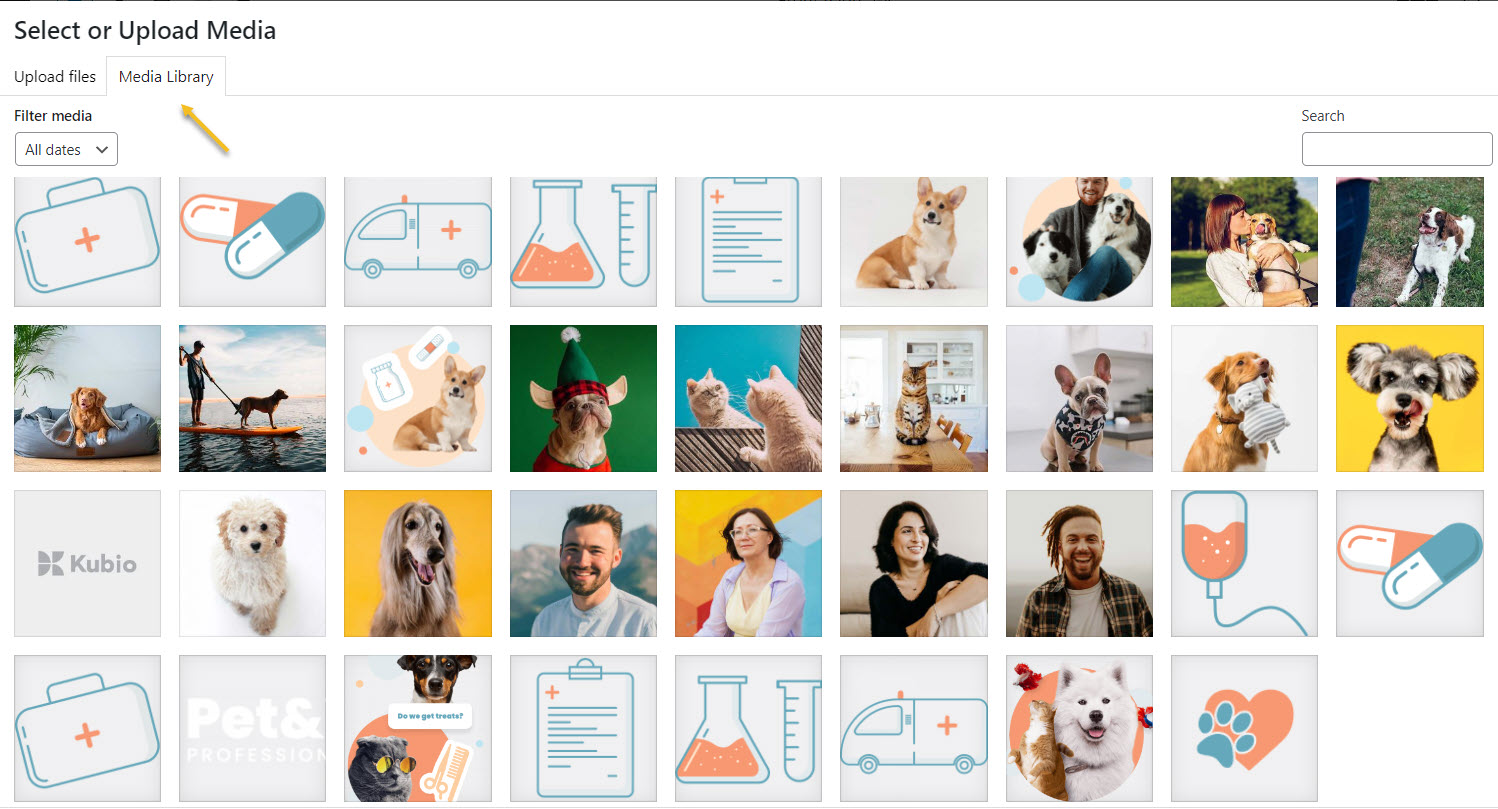
This will open up the Media Library. Here you can an image.
Or you can choose an already existing one by clicking on it.
There you go!
- Adding new sections to a page
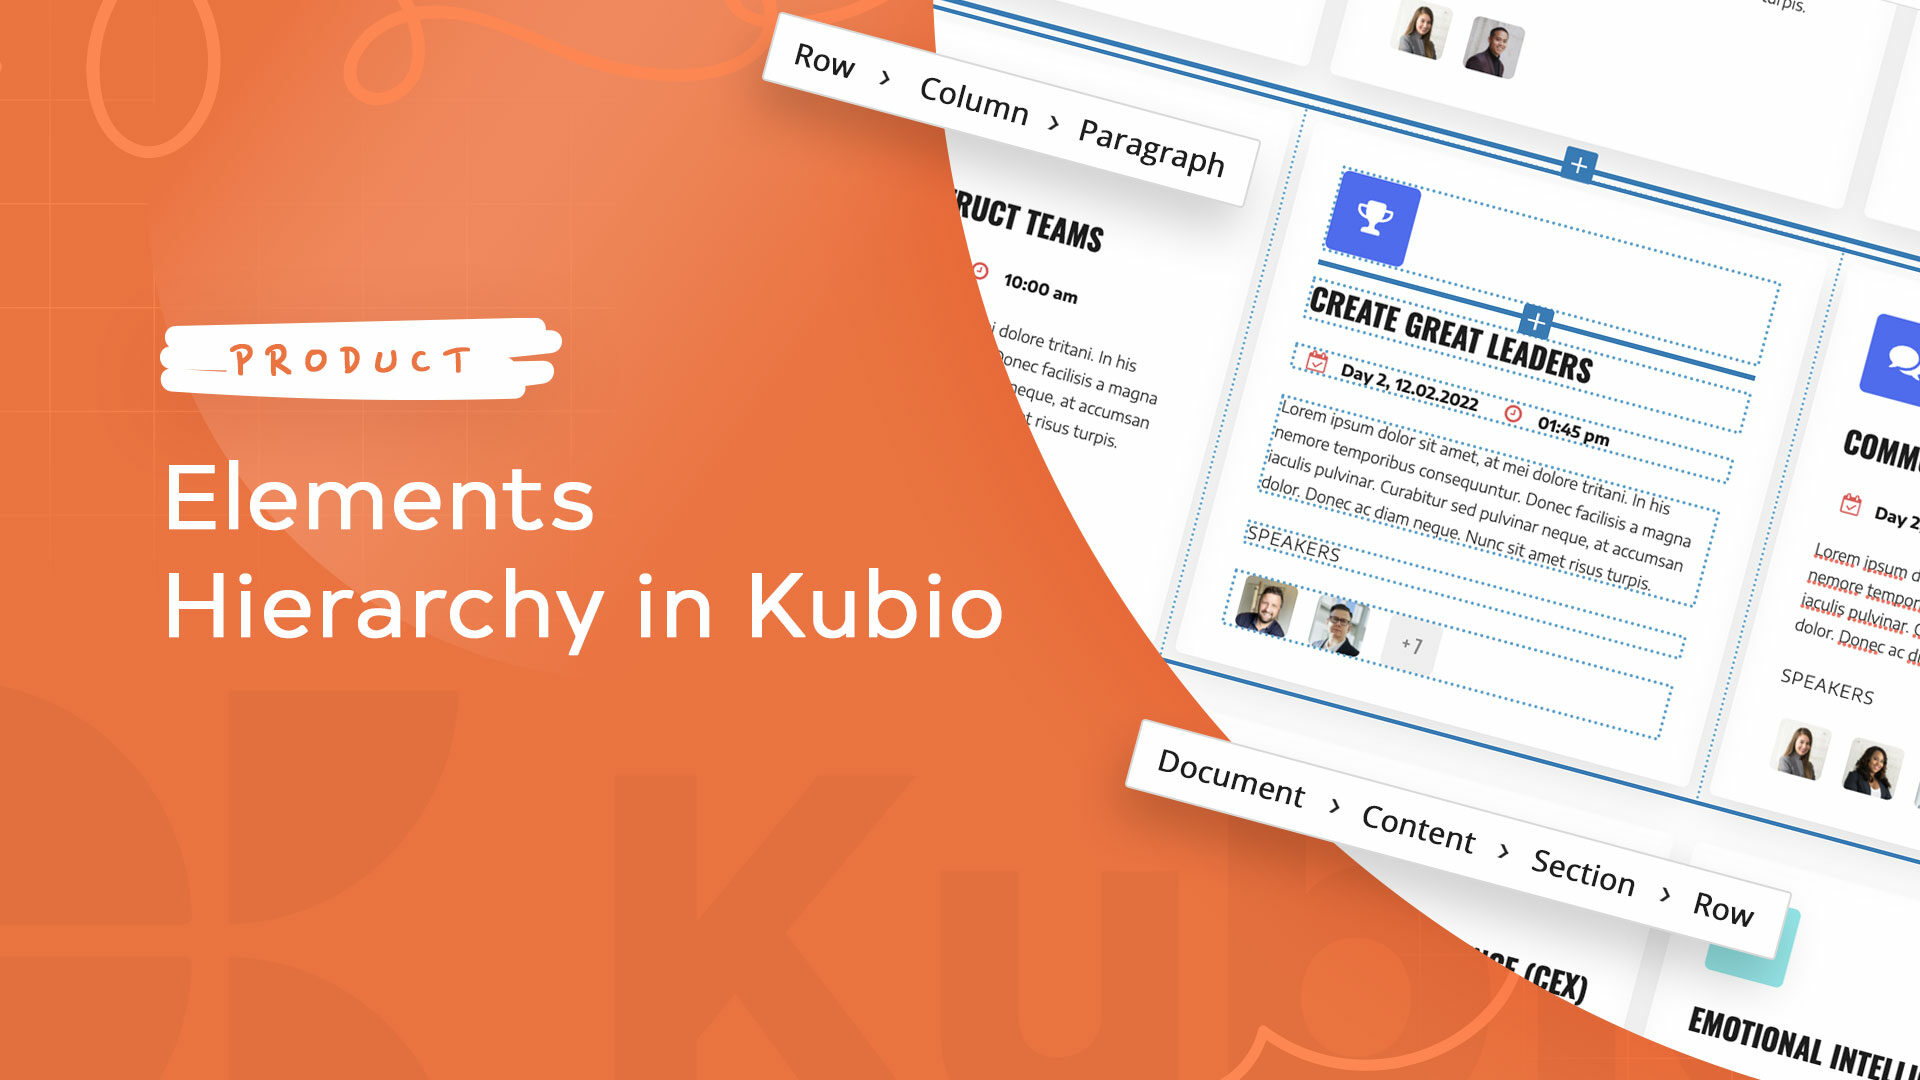
Every web page in Kubio is made up of sections that can be split into columns. In addition, you can add blocks to your sections and columns. Sections can be edited like any other block, inside the block editing panel. There’s one tiny change there, there’s “Layout” instead of “Content”.
There are 2 main ways for adding sections to a page or post using Kubio. After adding a section, the editing and styling options are the same.
- You can add sections as blocks, from the block inserter. Just open up the block inserter using the “+” sign in the upper-left, and look for “Section”. Now, drag the section block to your page.

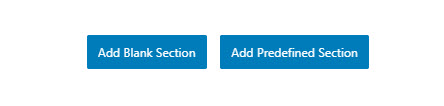
- Go to the bottom of the page, and click on the “Add blank section” button.
When the section gets added to the page, you will be asked to select a type of layout.
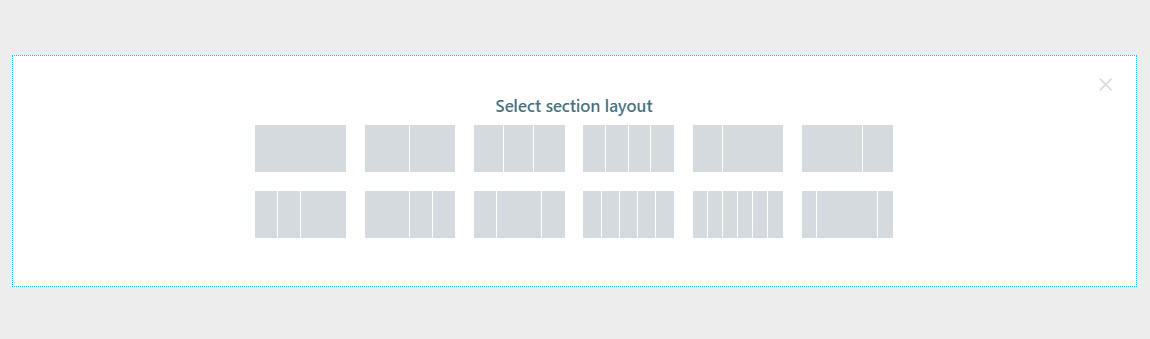
Click on the one that matches your vision for the section. I’m gonna choose a layout with 3 columns with unequal widths. Now, I’m using the “+” signs to add blocks to the columns. I’m adding a heading, a paragraph, and a map.
Now, you can make any content and styling change you want to these three new blocks.
Next, if you select the section all together, you will notice a toolbar on top of it.
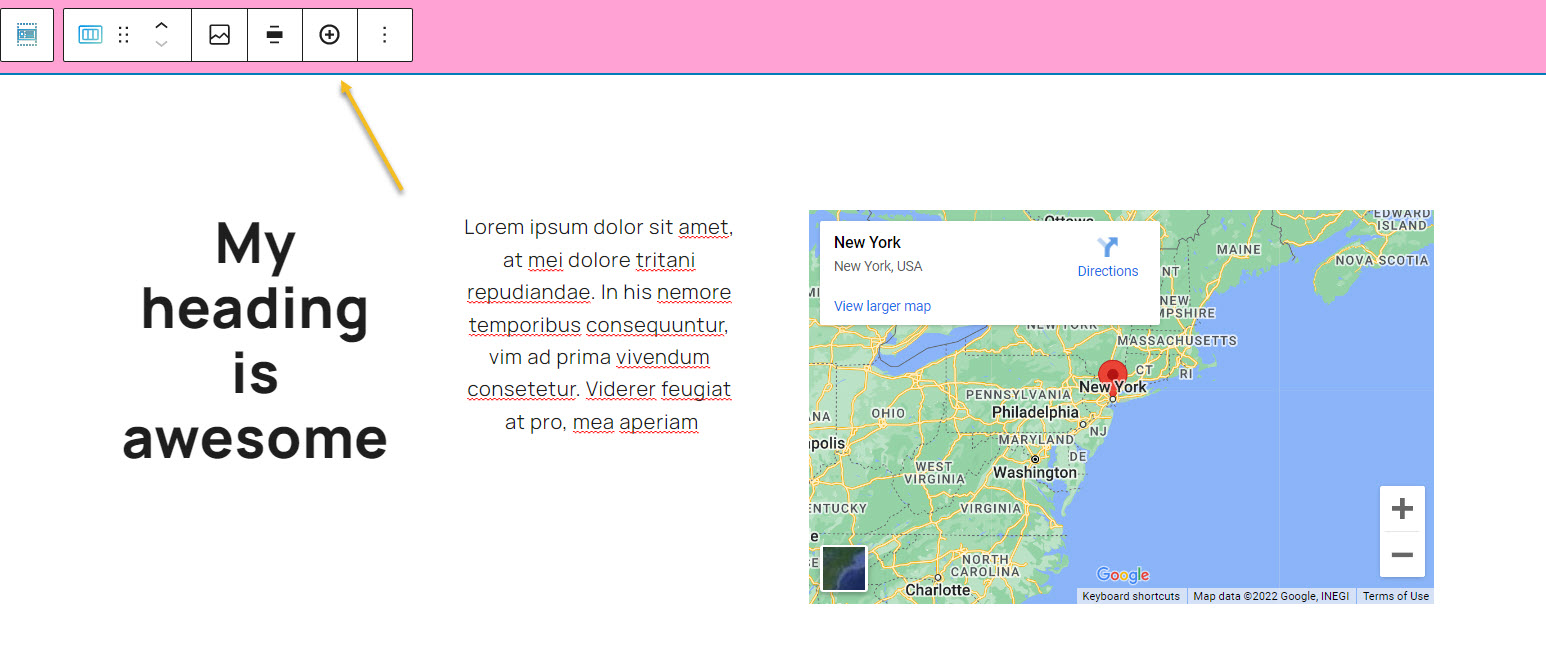
This toolbar allows you to reposition the section by drag and drop, add more columns to it, delete it, or more.
Now, did you notice there was another button next to the one saying “Add blank section”?
It said “Add predesigned section”. This is a great Kubio feature!
With Kubio you have access to predesigned website sections that can serve various purposes: from team sections to features. They are fully customizable.
When you click on the “Add predesigned section” button you will open up the block inserter on the left-hand side, at the “Sections” level. Click on a section to add it to the page, then use the toolbar to move it wherever you want.
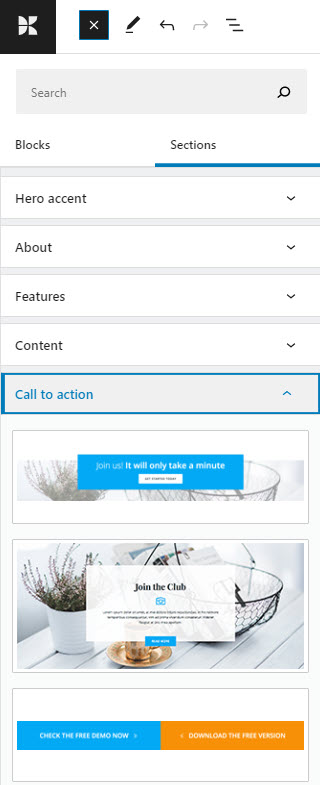
You can now replace the text and add your visuals. You do not reinvent the wheel with Kubio. This way you can save time and focus on what’s more important: finding the right visuals, preparing the copy, etc.
These sections are made of blocks. You can edit them separately in the block editing panel.
Here’s an example of an “About” website section. It has two headings, a paragraph, and a image, that can be edited separately.
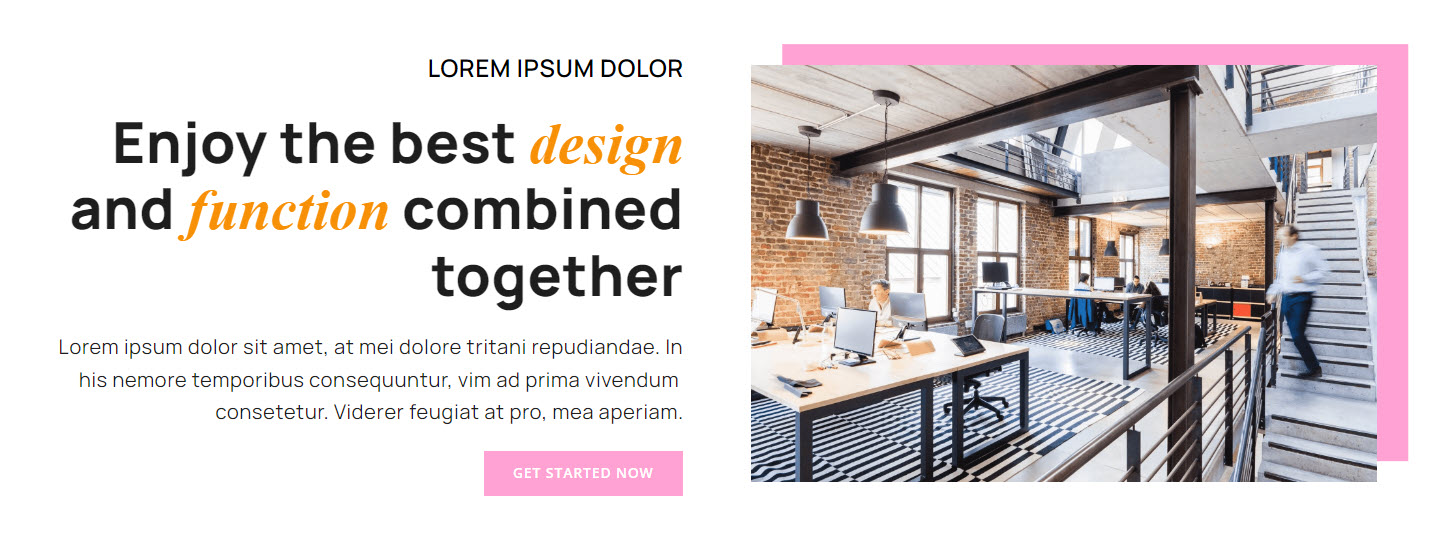
The moment you add it to the page, it will adjust to the current color scheme. Isn’t that great?
And that’s about it. You are now ready for your own school website design.
If you liked this article, and want to have access to similar content, make sure to subscribe to our YouTube Channel. You can also follow us on Facebook. If you want to find out how to customize your WordPress site, here‘s a great resource we’ve compiled to help you out.