Anchor links are used in WordPress mostly in two situations:
- When you have a one-page website and you want to highlight the most important sections as menu items.
- When you create long posts and you want to help readers navigate easily among chapters. This means you can use them also to create a table of content. And we’re doing just that in this article. Take a look at this table of content:
- How to create anchor links in the Classic Editor
- How to create anchor links in the Default WordPress Editor
- How to create a menu with anchor links
- How to create a table of contents using anchor text
Anchor links are also called jump links, because they allow you to jump between parts of a page. When someone clicks on an anchor link, he will be led to another section of the same page.
How to create anchor links in the the Classic Editor
If you are still using the WordPress Classic Editor for WordPress, then here is how you can add the anchor link.
Let’s go inside a post. Next, follow the steps below:
- Select the text that you want to add a link to, then go to the link symbol in the menu.
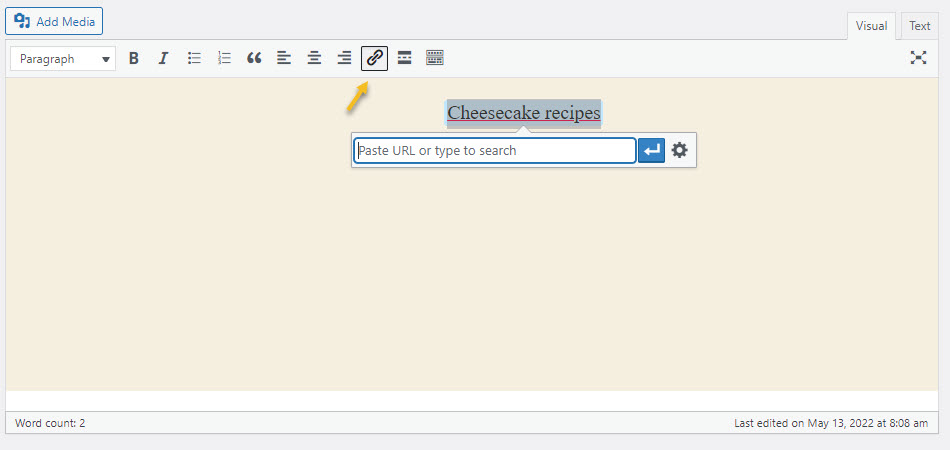
- Build the relevant link. In this case I am using “cheesecake-recipes”. Now, it’s important to place a #” sign before the link. In HTML markup this is called an id.
- Switch the editor from “Visual” to “Text”.
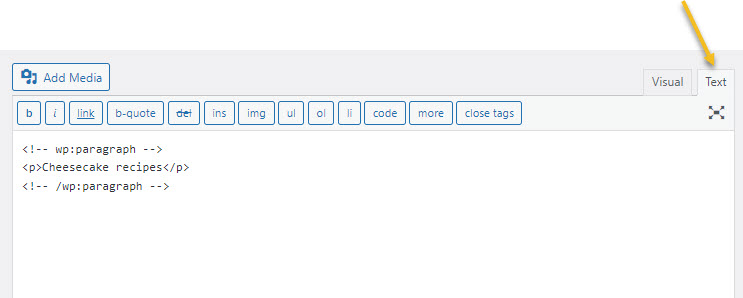
- Now, we need to add the id we set above to the section on the page where we want the reader to jump to when clicking on the words “Cheesecake recipes”.
We will add the id to the heading “17 Cheesecake Recipes For Every Occasion”.

Now, don’t be scared of the HTML code in the text editor.
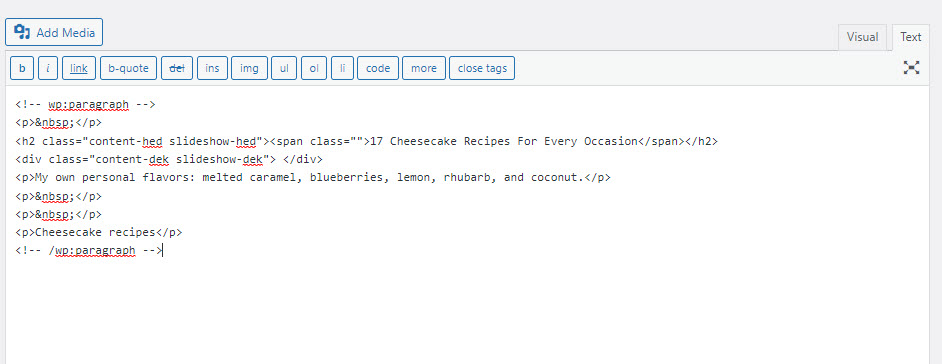
Next, identify the heading or paragraph you want to jump to, then paste the id next to the <h> or <p> tag.
In this case we have an< h2> tag, because headings can go from h1 to h6.

I’m pasting id=”cheesecake-recipes”. I’m not using the “#” symbol.
- Save the change using the “Update” button on the right-hand side.
- Preview the change using the “Preview” button on the right-hand side.
How to create anchor links in the Default WordPress Editor
Creating WordPress anchor links is easier in the Default WordPress Editor than in the classic one.
Let’s take a look at the steps:
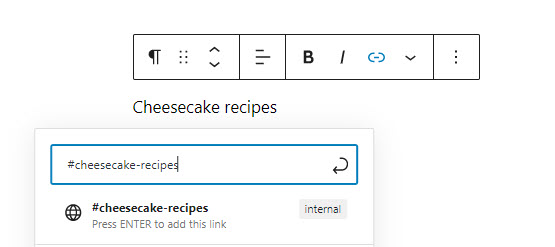
- Select the text that you want to add a link to, then go to the link symbol in the toolbar.

- Paste the internal link with a “#” in front, like here: #cheesecake-recipes. In HTML markup this is called an id. Hit enter in order to add the link.
- Now, we need to add the id we set above to the section on the page where we want the reader to jump to when clicking on the words “Cheesecake recipes”.
We will add the id to the heading “17 Cheesecake Recipes For Every Occasion”.
Now, let’s identify the heading on the page and select it. This will open up a block editing panel on the right. Make sure that “Block” is selected in the top menu, not “Post”.
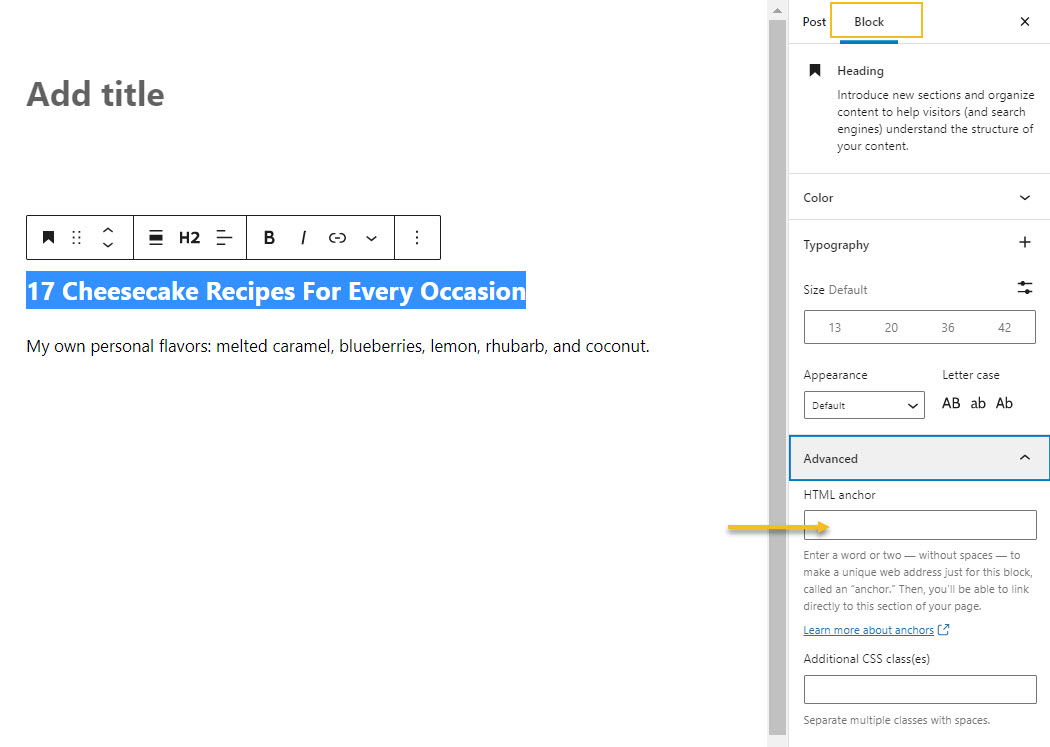
Now, go to “Advanced” and paste the id inside the HTML anchor field. No “#” symbol here.
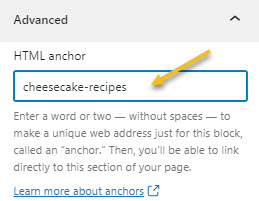
- Save the change using the “Update” button on the right-hand side.
- Preview the change using the “Preview” button on the right-hand side.
How to create a menu with anchor links
Take a look at the Colibri website. The links in the menu lead to sections on the homepage: the features section, the pricing section, and so on.

This is a hybrid one-page website.
If you click on the “Reviews” menu item you will be taken to this section on the page.

Now, let’s find out how you can also build a similar menu using anchor links.
First, you will need to add the necessary ids to the sections on the page, as shown here for the Classic Editor, and here, for the Default Editor.
Here are the steps:
- From the WordPress dashboard, head over to Appearance -> Menus.
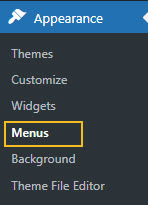
- Select the menu you want to edit.

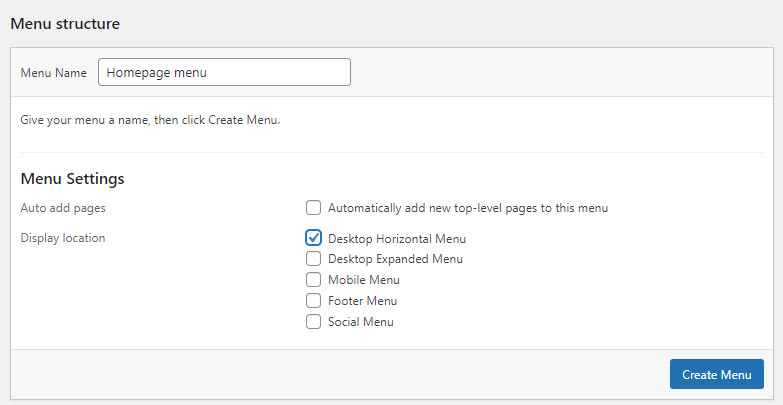
If there’s no menu created, select “Create new menu”. Give it a name, specify its display location, then hit “Create Menu”.
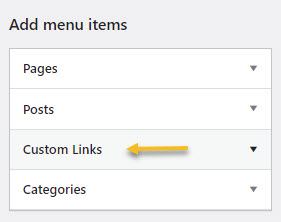
- On the left-hand side you will notice the options to add menu items. Select “Custom links”.
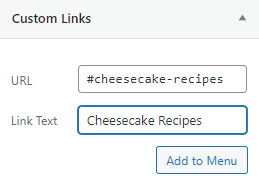
- Add the id of the element inside the URL field with the “3” symbol in front of it. Inside the link text field, type the menu item name. In this cake, I want to have “Cheesecake Recipes” written in the menu. Next, hit “Add to Menu”.
- On the right-hand side you can see all the menu items you have added: pages, posts, custom links. Drag the items into the order you prefer. Click the arrow on the right of the item to reveal additional configuration options.
Hit “Save menu” when you’re done with the changes.
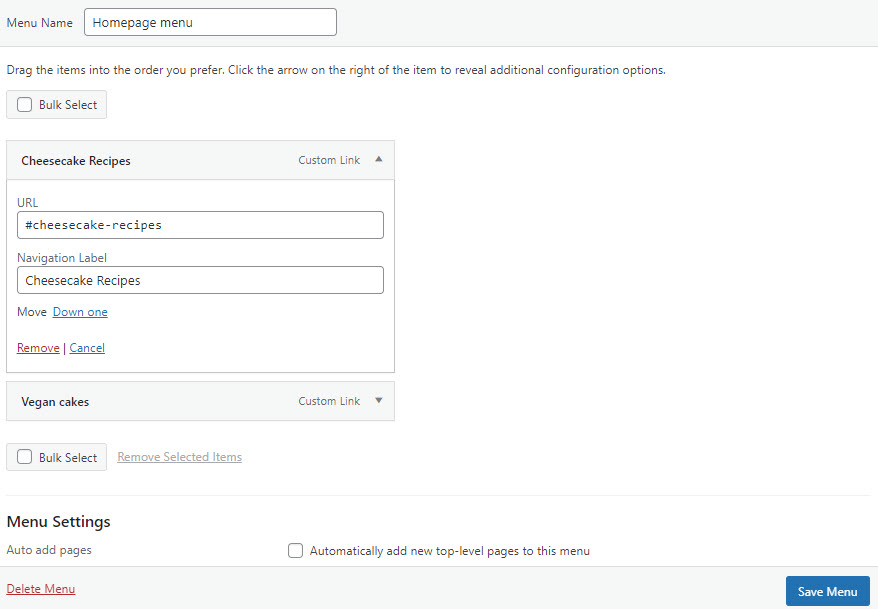
Here’s my menu:

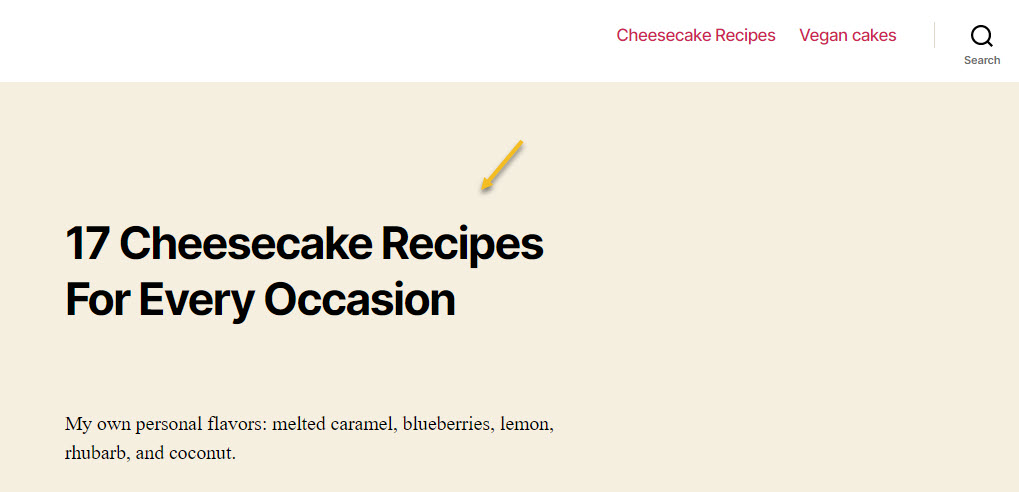
When I click on “Cheesecake Recipes” I will be taken to this section:
How to create a table of contents using anchor text
Now, did you notice the table of content at the beginning of this article?
You can create it using a WordPress plugin. Such a plugin will do the id settings up for you.
Usually these plugins will add headings to a table of content. As I said a bit earlier, there are 6 types of headings, from H1 to H6. You can select which ones to be added to a table.
But let’s take a look at the real deal.
How to create a table of contents using anchor text in the Classic Editor
Here are the steps:
- From Plugins -> Add New, look for Easy Table of Contents. When you see the plugin in the list, click on “Install now”, then on “Activate”.
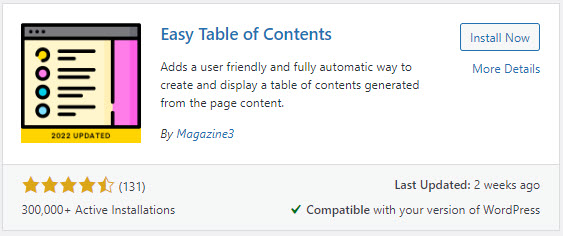
- Next, go to Plugins -> Installed Plugins and set up the Easy Table of Contents plugin.

If you use the auto insert option (as seen below) you will allow the plugin to automatically generate the table of contents for all articles.
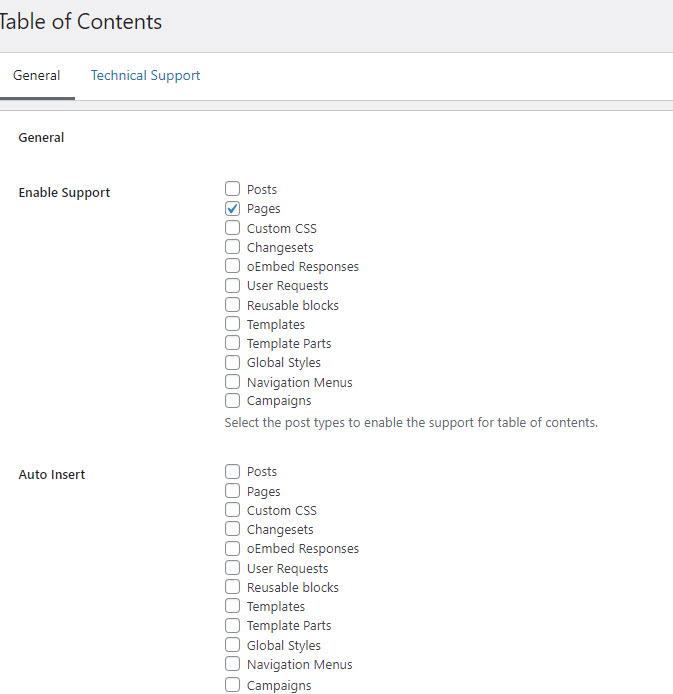
The plugin adds by default pages to the table of content, but you can set it up to use posts as well. Let’s tick posts inside “Enable support”.
Now, if you scroll down, you will notice some other types of settings. You can:
- Decide on the position of the table of contents,
- Decide to show the table when a certain number of headings is met,
- Show the table header,
- Set up the width, font size, font weight, the table of content theme,
- Create a custom theme,
- Select what kind oh headings to include or exclude,
and several other options.
- Let’s go inside our post. You will notice some options below it that will allow you to insert a table of content. Select what type of headings you want to add.
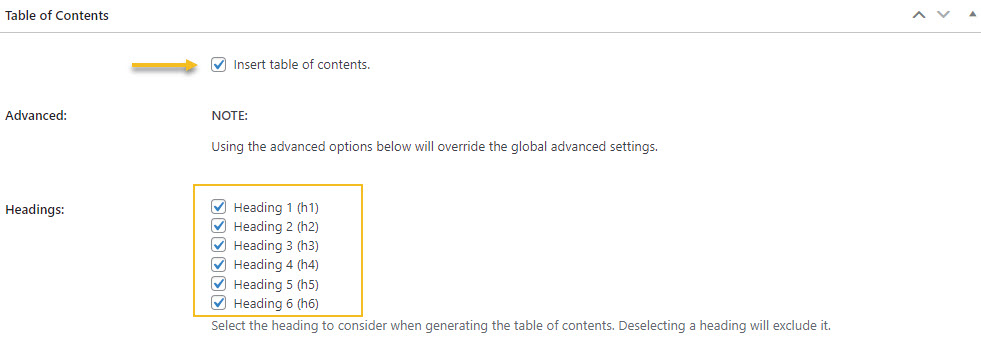
- Save the change then hit “Preview” to actually see the table of contents.
And that was all!
How to create a table of contents using anchor text in the Default Editor
There’s another plugin that I recommend when using Gutenberg blocks.
- From Plugins -> Add New, look for Spectra (formerly known as Ultimate Addons for Gutenberg). When you see the plugin in the list, click on “Install now”, then on “Activate”.
- The plugin will enrich the block inserter with new blocks. Just look for “UAG” to see the whole list. Now, you can drag and drop to the post the “Table of contents” block.
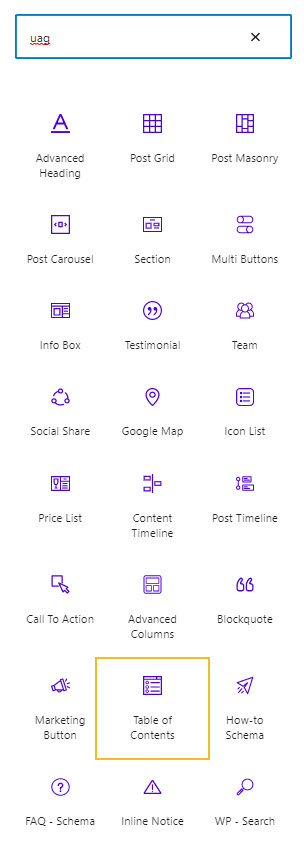
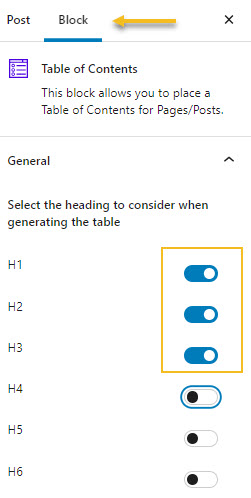
- When you select the block from the page, you will be able to set it up using the block editing panel on the right.
Let’s allow it to show only headings from H1 to H3.
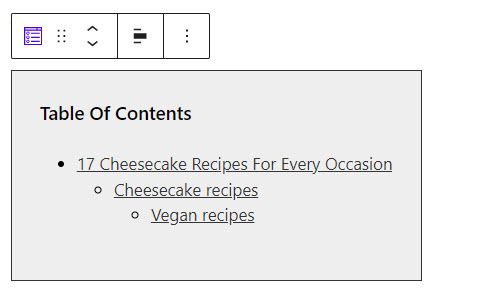
Here’s what we’ll see as table of contents:
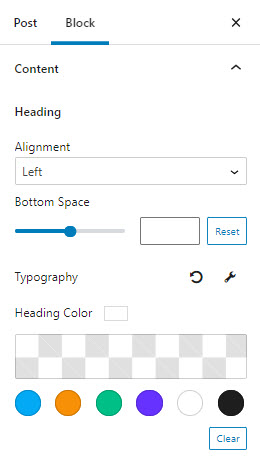
- Let’s style the block. Inside the block editing panel on the right-hand side you will find options that allow you to:
- Align the headings,
- Change the heading color,
- Make heading typography changes,
- Make the content collapsible,
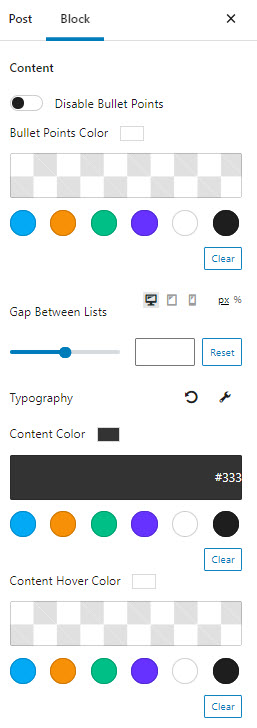
- Customize the bullet points,
- Change the content color and typography,
- Adjust the gap between the lists,
- Set the background color,
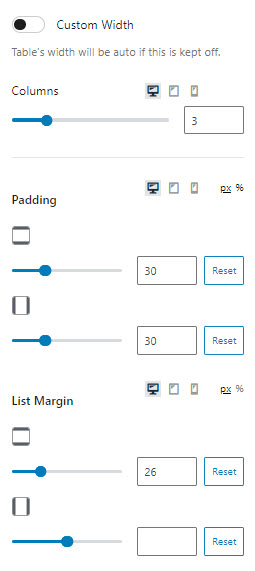
- Change the width of the table,
- Change the number of columns,
- Adjust the padding and list margin,
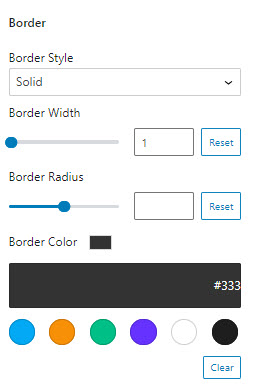
- Customize the border style, width, color, and radius.
Aaaand, you’re done!
Don’t forget to save the changes.
If you want to find out how you can create a WordPress website from scratch, check our guide here. If you liked this article, and want to have access to similar content, make sure to subscribe to our YouTube Channel. You can also follow us on Facebook.


