
Let’s say you’re going to your favorite hypermarket to buy stuff. And they redesigned everything. The isles are messed up, groceries are mixed with cosmetics, pet products with pastries, you get the point. Will you ever go back to the store?

This scenario could happen on a blog as well. If a reader ends up in a place where he can’t look for a specific article or topic, it’s “sayonara”.
But don’t worry, there are two simple solutions to this.
Ladies and gents: tags and categories!
WordPress Tags vs Categories
In the Tags vs Categories story, there’s no winner. They are both needed for two big reasons:
- Blog navigation
- SEO
Let’s go a bit deeper.
Categories are meant to classify blog articles around some broad topics. They can have their own sub-categories. Ideally, a blog article gets assigned one category. Don’t have more than 10 categories, it will get overwhelming for readers to browse through that many.
Tags let you do some micro-classifications, they describe specific details of your posts. You can assign as many as you want. Our advice: don’t go over the board with tags either. Stop when you reach 10.
Now, let’s look at some tags and categories in action.
Here’s a sidebar example with a category widget (we’ll talk more about the sidebar later on). The user can navigate to the category that interests him the most.
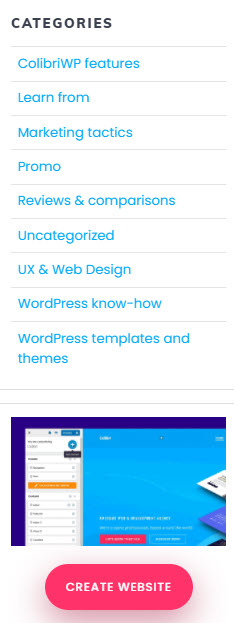
Let’s say he chooses “WordPress know-how”, he will end up on another page with all the blog articles listed in the category.

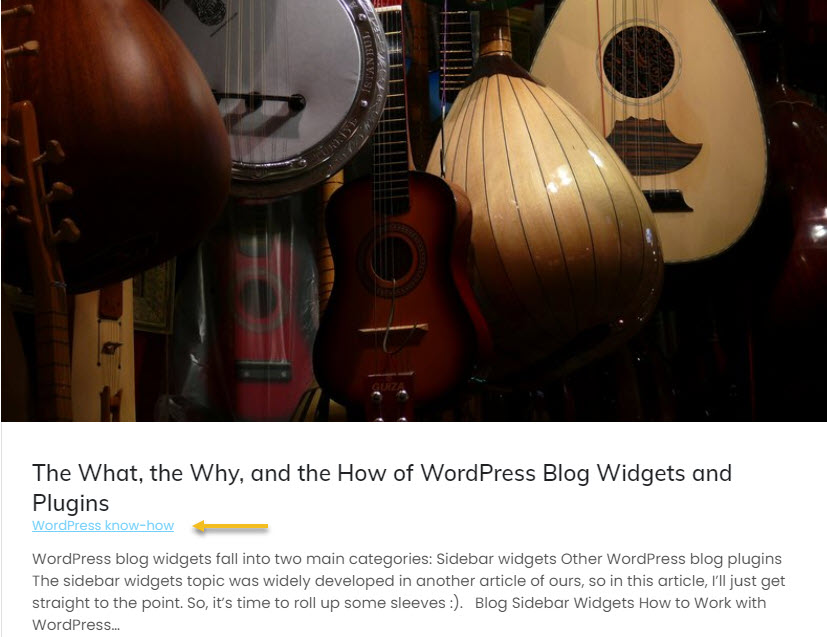
The category is also listed beneath the title of each blog article.
Tags, on the other hand, are showing up beneath the article.
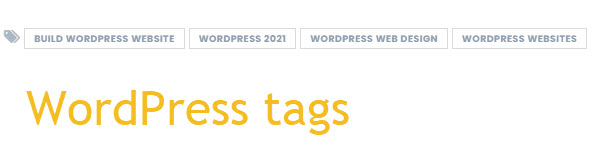
When you click on a tag, you’ll end up on a page that contains all the articles that contain that particular tag (same as for categories).
Some WordPress plugins can alter the way tags and categories are showing up. It depends on how fancy your blog needs to look.
The Benefits of Using Tags and Categories
Like I mentioned earlier, categories and tags help the end-user navigate your website, and this will be translated by Google as a signal that will help you rank better.
They offer the ability for visitors to drill down through relevant content, making it more “usable”. At the same time, Google’s crawlers can discover your website’s pages easier.
Important! When you design a content strategy around some specific keywords, those keywords can be used as tags or categories. One thing to bear in mind though: don’t organize categories and tags to appease crawlers. Do this while having the reader in mind.
Build your site with the end-user in mind, SEO should be in the background.
How to Create WordPress Tags in the WordPress Dashboard
Time to roll up some sleeves, don’t you think? Let’s create some tags in WordPress.
First, head over to Posts->Tags.
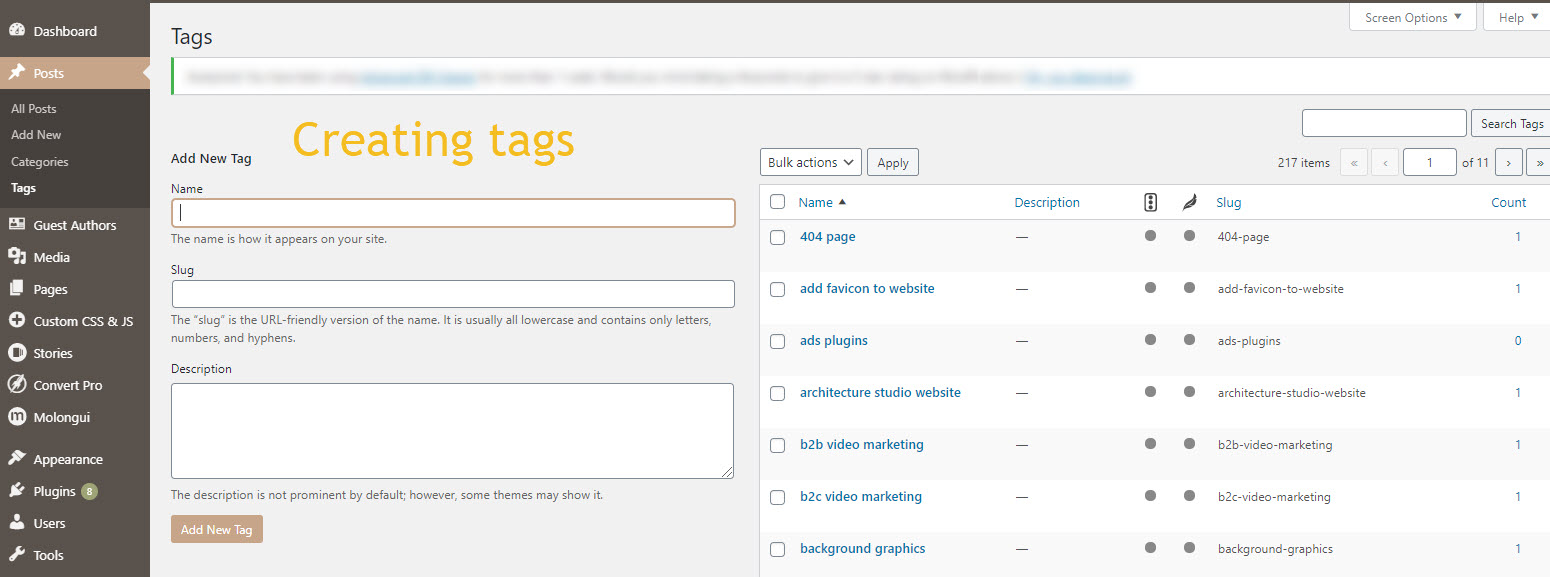
Type in a new tag. A slug will be automatically created for that tag.
Let’s say your tag is “drawing tutorials”, the generated slug will be “drawing-tutorials” which will be appended to the URL of your blog. Slugs help to identify specific content on a website.
Here is the structure of a blog post link: https://example.com/blog/slug. Example.com/blog is static, and it is common to all of the blog articles. The slug will help differentiate the articles.
Now that you’ve defined your tag, hit “Add New Tag”. You’ll see the tag on the list on the right.
Here you can search for a specific tag or delete the ones that are not needed anymore.
That’s it! You’re done. Next, you can go and write your first article. From the blog article level, you can assign your newly created tag.
Now, this method is not used that much. Usually, tags are created at the blog post level, and we’ll talk about it in a minute.
How to Create WordPress Categories in the WordPress Dashboard
The story is similar to tags. Head over to Posts -> Categories.

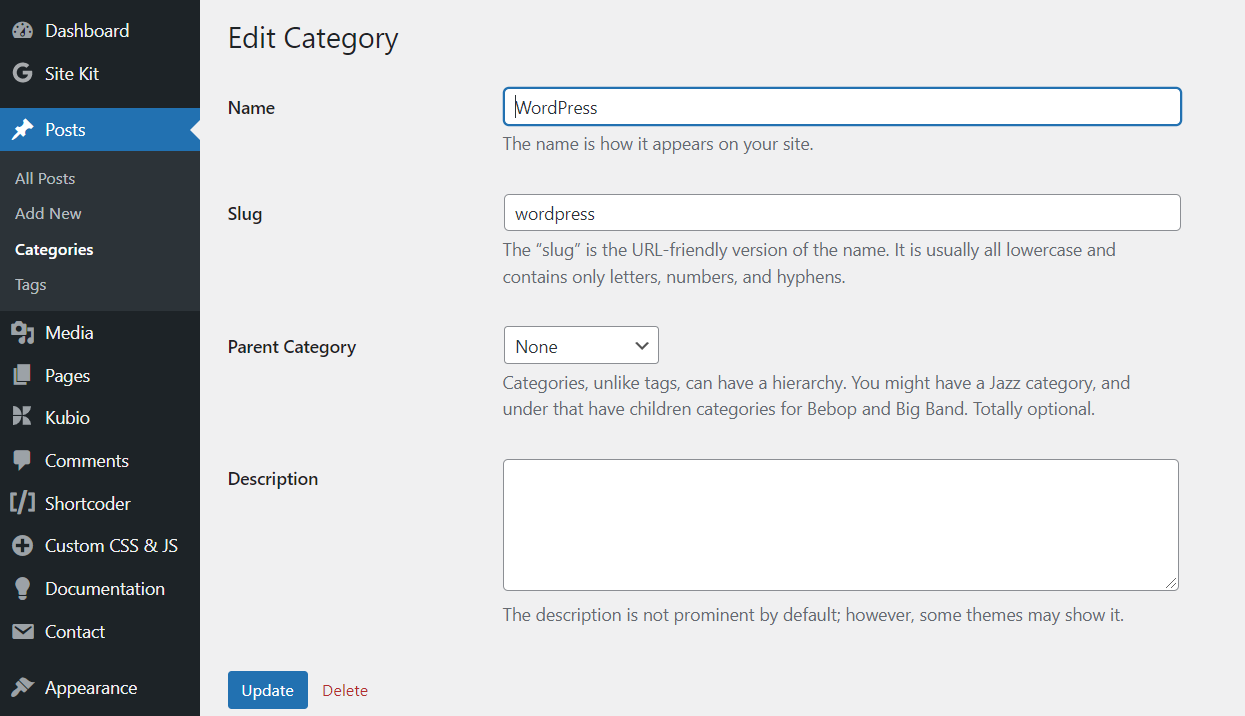
When you will define a category, you’ll provide the following information:
Name: the name of the category. It will show up on your site.
Parent Category: if you have subcategories in your blog’s hierarchy.
The slug is again generated automatically.
You can search for a specific category or delete the ones that are not needed, from the right-hand side. Also, you can see how many articles are in that category in the “count” column.
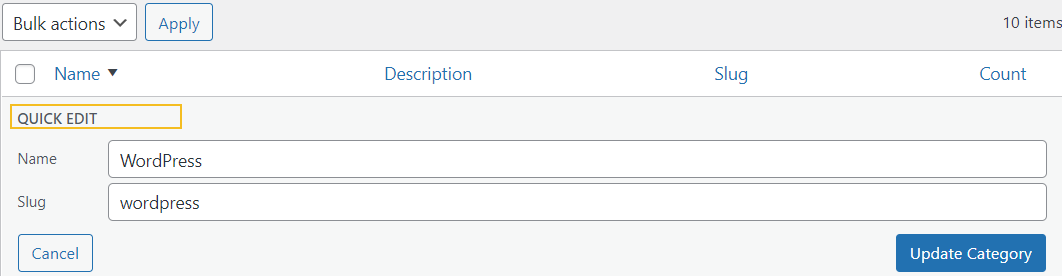
Now, if you hover over the name of a category on the right, you’ll see two editing options: “Edit” and “Quick Edit”.

When you select edit, you’ll be taken to a new window where you can make changes to your category.
If you select “Quick Edit”, you will be able to make rapid adjustments to the name and slug of a particular category.
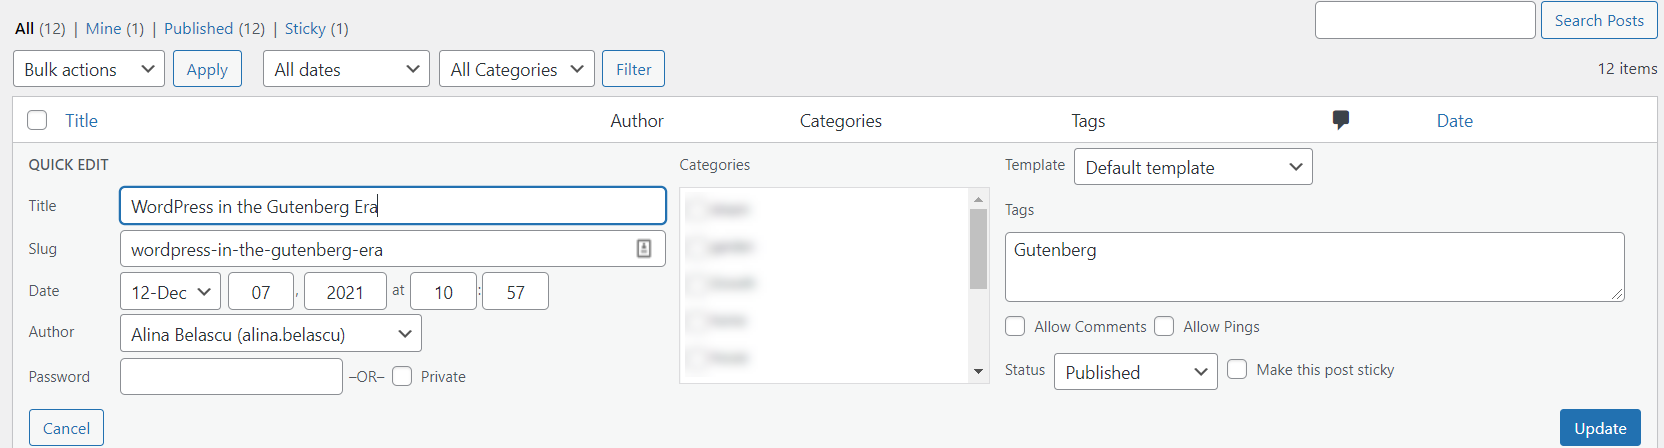
There’s another “Quick Edit” option if you go to Posts->All posts.
When you hover beneath posts, you’ll see some extra options that allow you to make quick edits to:
- Post title
- Post slug
- Publishing date
- Categories
- Tags
I just love this option. It saves me time, especially when I change the structure of tags and categories across the site. It’s easier than opening each post one by one and making the changes.
How to Create WordPress Tags and Categories at the Blog Post Level (in the Default Editor)
Tags and categories can be defined at the blog post level as well. Let’s get inside.
Start by adding a new post. From the WordPress dashboard we select Posts -> Add New.
On the right, you’ll see a menu with some options. You’ll see tags and categories listed there among the items.

For tags just type in a word and hit enter. The tag will get assigned to the current blog article.
For categories, go for “ Add new category”. You’ll see that new fields will pop up, where you will type in a new category and choose a parent category.
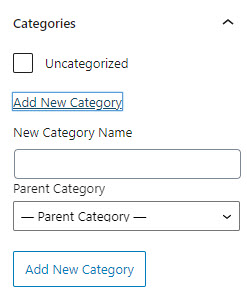
At this level, you can also change the category, by ticking the one you want.
Et voilà, you have tags and categories added to your post!
Now, don’t leave your blog post, because I’m going to show you something else.
How to Add WordPress Tags and Categories to the Sidebar
Now, let’s say you want your tags and categories to be more visible on your website, inside a sidebar.
For this, you need to go back to the WordPress Dashboard -> Appearance -> Widgets. Depending on your theme, you’ll be seeing some collapsible widget areas. Below there are several header, in page, footer, and blog widget areas.

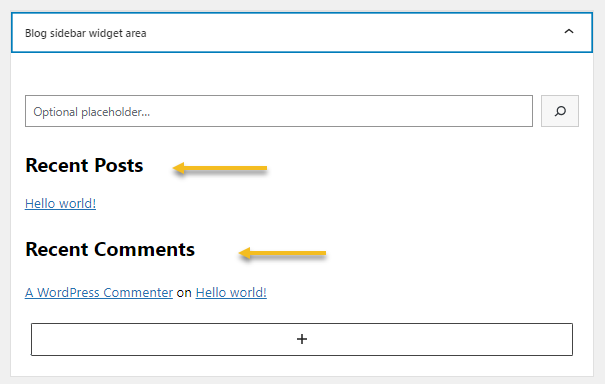
When you select the “+” sign you will notice a block inserter that allows you to add blocks that have specific functions. For example, this theme has a blog sidebar with the “Recent posts” and “Recent comments” blocks (formerly widgets).
Let’s look for the categories and tag blocks as well. You can type in the block inserter “categories” or “tag”.
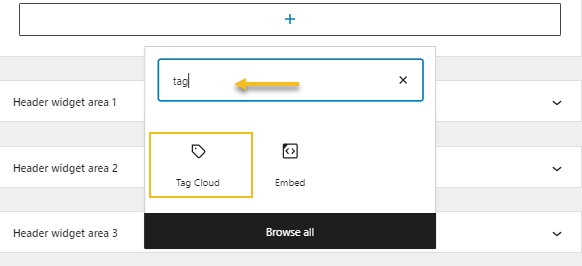
Select the block and hit “enter”.
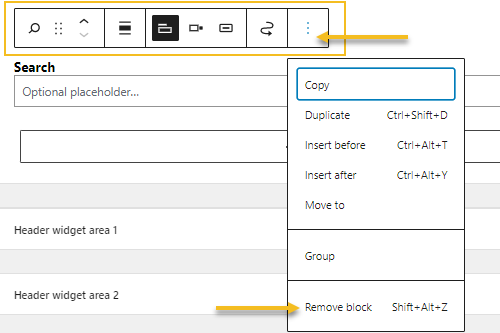
The sidebar will instantly go live when you add or remove blocks. You can easily delete blocks from the sidebar. When you select any block, you’ll see a toolbar showing up on top. Select the last vertical three dots in the toolbar. You’ll be seeing a set of options. Go to “Remove block” to delete the block.
Now that you have created your sidebar with categories and tags, there’s one thing you should remember though: don’t overcrowd your sidebar.
How to beautify the post tag and post category at the post level
The new WordPress editor is based on blocks. Each element that you can add to a page or a post in WordPress is a block.
In the previous chapter, we talked about blocks used as widgets for the blog sidebar.
Now, things can get a bit confusing here…When inside a blog post you can add the “Post Tag” and “Post Category” blocks. No, they’re not the same “Tag Cloud” and “Categories” blocks from above. These 2 new blocks allow you to add the category and tag inside a blog post, while the others are used only inside the widget area such as the sidebar, header, footer, etc.
Let’s add these blocks. On your blog post, locate the “+” sign. When you click it it will open a list of blocks. Search for “Post category”, then for “Post tag”.
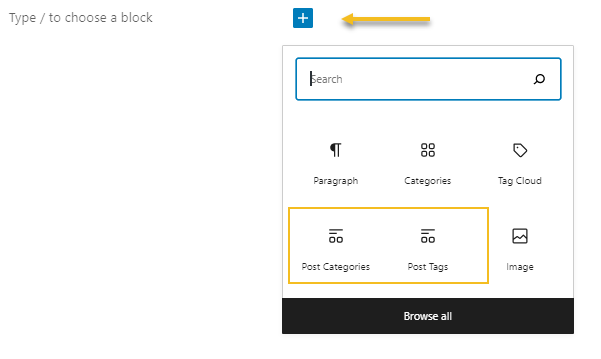
The moment you select the block, it will be added to the post. When you hit “Update” your blog article will go live with the changes.
Now, the moment you select the block, you’ll notice a toolbar showing up on top of it. The toolbar allows you to move the block by dragging and dropping it where you want inside the post. You can also use the up and down arrows to move the block…up and down.
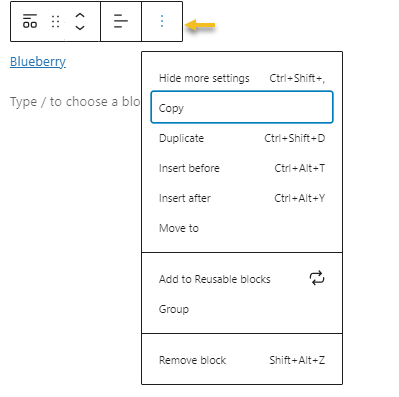
The last option in the toolbar opens a new menu where you can choose to copy the block, delete it, and more.
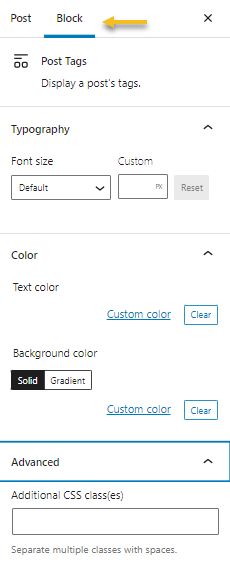
With the block selected, take a look to your right. You will notice a block editing panel.
Here you can make the following block adjustments:
- Font size;
- Text color;
- Background color;
- Add a CSS class.
These options are pretty basic and don’t give you any room for creativity. But, when there’s a will, there’s a way…Introducing Kubio, the WordPress block-based page builder.
How to Use Kubio’s Post Categories and Post Tags Blocks
Kubio website builder enriches the current default WordPress Editor with new blocks. But, the Kubio superpower lies in its powerful block styling editor.
The moment you click on any “+” sign inside a page or post, you’ll notice some extra blocks, with an icon in a blue-green color. These are the Kubio blocks.
In order to have full control over how the post category and post tags look like inside a post, you can add the “Post Category” and “Post tags” blocks, instead of the default Gutenberg ones, “Post Categories” and “Post Tags”.
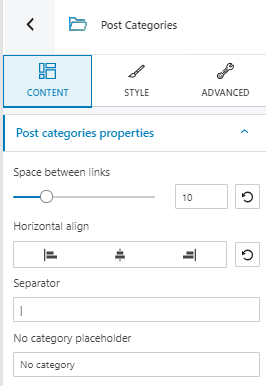
Now, the moment you select any of these two blocks, you’ll be seeing a block editor on the right-hand side of your screen. It’s here where all the styling magic happens.
You will see here three options:
- Content – here you can select alignment, specify the space between the links, and choose a separator.
- Style – here you can make link color, link hover color, and typography customizations.
- Advanced – here you can make the following adjustments for categories and tags: background, spacing, border and shadows, and other.
For more details on how to deal with Kubio blog blocks, read the documentation here.
SEO Optimization for Category Pages
If you want to rank higher in Google’s organic results, this means that you will need to optimize your pages and posts around some keywords and topics. Because blog categories have their own slug, you can make tiny SEO optimizations to that URL as well.
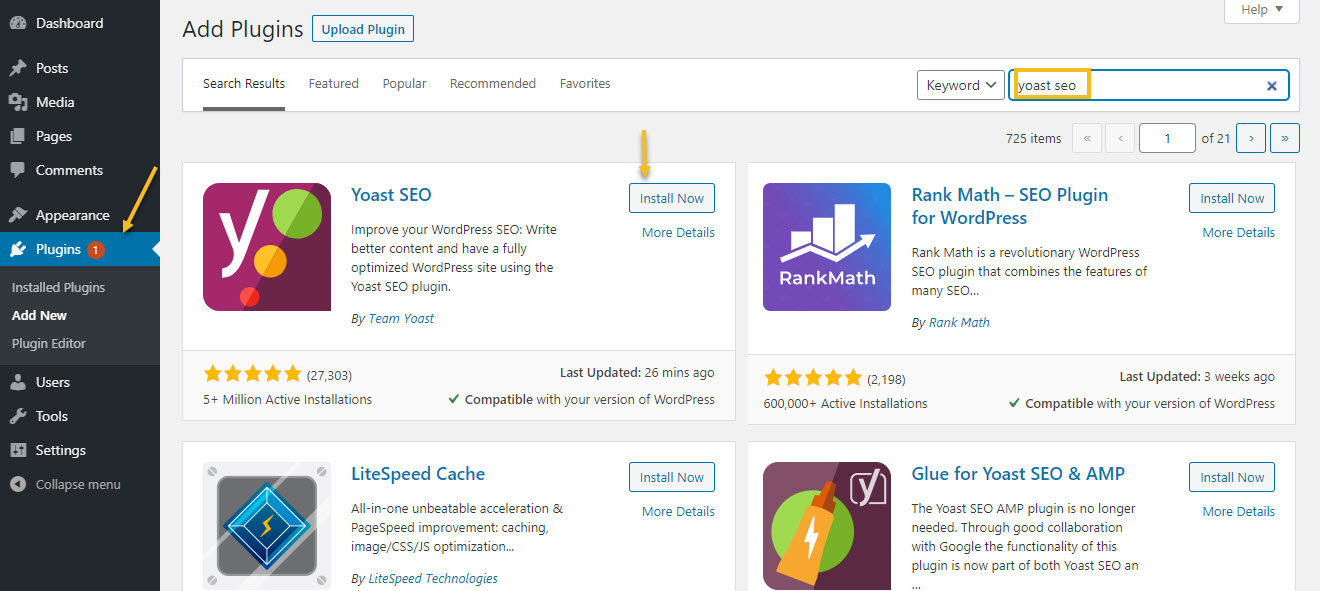
In WordPress, there are SEO plugins that can guide you with this. Such a plugin is Yoast SEO, and I will show you how you can follow it’s guidelines.
- Head over to Plugins->Add New and look for Yoast SEO.
- Install and activate the plugin.
- Go to Posts->Categories. Choose the desired category and select “Edit”.
- Below the category setup, you’ll see the SEO optimization recommendations from Yoast SEO.
- Define:
- A focus keyphrase that is relevant to the topic of the article.
- The SEO title – a catchy SEO-friendly title for your category page that also contains the focus keyphrase. This can be the same with your article title or be more SEO-focused.
- A meta description – a description of your topic, that should be convincing enough for the audience so that it will get clicked. It will show up below your SEO title in the organic results.

Having a keyphrase, a slug, and meta description that reflect the keyphrase is not enough to rank higher. There are lots of SEO strategies out there that need to be implemented, and lots of hard work. I just scratched a bit the surface in this chapter.
Conclusion
Tags and categories are the two primary ways to group content on any site, not just WordPress sites.
They help users and crawlers find blog posts easier, and this will lead to better website usability and bring in SEO benefits.
The management of tags and categories in WordPress is easy peasy. The most important thing is to figure out the proper structure in advance and make sure you don’t abuse them.
That’s all folks, thanks for reading!