
Incorporating images, videos, and other media files into your WordPress website is a must from the design perspective any WordPress website would be incomplete without them.
However, to use them effectively, you should first understand how the WordPress Media Library works – how to upload files, what types of files you can upload, what are the different tricks you need to know, guidelines and measurements, all that sort of stuff.
So let’s dig into it!
What is WordPress Media Library?
As suggested by its name, WordPress Media Library is essentially a library of all the media assets you’ve uploaded to your site. Images, videos, audio, and even documents are all examples of media files.
You can access the Media Library straight from your WordPress dashboard. Just head over to “Media”, then “Library.” Here, you can view, edit, and manage your media files, regardless of where you post them to your website. You may also incorporate plugins with your library to take things up a notch. It is versatile, transportable, and adaptable. WordPress has improved in recent iterations.
This is what your WordPress media library looks like:
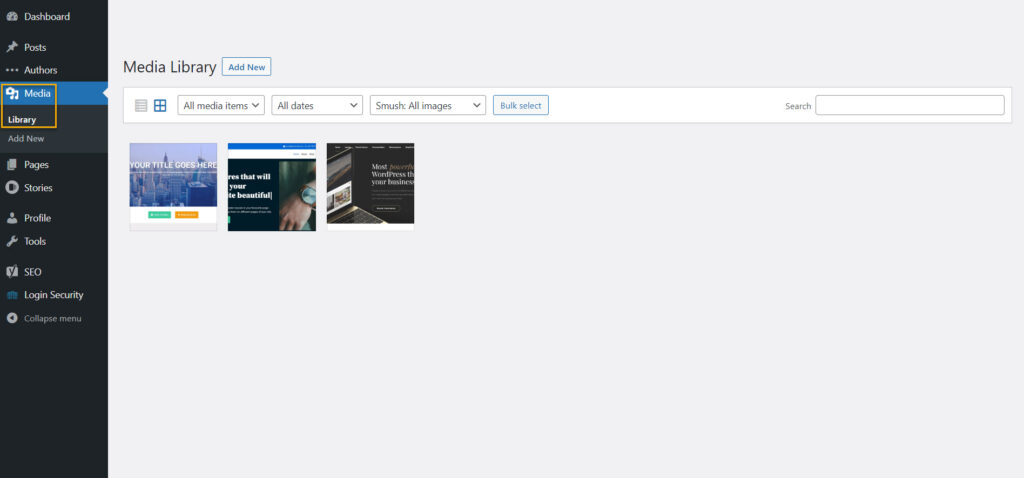
There are two ways to view the data: grid, shown above, and list.
You also have a couple of settings options inside the media library, such as :
- Choose whether to view your files in a list or grid view by clicking on the appropriate icons.
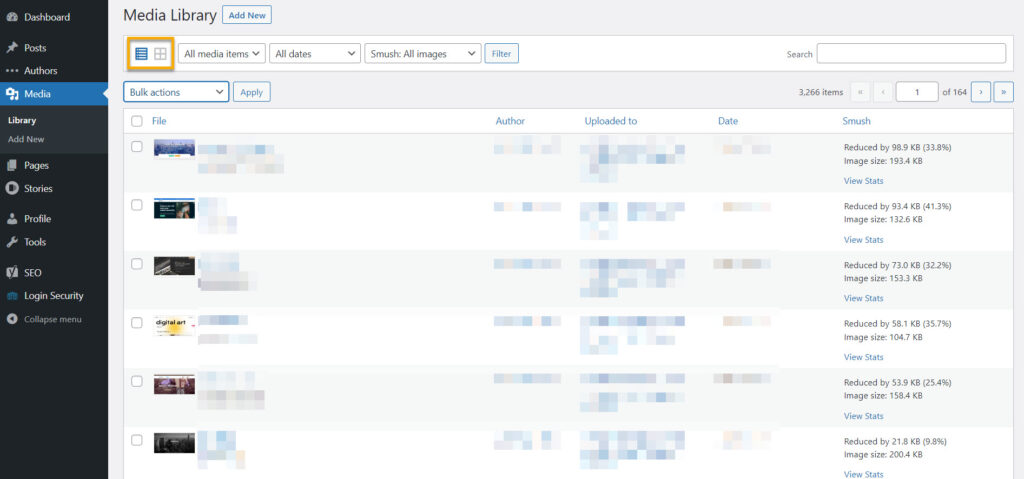
As you can see, the first image we’ve shown you featured the media library in a grid format and now a list.
- You can also use the drop-down menus to filter your files.

The first menu allows you to view your media by type, while the second filter shows you the contents of your library by the dates they were uploaded.
- You can also use the search bar to find files by name:

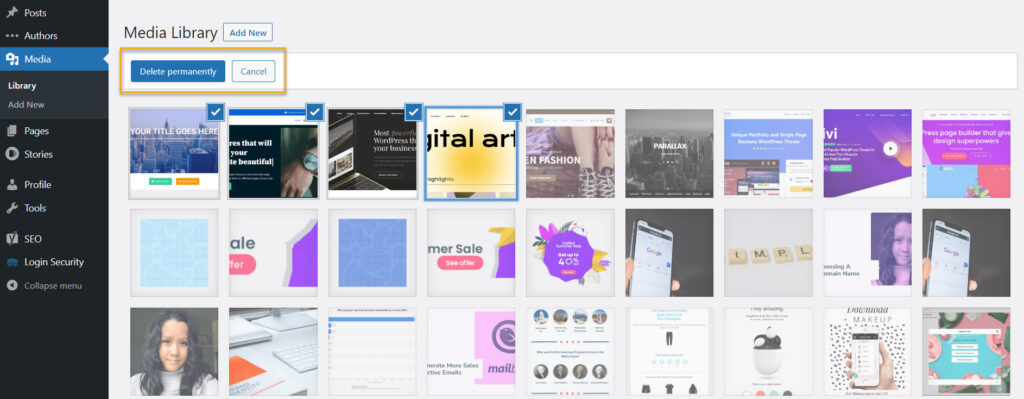
- Additionally, you can use the Bulk Select button. This feature allows you to delete multiple files from your WordPress installation at the same time:
Now, let’s go over how to add media files to WordPress.
Types of WordPress Media Files
To keep it secure, you can only upload the most commonly used file types to your WordPress website. There is also a file size restriction on the files that can be uploaded.
Here are the following file types you can upload to your WordPress Media Library:
- Images: .jpg, .jpeg, .png, .gif, .ico
- Documents: .pdf, .doc, .docx, .ppt, .pptx, .pps, .ppsx, .odt, .xls, .xlsx, .PSD
- Audio: .mp3, .m4a, .ogg, .wav
- Video: .mp4, .m4v, .mov, .wmv, .avi, .mpg, .ogv, .3gp, .3g2
How to Add Files to the WordPress Media Library?
You have several options when it comes to uploading files to your media library. Let’s discuss them each.
- Upload files via WordPress Admin Dashboard
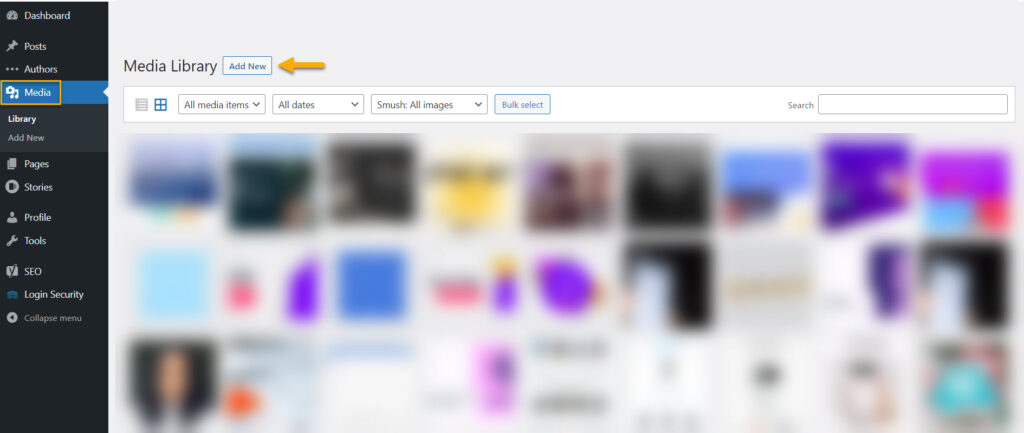
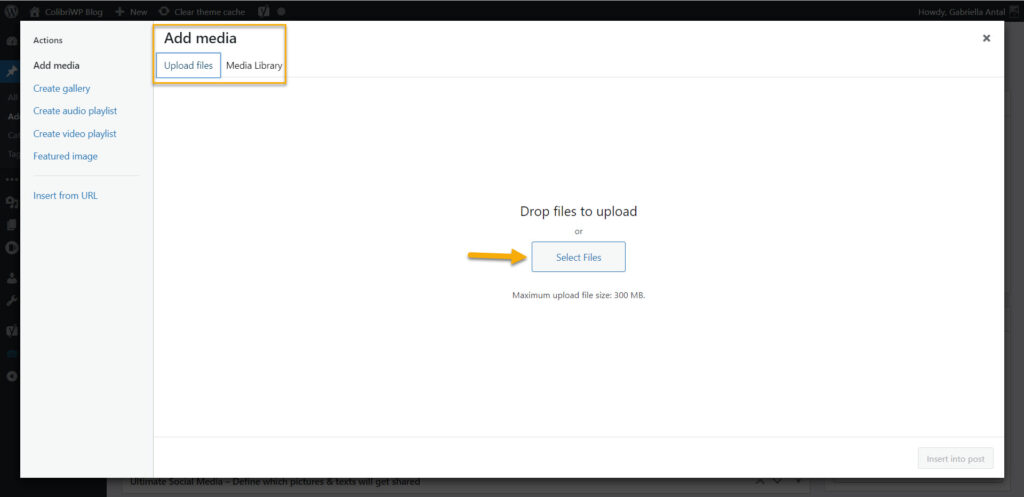
To add new media items to your WordPress dashboard, go to the Media → Add New tab in the WordPress admin sidebar:
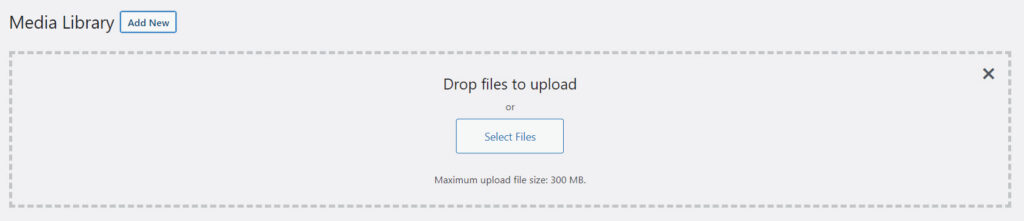
Then, you can easily drag and drop your files into the box or click the Select Files button to upload them. Make sure the file size does not exceed 300 MB.
Upload files to a page or post using the WordPress Gutenberg Editor.
If you are using the Default WordPress Editor (aka the Block Editor aka the Gutenberg Editor) and want to add a file to a page or post, you will need to add the proper WordPress block.
In the Default Editor, everything is a block, from paragraphs and images to sliders and tables. This means that depending on the file you want to upload, you will use a specific block.
- Audio file – the audio block,
- Image file – the image block,
- Video file – the video block,
- PDF file – the file block.
But first, how can you add a block to a page or post inside the Default Editor?
Well, there are two ways:
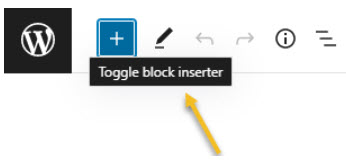
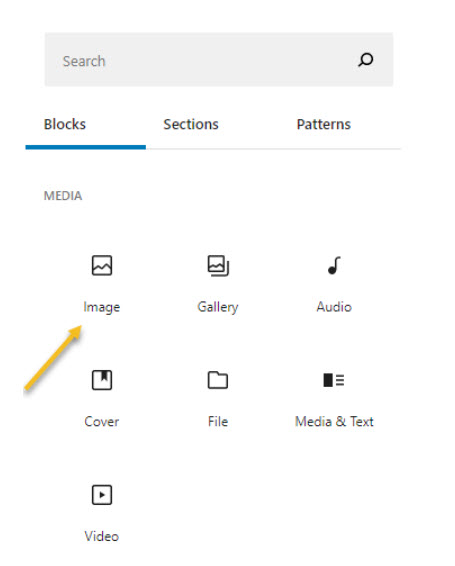
- Go to the “+” sign in the upper-left to open the block inserter.
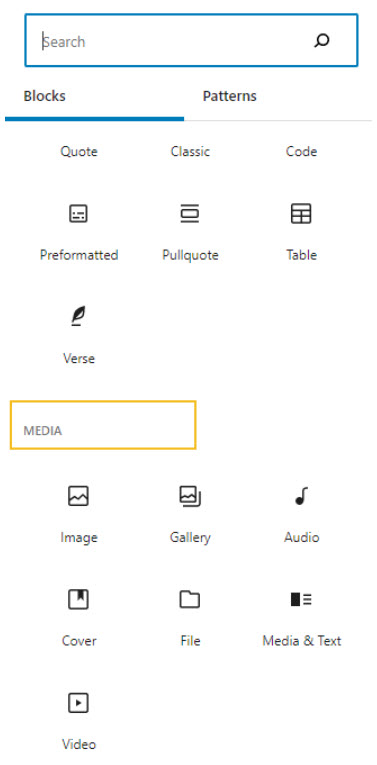
Scroll down to the media blocks, locate the block you need, and drag it to the page.
- Hover between the elements on the website canvas until you notice a “+” sign.
You will see a tiny block inserter opening up. You can start typing the name of the block you are looking for: “audio,” “video,” etc.
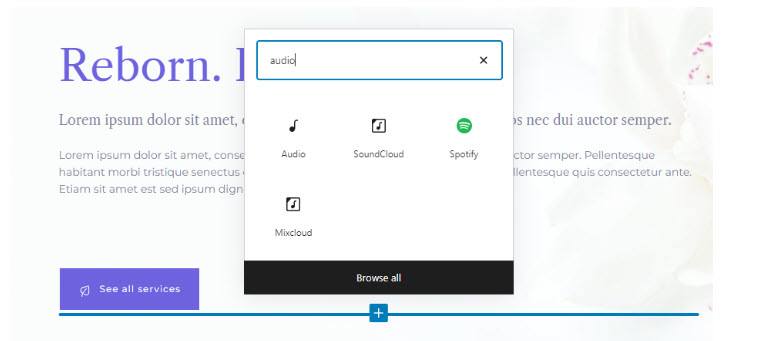
When you click on the block, it will be added to the page you initially hovered over.
You can also click “Browse all” to access the main block inserter. From here, you can easily drag and drop the block onto the website canvas.
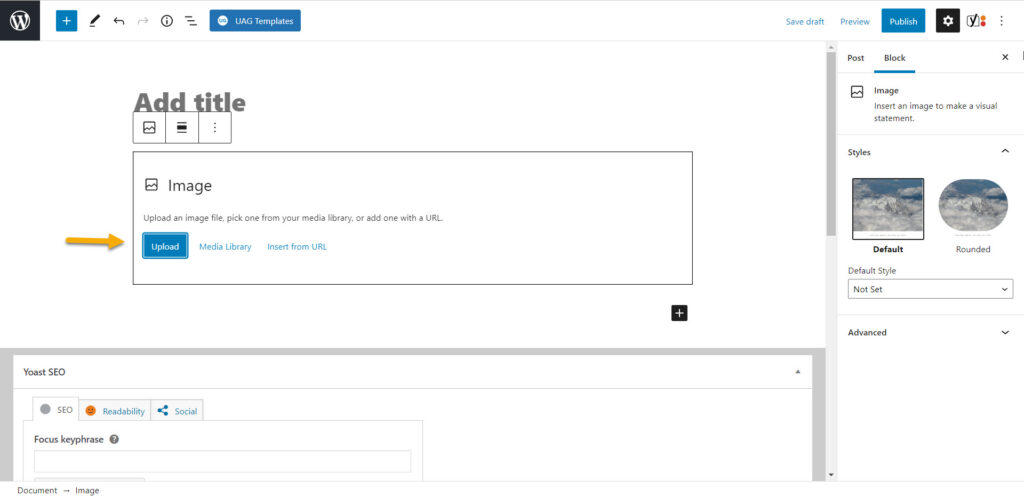
We’ll choose the Image block for this tutorial, so go ahead and click on that one. Once the block has appeared, click the Upload button to begin uploading your media file.
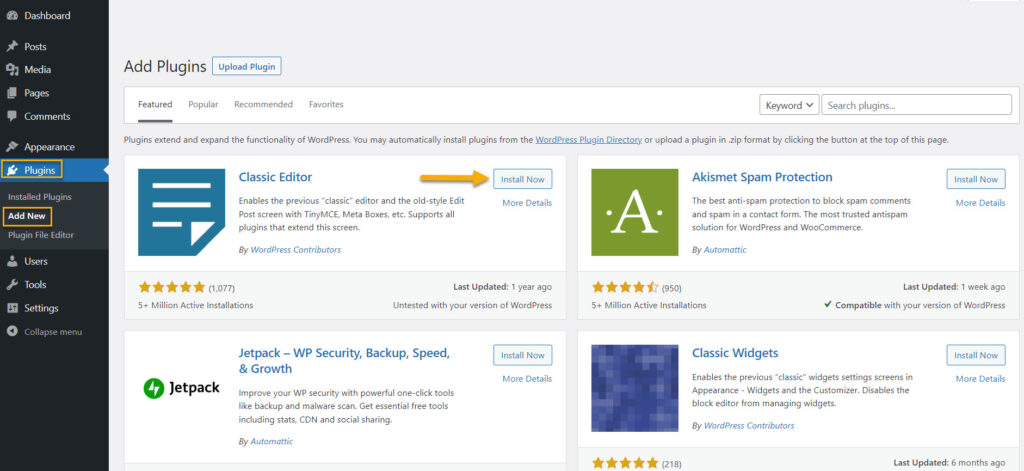
Upload files via WordPress Classic Editor.
If you prefer using the Classic Editor to create posts on your WordPress site for whatever reason, you can do so by installing the official Classic Editor plugin.
From your WordPress dashboard, go to Plugins → Add New. You can type the name of the plugin in the search bar in the upper right. After finding it, just hit “Install now,” then “Activate.”
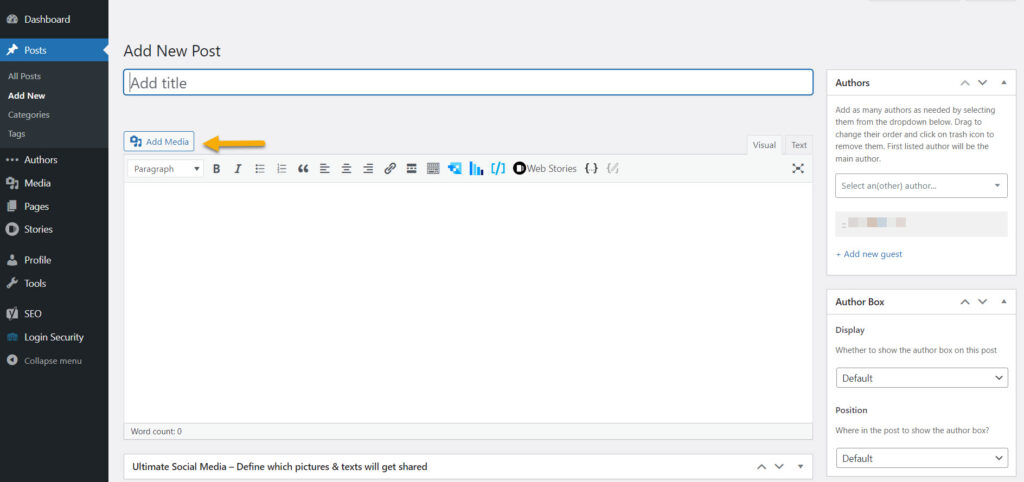
Let’s say you are inside a post using the Classic Editor.
Notice the “Add Media” button on top of the text editor. You can click on it to open up the Media Library and upload all the files you want to use inside the post.
You can also upload the files one by one.
Place the mouse cursor somewhere in the website canvas, then click on the “Add Media” button. You can now select an already existing file or upload a new one. It will be added to the exact placement you chose from the canvas.
And there you have it! Three ways to upload media files to your WordPress Media Library.
Now, the WordPress community has built all sorts of blocks that can be found alongside the default ones inside the block inserter. Whenever you see blocks having black icons, you should know that those are the default ones.
If you install a plugin that enriches the inserter with new blocks, they will have another color, like here:
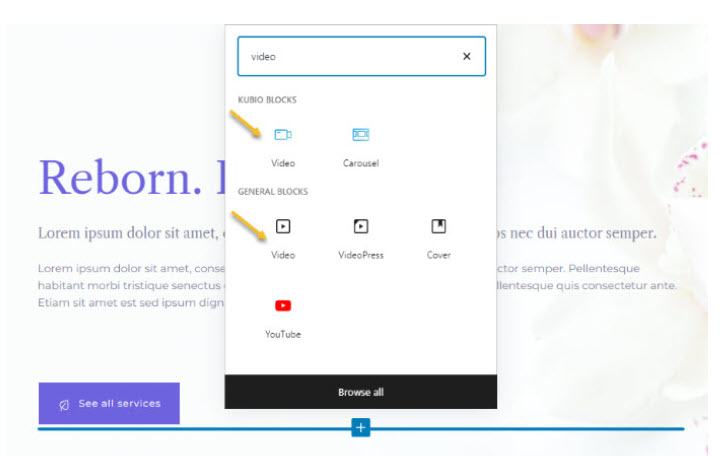
Notice two video blocks? The one with a blue-green icon is a Kubio block. But which one is better? Let’s find out in the next chapter.
How to use media third-party media blocks
Now, all sorts of plugins can add up blocks to the block inserter: Kubio, Kadence, Stackable, etc.
But, they do more than that. They bring in more customization options to the block editing experience. The default styling options in the Block Editor are kinda scarce, to be honest.
This is why such tools will give you more design freedom, allowing you to gain control over design.
I’m gonna show you how this works using Kubio. I will use the example of the Kubio image block versus the default WordPress image block.
Working with the Kubio image block
For starters, after installing Kubio, you will need to enter every post or page using the “Edit with Kubio” option.
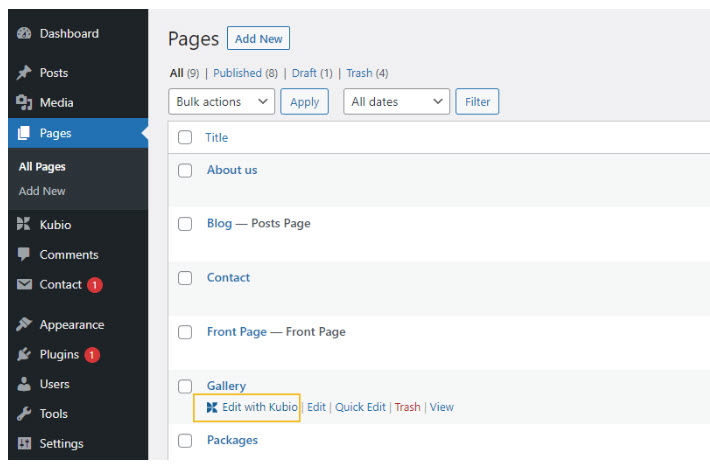
Now, we will add the Kubio image block as we add any other block: via the block inserter.
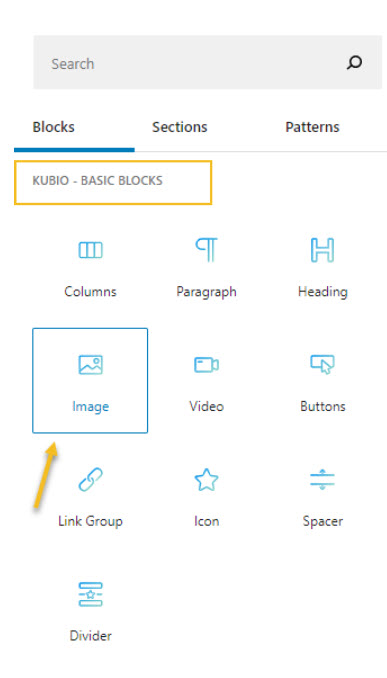
This is what the block will look like on the website:
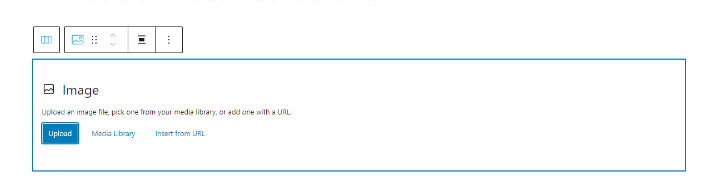
You can either upload an image, select one from the Media Library, or paste the URL of an image.
Here’s what you need to know about the Image block:
The Gutenberg image block allows you to include images on your website. You can drag the WordPress image block to any page section or add it from any “+” sign on your canvas. You can also upload a locally hosted image, an image from the Media Library, or a URL.
When you select an image block, a toolbar with several basic editing options appears on top of it.
This is the toolbar:
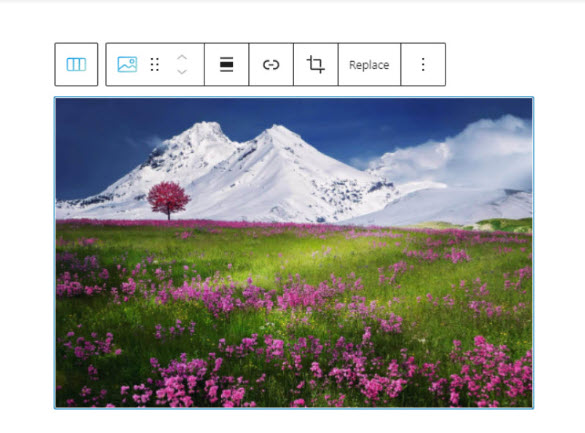
Here are the image block’s specific editing options:
- Transform\Alignment: there are four choices: left, center, right, and justified.
- Add a link: select this option if you want to add a link to the block image. When you add the link, you have the option to open it in a new tab.
- Crop: when you select the crop option, some additional options will appear, allowing you to zoom in (on a scale of 100 to 300), adjust the aspect ratio of your image, and rotate the image. When you’re finished, click “Apply” or “Cancel.”
- Replace: you can select an existing image from the Media Library or upload a new one. You can also make changes to the image URL.
Here is the editing panel:
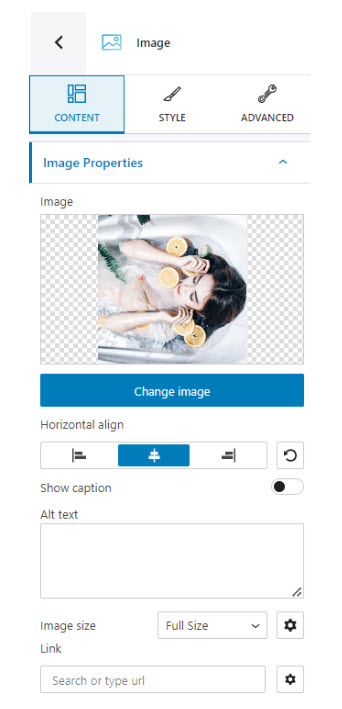
As you can see, you have three options: Content, Style, and Advanced.
Content
You can do the following here:
- Change your image;
- Orient the image;
- Include a caption with the image;
- Attach a link to the image and specify whether it should open in a new window or not, as well as whether it should be no-follow.
- Change the image’s size.
Style
At the Style level, here are your options:
- Opacity: The opacity is set on a scale of 0 to 1, with 0 being completely transparent and 1 being completely opaque. You can also choose a color.
- Box shadow: The box shadow’s position, blur, color, and spread radius can all be changed.
- Border: There are several border styles to choose from. You can easily change the border color and thickness.
- Radius: You can round the corners of the image using this option. If you choose the link symbol, you can change the top-right, top-left, bottom-left, and bottom-right values. As shown below, you can be creative and assign different values to the top-bottom and left-right.
Effect options (PRO only) Frames
- This option allows you to frame your image. You can also change the type of frame here (background or border);
- Change the color of the frame;
- Set the frame’s width and height;
- Enable the option to display the frame on top of the image, and enable the frame shadow option. Learn how to customize shadows here;
- Change the offset to the left. Left balances can be positive or negative. The values range between -100 and 100. A negative value moves the frame to the left, while a positive value moves it to the right.
- Modify the top offset. Top offsets can be both positive and negative. The values range from -100 to 100. A negative value moves the frame closer to the top of the image, while a positive value moves it closer to the bottom.
Effect options (PRO only) Overlays: You can find More information on how to work with overlays here.
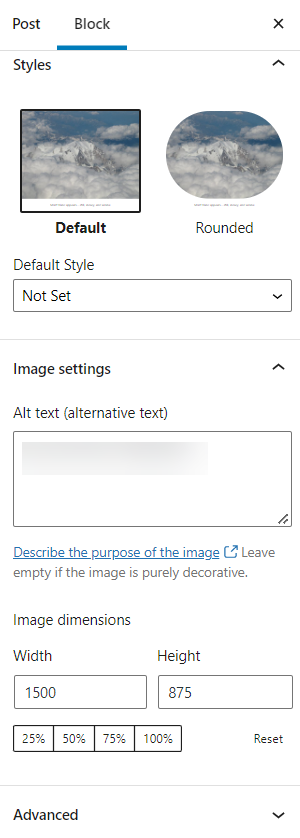
Advanced
At the Advanced level, you can edit the container, the picture, or the image caption in both the hovering and normal states. The space your image occupies can now be considered the container.
Here’s what you can do:
- Background: here, you can change the background’s type and color.
- Spacing: the margins and paddings for your image block can be configured here.
- Shadows and a border: here, you can give your image block borders with a different color, radius, and thickness. Box shadows are an additional option. The box shadow’s position, blur, spread, and color are all completely under your control.
- Responsive: you can choose here whether or not the block will appear on a desktop, tablet, or mobile device.
- Miscellaneous: you can configure your image’s z-index (which vertically arranges overlapping elements), decide whether the component overflows (which shows the block’s content spilling outside of its container), add HTML anchors, and configure CSS classes.
Now, let’s see what the image editing experience looks like when using the default WordPress image block.
Working with the Default WordPress Gutenberg image block
Now, we will add the image block to a page.
When you select the image block, you will notice a toolbar showing up. It is similar to the Kubio Editor one, with some exceptions. Here we have the option to “save as a reusable block”. And Kubio allows you to copy and paste styling (in the PRO version).
The main differences can be seen in terms of the customization options inside the block editing panel.
Here’s what the default panel looks like:
Here you can choose between two image styles, set up the image’s width and size, and specify an Alt Text. And that would be all.
As you can see, the Kubio builder really puts the Block Editor on steroids. And its free plan is more than enough for most sites.
How to Edit Images in WordPress Media Library
WordPress includes a few native image editing tools. However, remember that these tools are pretty limited compared to graphic design software such as Adobe Photoshop. So you can’t do anything outrageous or out of the ordinary.
To get to them, go to your WordPress Media Library and select the file you want to work on. Then, select the Edit image option.
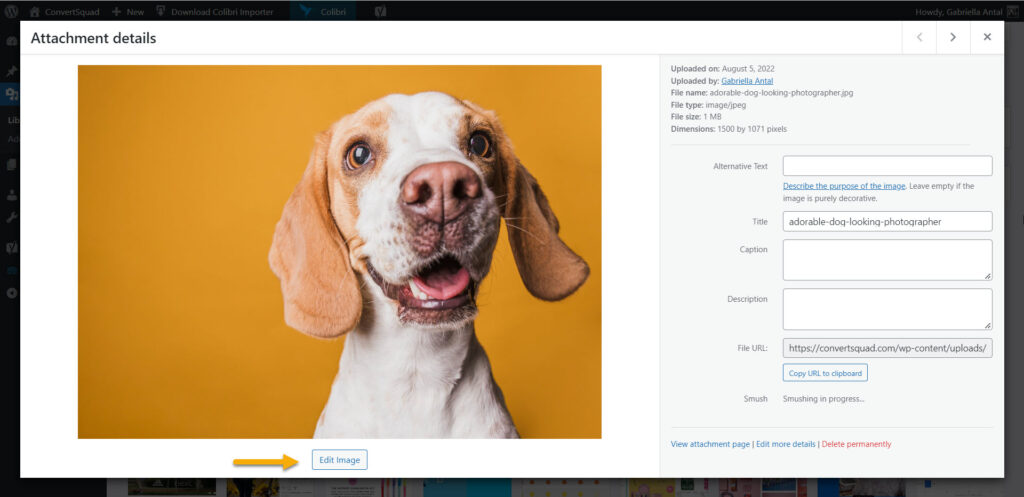
This will open the image editor:
You can perform three basic edits:
- Cropping: Cropping allows you to remove sections of an image.
- Rotating: You can rotate the image by 90 degrees and turn it counterclockwise or clockwise.
- Flipping: When you flip the image, it will reflect either vertically or horizontally.
You can find the other three options in the sidebar. The first allows you to change the image’s size by scaling it. You must enter your desired height or width, and the other field will automatically fill in. Then press the Scale button.
It’s worth noting that resizing images in WordPress can sometimes degrade their quality. You can also only take large images and scale them down. Remember that you cannot scale images to a larger size.
How to Download Files from WordPress Media Library?
Here’s what you need to download files from your WordPress media library:
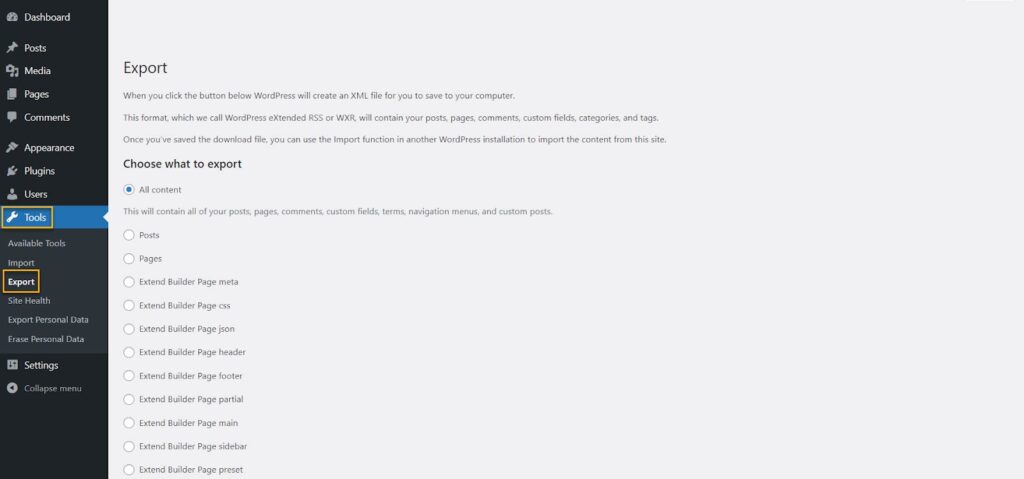
First, click Tools in the navigation menu on your WordPress admin dashboard, then select Export from the tools list.
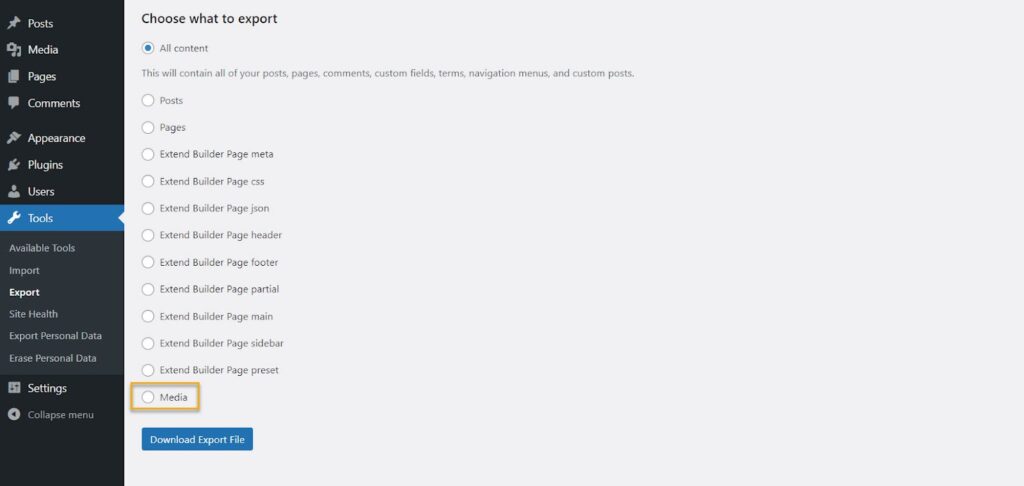
From here, make sure you scroll down a bit and select Media.
Next, specify the start and end dates for downloading the media files you uploaded during that period. Finally, click the Export File Download button.
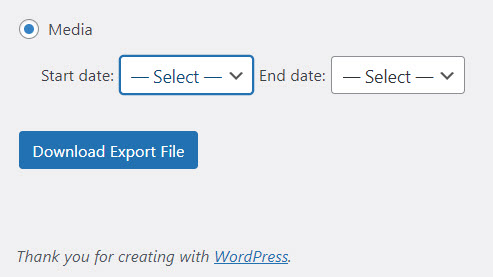
Once you hit the Download Export file, your files will begin downloading.
How to Deal With WordPress Media Library Errors
Uploading files to the WordPress media library is not always easy, and errors occur. However, you can tackle them quickly, and we will show you how.
When uploading images, you may encounter an HTTP error, Upload: Failed to Write File to Disk error, or your WordPress Media Library failing to load.
- HTTP error:
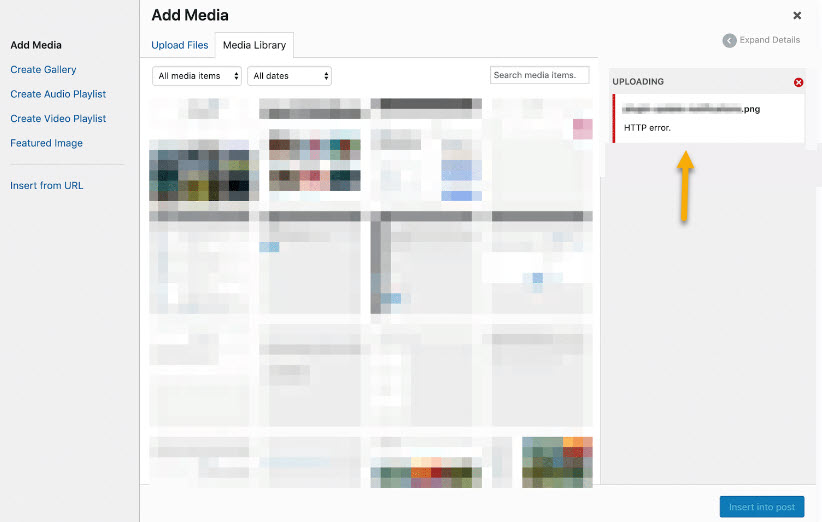
Typically, you can wait for this error to disappear and then retry your upload after a few minutes. However, your WordPress session may have expired if the HTTP error occurs again. Therefore, you must log in again before retrying your upload.
- UPLOAD: Failed to Write File to Disk error:
This is usually caused by a problem with your site’s file permissions. For example, as a security measure, WordPress restricts certain users from modifying their files, including the uploads folder.
Your upload attempts will fail if the permissions for this folder are set to prevent users from modifying it. Using the Site Health tool, you can quickly determine if this is the problem.
Go to Tools → Site Health in your dashboard and select the Info tab. The final dropdown menu displays the file permissions for a few folders, including the uploads directory. The directory’s permissions should be set to Writable. If it’s set to Not writable, you’re dealing with a permissions problem.
- WordPress Media Library fails to load:
When this occurs, it usually indicates a problem with your plugins or theme. First, switch to the default WordPress theme and disable all plugins to see if the problem persists. If the WordPress Media Library loads appropriately after that, don’t forget to permanently fix the problem with your plugins or theme. For more information, try contacting the plugin or theme developer.
Five Plugins to Help You Organize Your WordPress Media Files
The more time you spend using your WordPress Media Library, the more media files you’ll upload. As the number of media items in your library grows, keeping track of them can become challenging. However, it’s not messy if you know how to organize your media files correctly.
Fortunately, installing the necessary plugins will provide you with various tools to help you better organize your media files.
WordPress Media Library Folders
WordPress Media Library Folders is a helpful plugin that allows you to create, organize, and label folders in your media library. This is a free plugin, but the premium version adds advanced custom fields, multisite support, and category-based folder organization.
Main features:
- Image thumbnail regeneration: This regenerates thumbnails so that the dimensions of their uploaded version can be changed.
- Search engine optimization: When the SEO settings are enabled, the uploaded image automatically receives alt and title attributes.
- Syncing via FTP: It keeps the same folder structure in both your media library and the FTP, avoiding the mess of disorganized items that appears in your library when doing bulk file uploads via FTP.
Folders are yet another plugin for organizing and organizing your media uploads. Folders is free to use, but the pro version includes more features such as unlimited subfolders and folder appearance customization.
Main features:
- Media substitution: It automatically replaces your old media with the new one across the entire website.
- Migration of media from other plugins: It can import media folders like FileBird and Real Media Library.
- Progress bar for uploading: It monitors the file uploading process.
Media Library Categories is a plugin that allows you to organize items in the WordPress Media Library using categories. This one is also free to use, but its premium version will enable users to filter media items by category when uploading them to posts or pages.
Main features:
- Bulk action: Use it to add, modify, or delete the categories of multiple media items simultaneously.
- Filter for taxonomy: It uses custom taxonomy to filter media files in your library.
- Shortcode for a gallery: Display images from a specific category in a gallery format using a WordPress shortcode.
Real Media Library is a WordPress plugin that manages and organizes large amounts of media files into folders, galleries, and collections. The plugin is entirely free, but the premium version includes a Real Physical Media plugin for displaying the media library folder structure in the file system.
Main features:
- Support in multiple languages: This plugin supports a long list of languages, ranging from Spanish to Chinese.
- Image selection: Use the drag-and-drop or order function to change your image files’ display.
- Upload to a folder: Select a specific folder as the destination for your file upload.
- Folder-to-gallery conversion: Create a gallery with images from a single gallery folder using the Gutenberg editor.
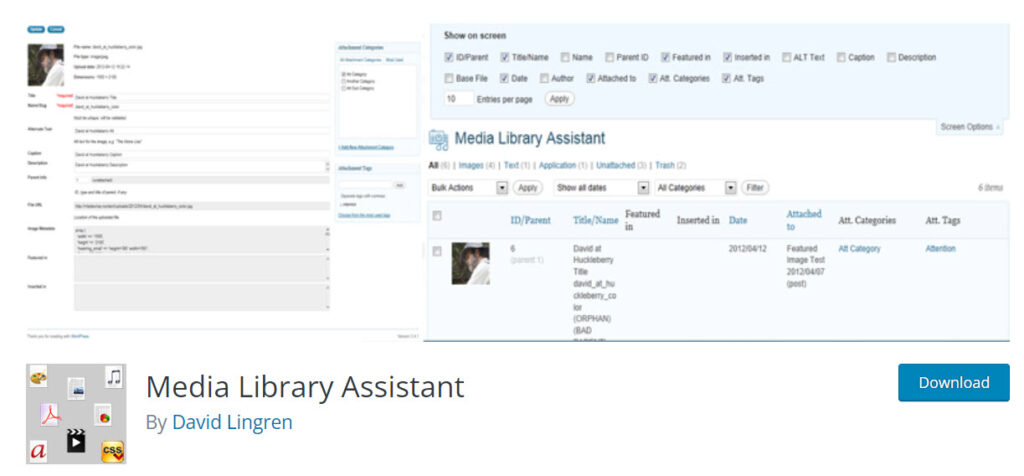
Media Library Assistant is a plugin that uses shortcodes to provide valuable media library management tools. This plugin does not have a paid version—all free.
Main features:
- Extensive gallery personalization: Custom taxonomies and all media types – not just images – are supported by the [mla gallery]shortcode. Users can also customize each gallery’s style, markup, and content.
- Display the most frequently used terms: Using the [mla tag cloud]shortcode, you can display the most commonly used taxonomy terms in your media library.
- Term display in a hierarchical taxonomy: Show the hierarchy of the taxonomy terms you use in the form of a list, drop-down menu, or checklist using the [mla_term_ list]shortcode.
- Search box: This feature extends the native search box by allowing you to look up images and other media item slug, alt text, and caption fields.
Wrap Up
That pretty much covers everything there is to know about WordPress Media Library. The WordPress Media Library is capable of much more than simply storing your media files. As you can see, it is a powerful tool that covers all of your media management needs and more.
This guideline should help you navigate your media library more quickly and efficiently, saving you time and headaches.
If you enjoyed this article and want to see more like it, please subscribe to our YouTube channel. You can also connect with us on Facebook. Or, if you want to learn how to customize your WordPress site, here’s a great source we’ve put together.
Later!