Whether you are inside “Style” or “Advanced” in the Kubio block editing panel, at the block, sections or column level, you can make color changes across backgrounds, texts, and more. Let’s find out how.
How to make any color change in Kubio
The moment you notice a setting that allows you to make color changes to a border, text, shadow, background, link, etc, you will need to select the colored circle next to your option.
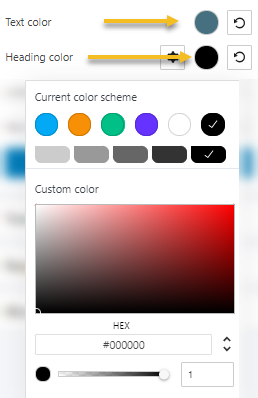
A panel will open up that allows you to pick a color from the current color scheme or gradient from a color, pick a color from a slider, or just type in a desired color code in the “HEX” field. You can also switch to the RGB color mode if it suits you better from the dropdown arrow.
You can also adjust the opacity of your color. The slider offers you values from 0 to 1, 1, meaning there’s no transparency. You can always reset the color to the default value when you select the reset button.
How to make background changes in Kubio
The Kubio free plan allows you to use two background types: images and gradients. Inside the PRO plan you can also use video and slideshow as background.
Working with image backgrounds
After selecting the image background type, you will see a default image showing up. You can easily change it after clicking on the “Change background image” button. You can upload your desired image or pick one from the Media Library.
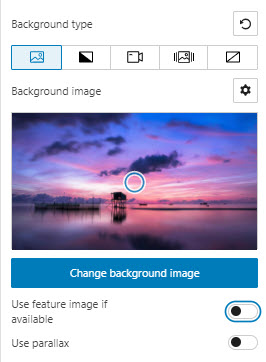
If the page you’re on has a featured image, you can choose to use it as a background image. Just enable the “Use feature image if available” option.
The PRO users can enable the parallax scrolling option as well. Parallax scrolling is a technique in which the website background moves at a slower pace than the foreground.
Working with gradient backgrounds
If you prefer a gradient as a background, select the gradient icon. You will have 5 free gradients available, and more than 100 in the PRO plans.
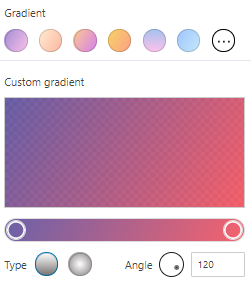
There are two types of gradients that you can use: linear or radial. You can adjust your gradient by using the slider (for both the linear and radial gradients) or the angle (in the case of linear gradients).
When you click on the slider, you will be able to add more color points to the gradient. Just choose its color and set up its opacity.
In the case of the attachment option, you can choose between fixed and scroll. If you choose fixed, you’ll notice that the moment you scroll, the gradient will lag behind.
In the example below, look how the center of the radial gradient stays put while scrolling happens. This is how the fixed attachment works.
Working with video backgrounds (PRO feature)
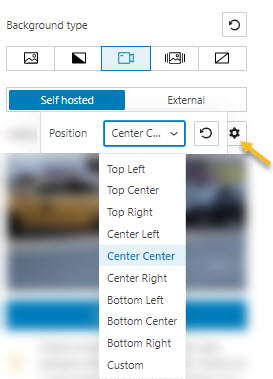
When you select the video option for your background, you will see that a a default video will be applied as background. In the editing panel, you will notice a circle on top of the video. You can move it in order to establish the focus of the video. Pay attention to the canvas to see the change.
You will be able to use a self hosted video or an external video (using YouTube URLs). In the case of self hosted videos, click on the “Change Video” button to open up the Media Library. You can pick a video from here, or upload one.
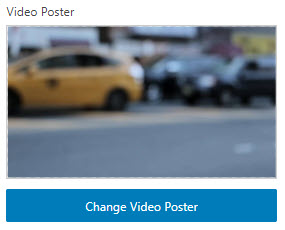
Mobile browsers usually disable video backgrounds to save bandwidth. Because of this we advise you to set a cover image (video poster) as well. Go to the video poster option and click on “Change video poster”. A window will open with the Media Library. You can choose an image from here or upload one.
In the case of self hosted videos you can also choose the position of the video background. There are 9 positions available, and a custom one, where you can specify your own top and left position (percentage values).
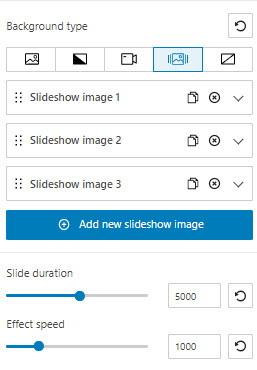
Working with slideshow backgrounds (PRO feature)
If you select the slideshow background option you will be able to:
- Add a slideshow image. Just click on the “Add slideshow image” button to add one.
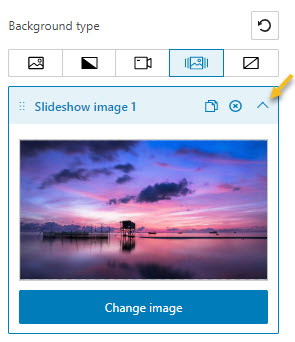
- Change images inside a slide. For this you can click on the dropdown arrow. You will now see the image, and a button saying “Change image”. Click on the button to open up a window with the Media Library. You can choose an existing image or upload a new one.
- Remove slideshow image from the “x” sign,
- Reorder slides by drag and drop,
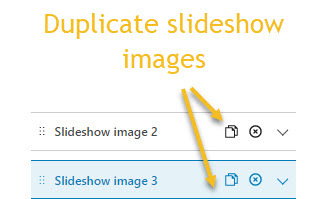
- Duplicate slideshow images,
- Toggle on the overlay option.
- Set up the slide duration,
- Set up the effect speed.
How to work with overlays (PRO feature)
In the case of sections, rows, and columns, in the PRO plan, you can add a background overlay from the style option inside the block editing panel.
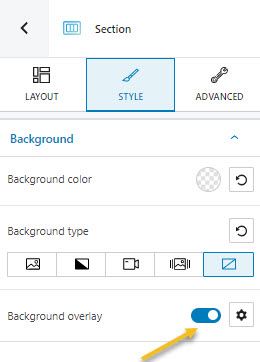
After enabling the background overlay option, go ahead and take a look at the available settings. You can use a color, gradient, or shape for your overlay. Each option comes with some specific customizations. Let’s check them out:
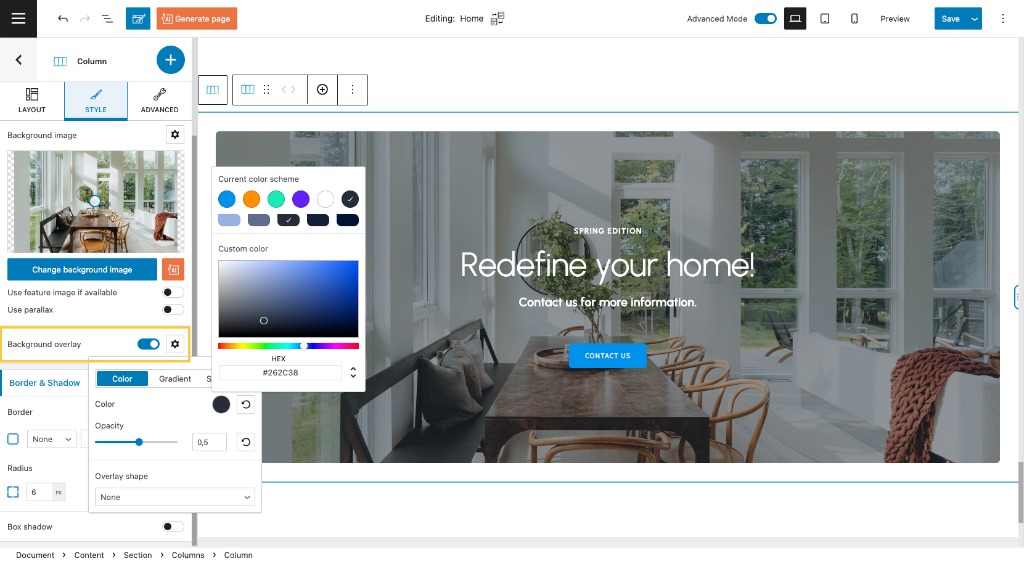
Color background overlays
In the below example, there’s a section that uses an image as a background. We have added a dark color overlay to it.
In the case of a color overlay you can:
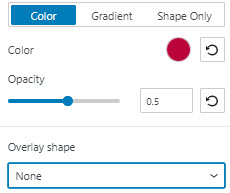
- Make color overlay changes,
- Set up the overlay’s opacity,
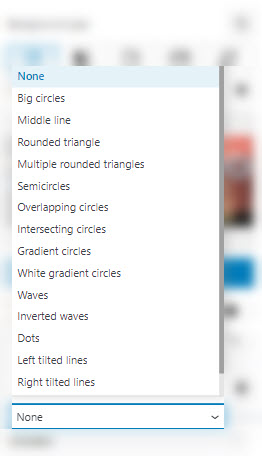
- Apply shapes to the overlay. There are over 15 shapes available.
- Set up the amount of light needed for the shape (the slider contains values from 0 to 100, 100 being the darkest).
In the example below, we applied the waves shape, and the light was set to 60.

Gradient background overlays – check above how gradients are set up.
Shape only overlays. Here you just choose between the 15 shapes available.