The moment you select the Kubio logo from the dashboard or select “Edit with Kubio” from underneath any page or post, you’ll enter the Kubio interface. Let’s take a look at it for a bit.
A. The navigational panel
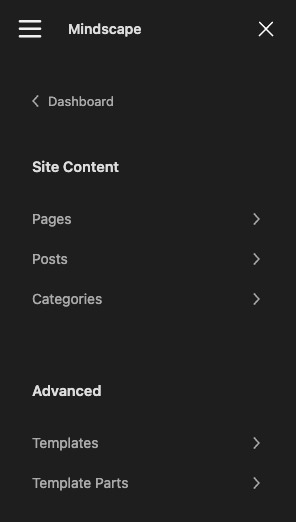
When the burger menu from the top left-side of the screen gets clicked, you’ll see a panel to the left that allows you to navigate across pages, posts, the WordPress dashboard, and templates.
B. The top bar

Here you can:
- Access the navigation panel on the left when clicking on the Kubio logo.
- Access both the default Gutenberg blocks and Kubio blocks from the “+” icon.
- Choose an item for selection for editing from the edit icon.
- Undo and redo changes.
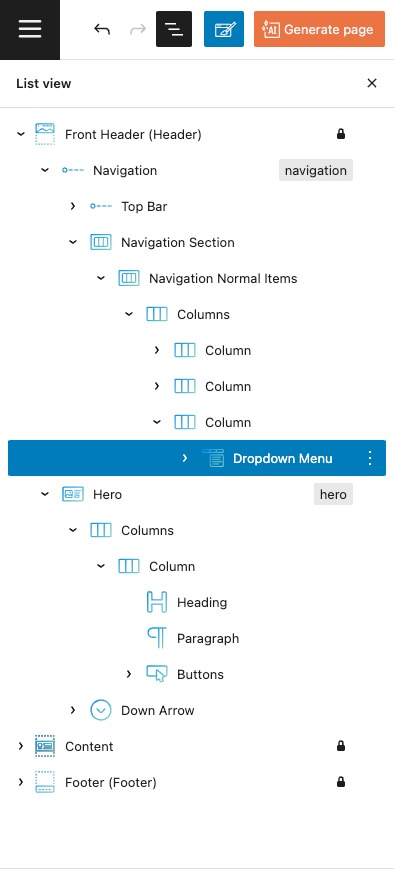
- See all your website sections in a list view. This view allows you to see how sections and blocks are nested one inside the other. Find out more about nesting and hierarchy in web design in Kubio, here.
- See the name of the page that you’re currently editing. If you click on it, it will open up the navigational panel that allows you to switch pages.
- Switch from the desktop version of your website to the tablet and phone one. This feature also allows you to apply different stylings from device to device. For example, you can have different font-weight and font colors for desktop and mobile.
- Preview the current page you’re editing.
- Save your page.
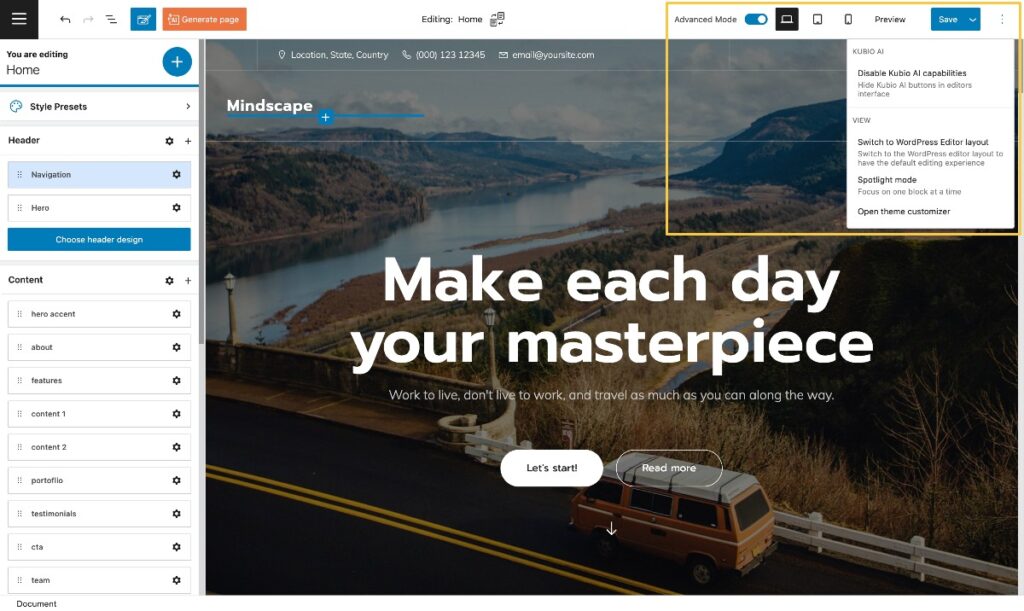
- Enable / Disable Advanced mode interface (NEW!). This feature is disabled by default, so you will see the quick mode of the interface when you first access the editor. Toggle the button in order to enable the advanced mode and have acces to: more options in the content and style tabs, advanced tab in the editor panel and have more control over the content of your page.
- Access more view options and tools from the three vertical dots.
C. The block inserter
The moment you select the “+” sign from the top bar, you’ll be seeing a list with all the default Gutenberg blocks and the Kubio blocks.
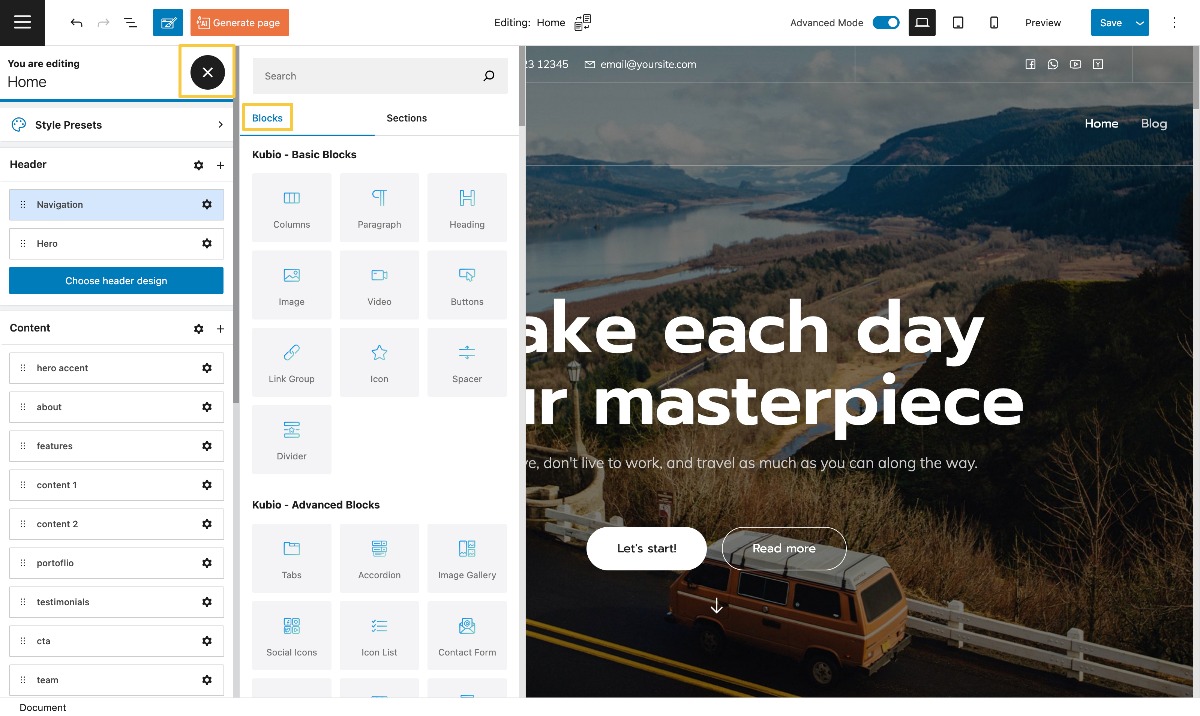
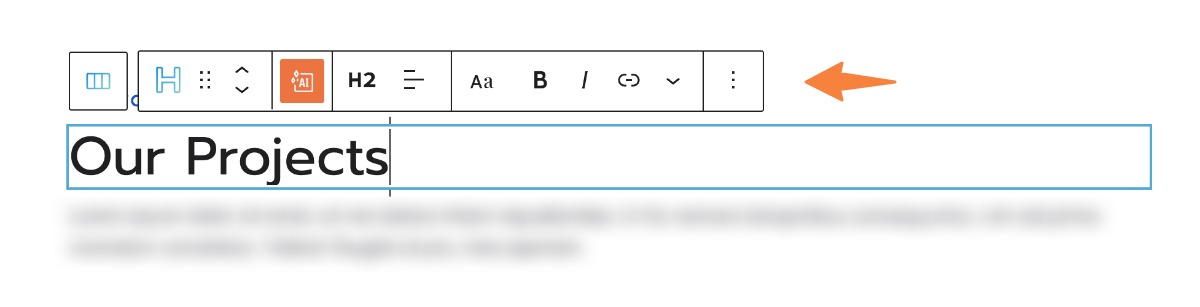
D. The block toolbar
The moment you select a block from the canvas, you’ll open up a toolbar on top of it, with some basic edit options such as the possibility to move the block, to remove it, or duplicate it. More info on how to work with Kubio blocks, here.
E. The page editing panel (on the left-hand side)
To configure your settings, there are two convenient methods available:
1. Navigate to the settings panel by clicking on the “Document” link located in the bottom breadcrumbs.
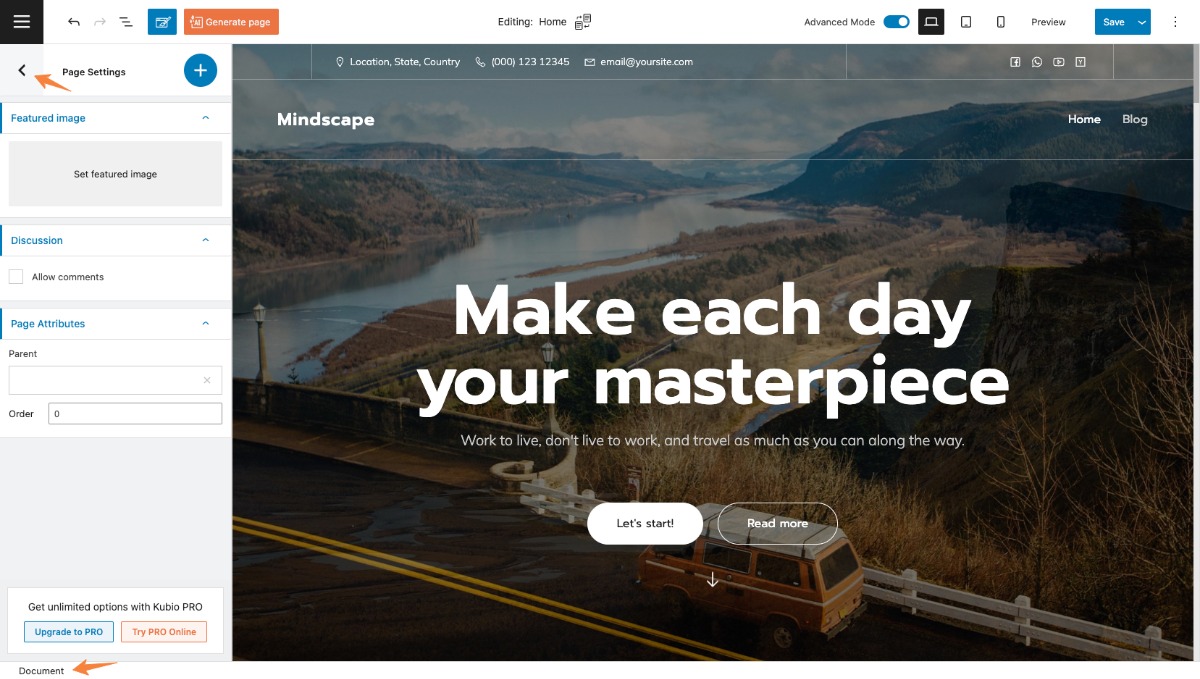
2. If you have a specific block selected, simply click the arrow on the top left of the panel labeled “back” to access the “Home” panel.
- Make page settings. Here you’ll be able to assign a featured image or enable comments.
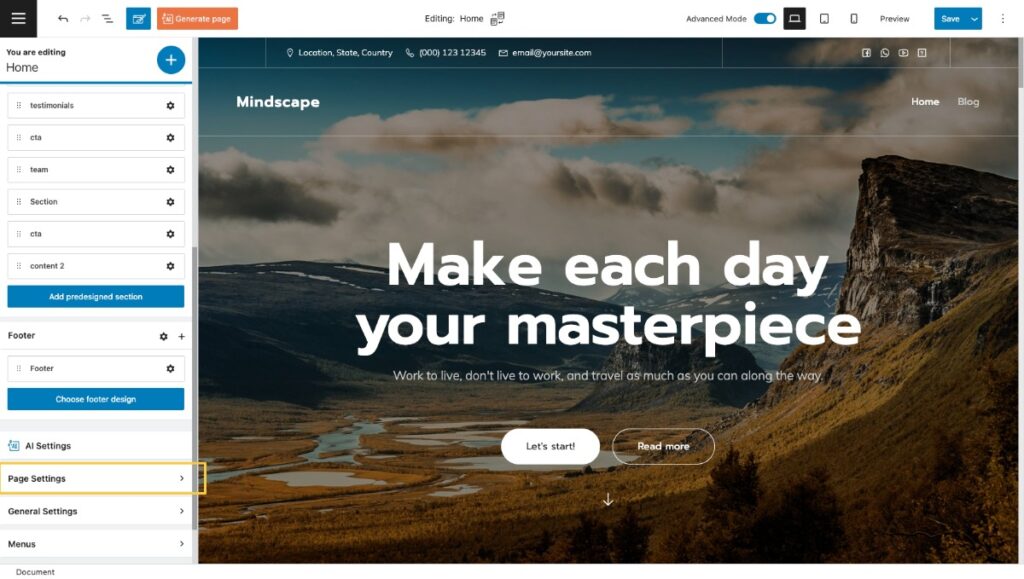
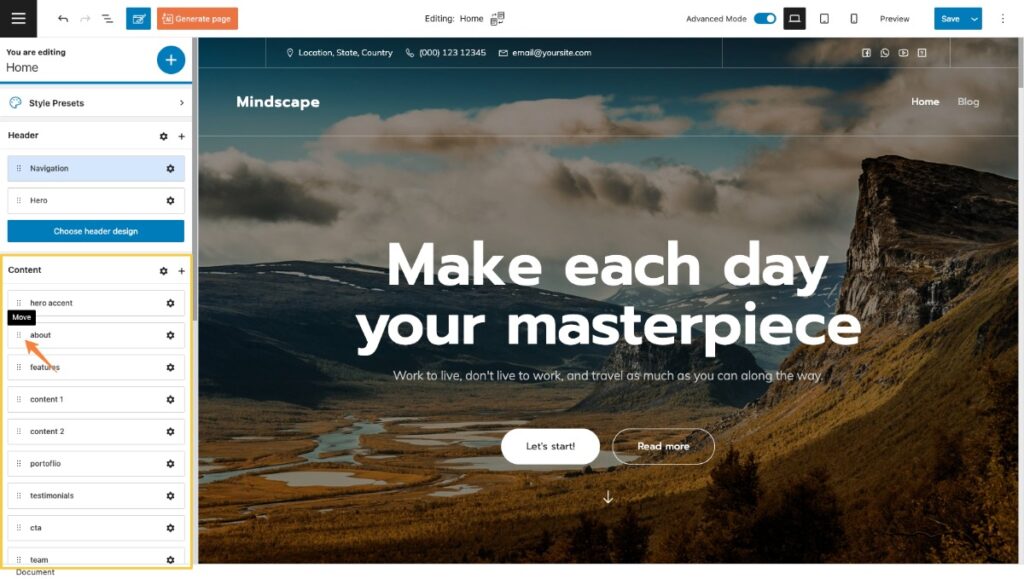
- Visualize and rearrange page content sections. This panel allows you to visualize your page sections easily. The structure is made of header, content, and footer. Inside “Content” you can easily rearrange your content sections by dragging and dropping them. Click and hold the six dots near the name of each section and reposition that specific section.
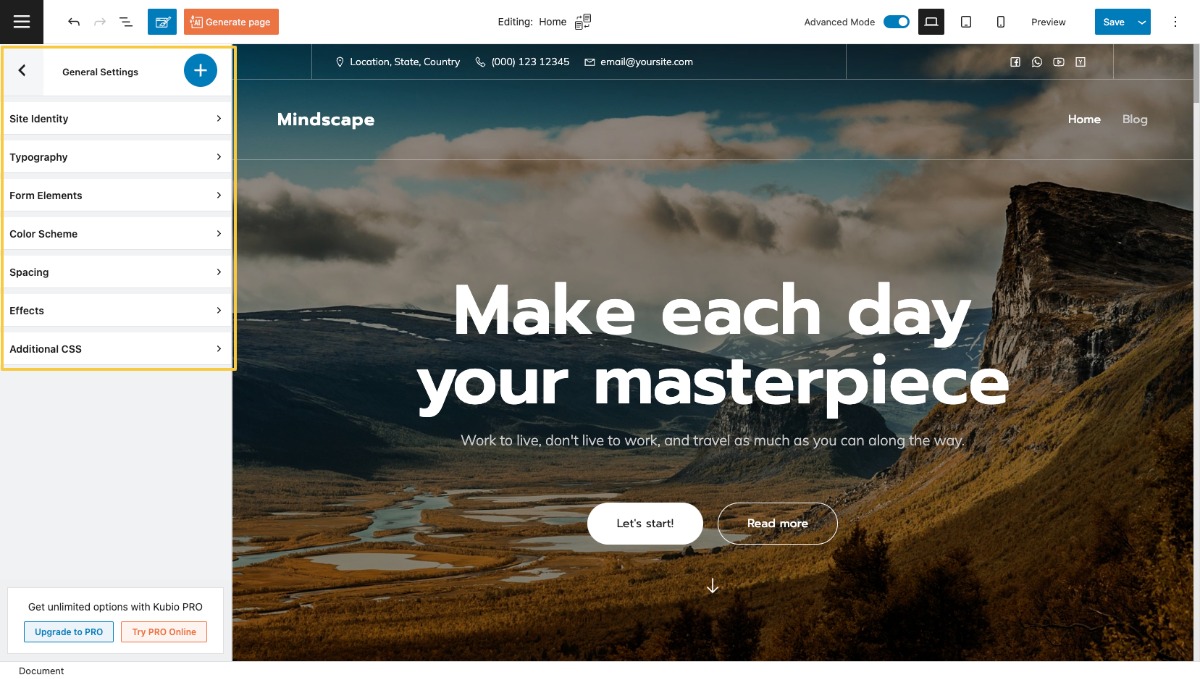
- Make general site/page changes. You can change the global color scheme, typography, spacing, and more. More details here.
- Set up the website menu. Here‘s how you can create a WordPress menu with Kubio.
F. The block editing panel (on the left-hand side)
Whenever you select a block from the canvas, you will notice an editing panel on the left. It allows you to customize sections, columns, and blocks in the tiniest detail.
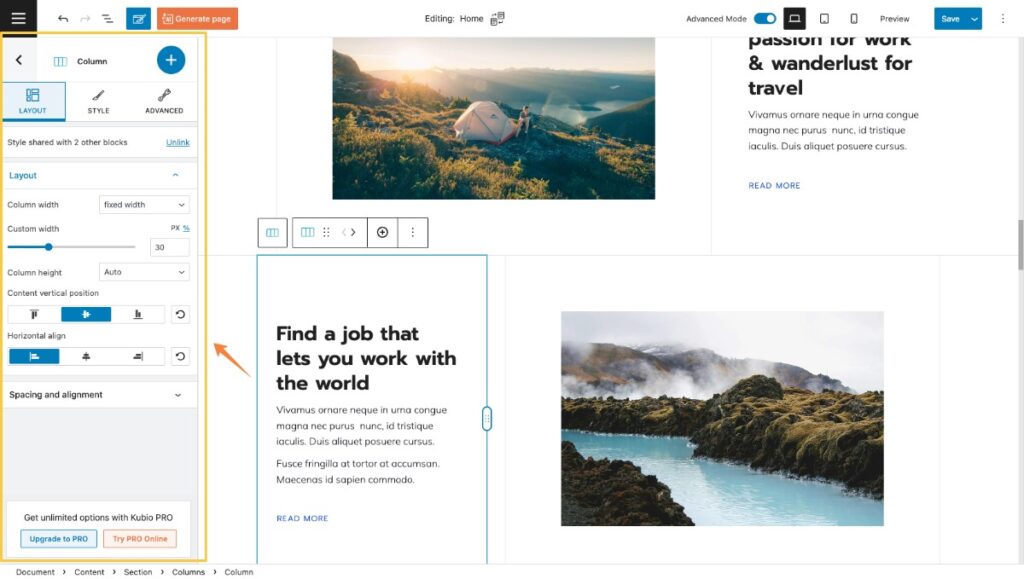
It’s here where all the editing magic happens. Here you have tons of customization options that allow you to bring your vision to life. More details on how to work with Kubio blocks, here.
G. The canvas
In the middle of the interface, there’s your actual website. All changes will be reflected here in real-time.
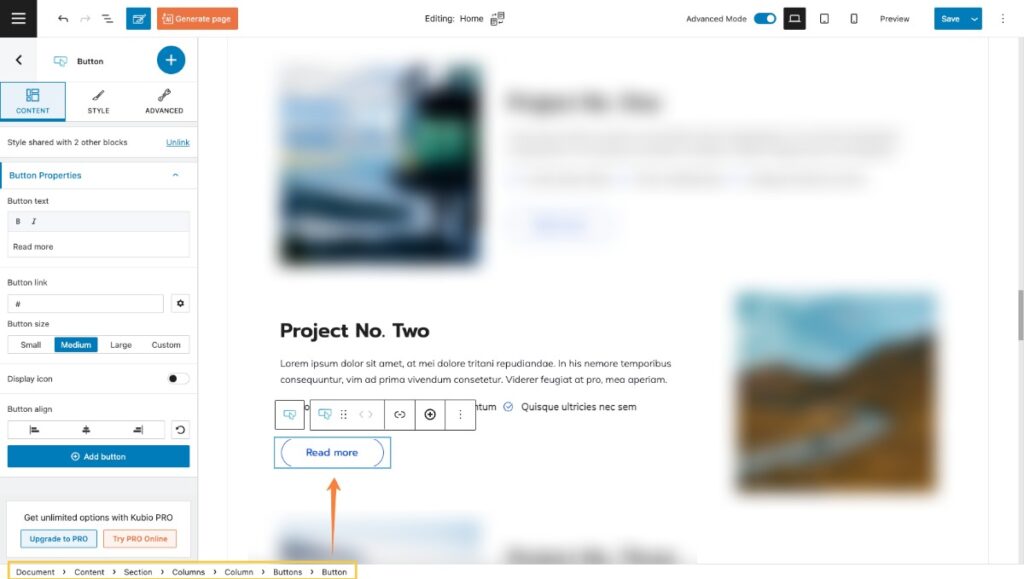
H. The bottom
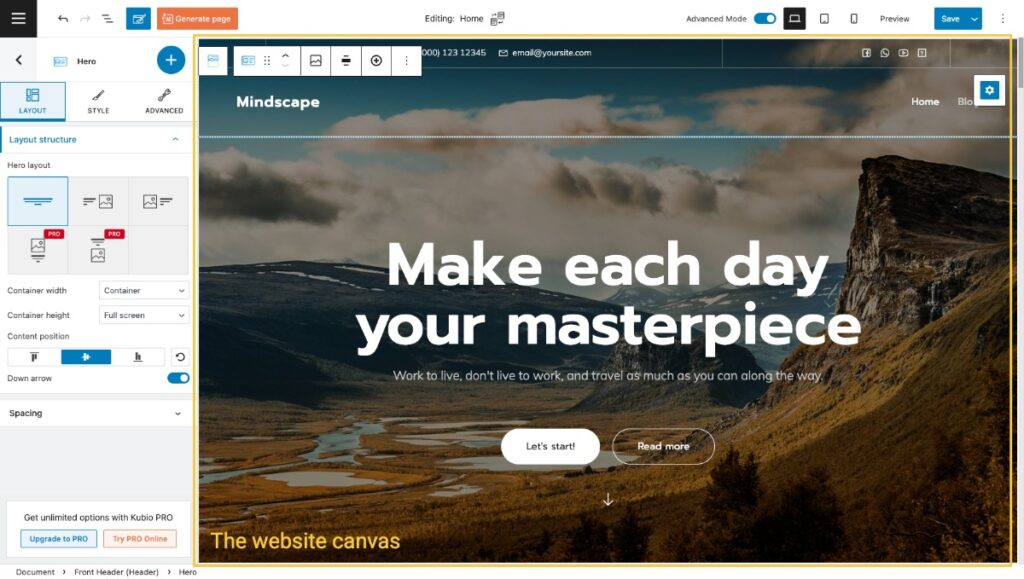
When you select a specific element on your web page, sometimes you might wonder how it is nested. To which row or section does it belong? The moment you select the item, you will see some breadcrumbs at the bottom.
In this case, there’s a button inside a button group, inside a column. The column is nested inside a row, which is nested inside a hero section. If you select “Hero” from the breadcrumbs, for example, you’ll be taken to the hero section of your site for editing.