Inside the Kubio block editing panel you will see several options that allow for typography editing at the “Style” and “Advanced” level, depending on the block.
Typography editing at the “Style” level
Certain blocks allow for text styling inside “Style”, such as heading, paragraph, tab, accordion, and many more. Let’s take the heading block as an example. If you understand the options here, you’ll be able to apply the same logic across other blocks as well.
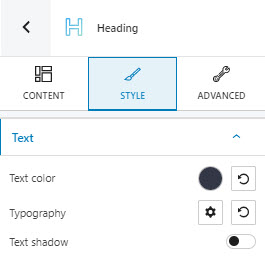
Here you can:
- change the text color. Wherever you notice a colored circle inside Kubio, it will allow you to make color changes (for either text, backgrounds, borders, shadows, icons, etc).
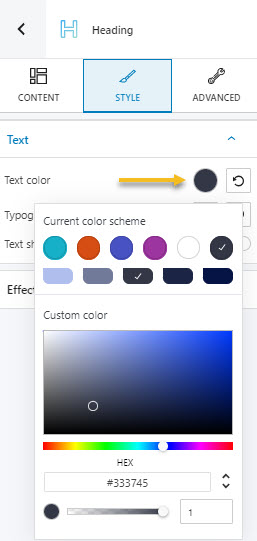
Let’s click on the colored circle next to “Text color”.
You can pick a color from there, use the slider, or just type in your desired color code in the “HEX” field. Then, you can switch to the RGB color mode if it suits you better from the dropdown arrow.
You can also adjust the opacity of the text’s color. The slider offers you values from 0 to 1, 1, meaning there’s no transparency.
- add a text shadow. When you enable the text shadow option, you’ll recognize again the same colored circle from above. It will allow you to change the color for the text shadow.
Text shadows are described by X and Y offsets relative to the element, blur, and color.
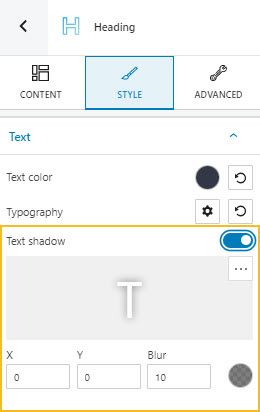
A positive horizontal offset (X) of the shadow means the shadow will be on the right of the box; a negative offset will put the shadow on the left of the box. A negative vertical offset (Y) of the shadow means that the box-shadow will be above the box, a positive one means the shadow will be below the box.
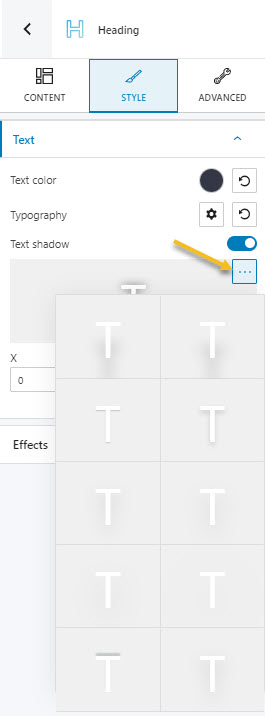
If you don’t wanna play with offsets, you can choose a type of shadow from the 3 horizontal dots, shown below.
In the blur case, the higher the number set, the higher the blur. When the blur is set to 0, it means there’s no blur.
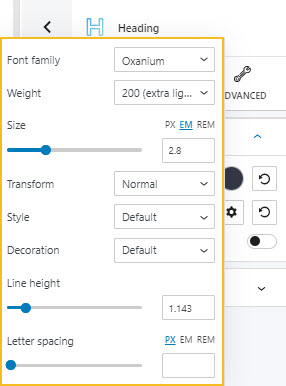
- make typography adjustments. Here you have several options available. You can customize the following:
- Font Family. Tons of Google fonts are available for you to choose from. If you have a PRO plan you can retrieve Adobe Fonts using an API token. Now, if scrolling isn’t your thing, and you already know the font you want to use, you can type its name in the search box.
- Font Weight. This refers to the relative thickness of a font’s stroke. In this case, 300 is the thinnest font-weight, while 800 is the thickest one.
- Font Size. You can use the slider to make the font size smaller or higher. You can use PX, EM, and REM for font sizes.
- Transform. This option allows you to make letter capitalization changes.
- Style. This is where you can make your font italic or bold.
- Decoration. Here you can add underlines, overlines, or line throughs.
- Line height. This is where you can control the amount of space between baselines in a block of text. A text’s line height is proportional to its type size. In this case, the default is 1.6x the actual font size. You can decrease it or increase it if you want. Just make sure that your text doesn’t look too crowded or too loose.
- Letter spacing. This refers to the space between letters in a piece of text. In the case of headlines, to improve readability, it is advised to use tighter letter-spacing. For smaller type sizes, looser letter spacing can improve readability.
Typography editing at the “Advanced” level
At the advanced level you can notice more customization options. Depending on the block, you can make style changes across several states, such as: normal, hover, or focus. In the example below, you can see that columns have two states: normal and hover.

Let’s click on the arrow next to typography and check the options inside. At this level you can make changes to text, heading, link, and hover link color.
Inside heading color, if you click on the settings icon you can make color changes from H1 to H6.

The colored circle indicates the current color for each element. Click on it if you want to select another color.
You can pick a color from there, use the slider, or just type in your desired color code in the “HEX” field. Then, you can switch to the RGB color mode if it suits you better from the dropdown arrow.
You can also adjust the opacity of the text’s color. The slider offers you values from 0 to 1, 1, meaning there’s no transparency.

Under typography, you also have the option to make changes to the themes’ defaults. Find out more about global typography changes, here.