There are two ways to generate new pages with Kubio AI. Let’s see our options:
1. Adding a NEW AI Page
This option allows you to add a new blank page or generate a new one using Kubio AI.
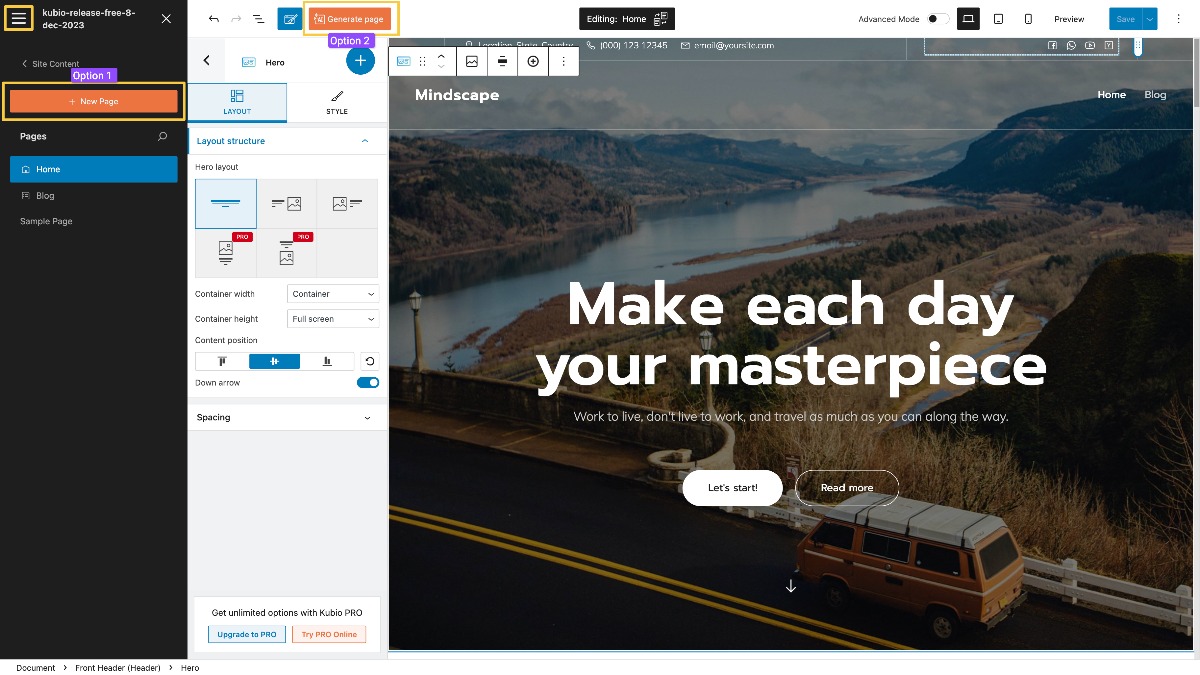
When the burger menu from the top left-side of the editor gets clicked, you’ll see a panel to the left that allows you to navigate across pages, posts, the WordPress dashboard, and templates.
From there, click on “Pages” and then “+Add a new page” button. A window with the 2 options will appear on the screen and it look like this:
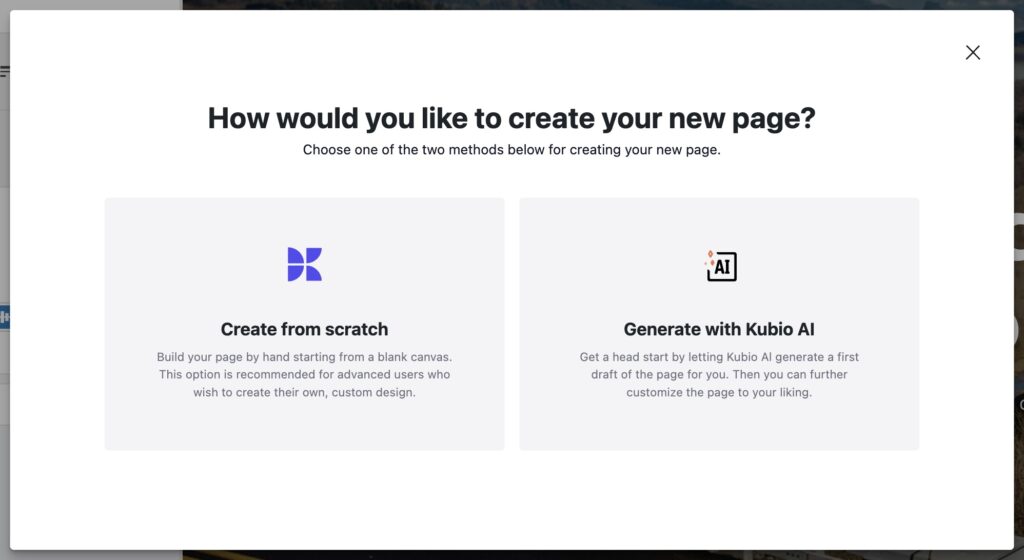
Let’s click on the second option, “Generate with Kubio AI” and go through the wizard steps.
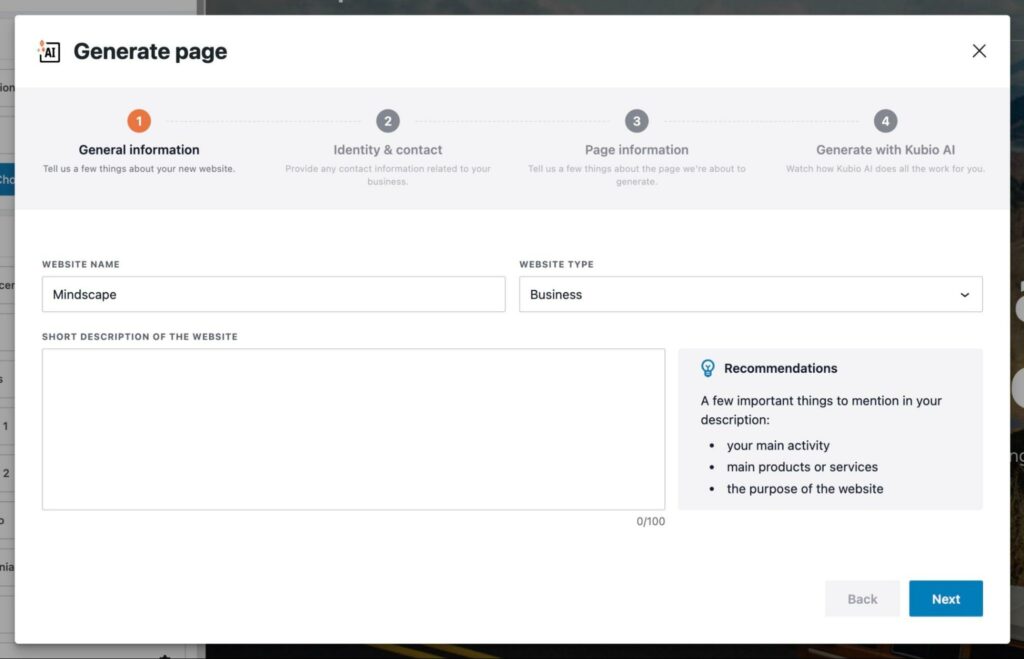
Step 1 – General information: in this step, you will be adding some general information about your website, such as website name and a short description for it (don’t miss out the recommendations on the right). You can also set the website type from various options such as Consulting, Art, Event and many more.
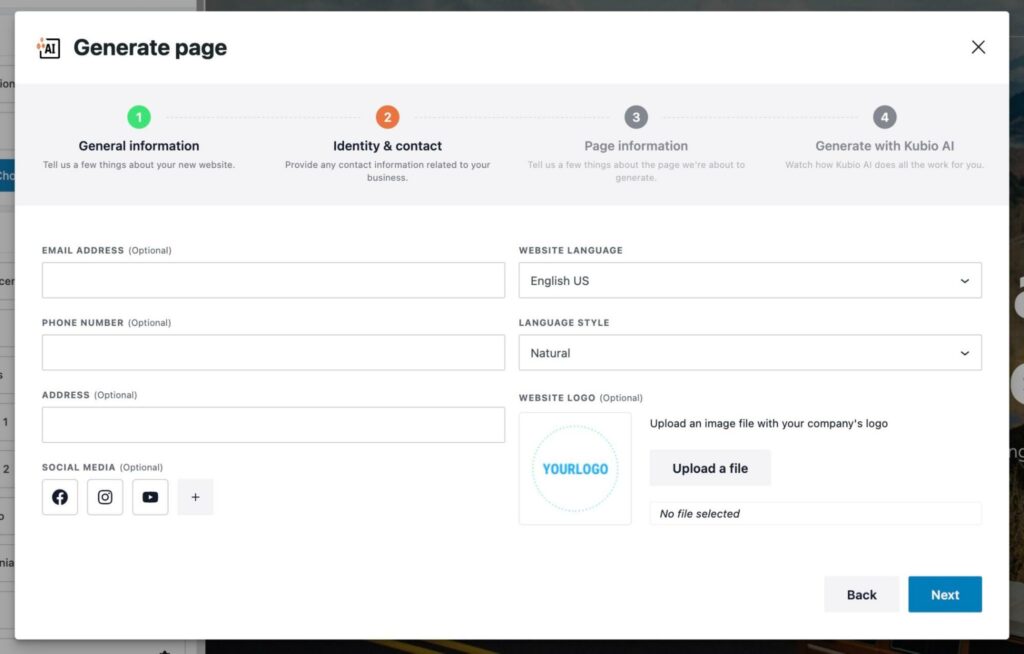
Step 2 – Identity & contact: here, you will be adding contact information related to your website. Keep in mind that some of the options are optional. At this point, you can set the language style of your website. This will determine the tone of generated text throughout the website.
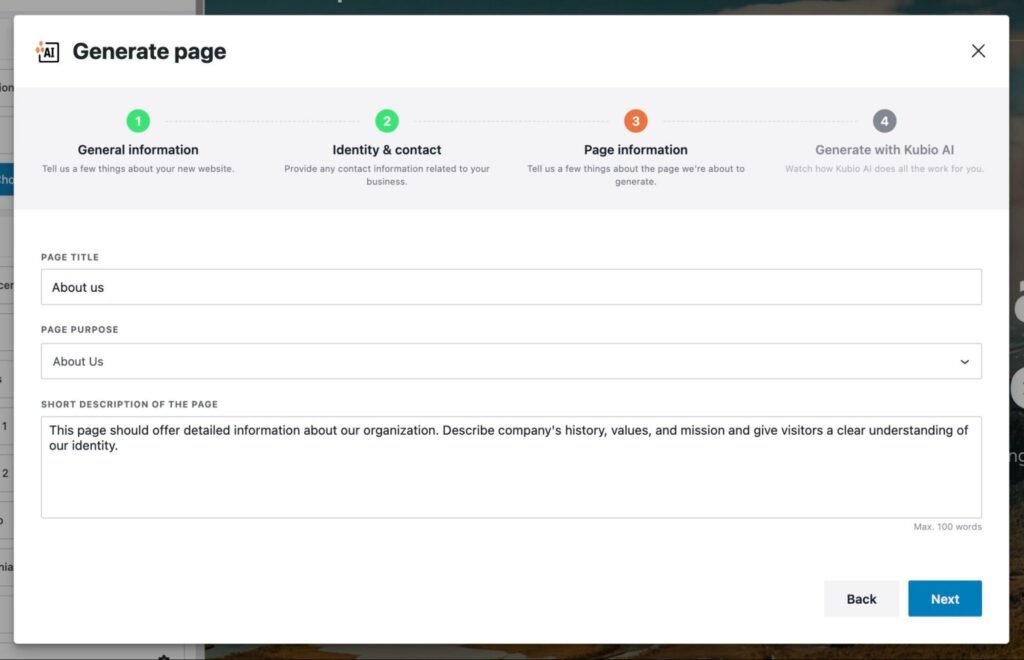
Step 3 – Page information: Now that you have set the general information and style of your website, it’s time to provide some information regarding the new page. In this screen, you will be able to set the page title, purpose and a brief description of it.
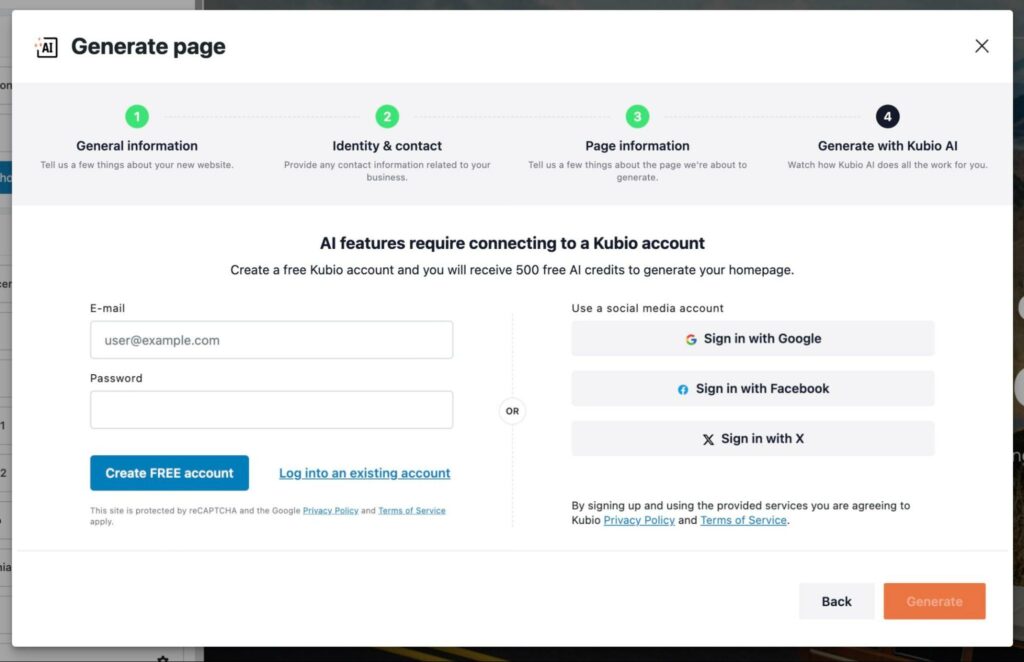
Step 4 – Generate with Kubio AI: in this final step of the setup wizard, if you haven’t connected to your Kubio Cloud account yet, now is the crucial moment to do so. Connecting is essential to unlock and utilize the full spectrum of Kubio AI features at your disposal.
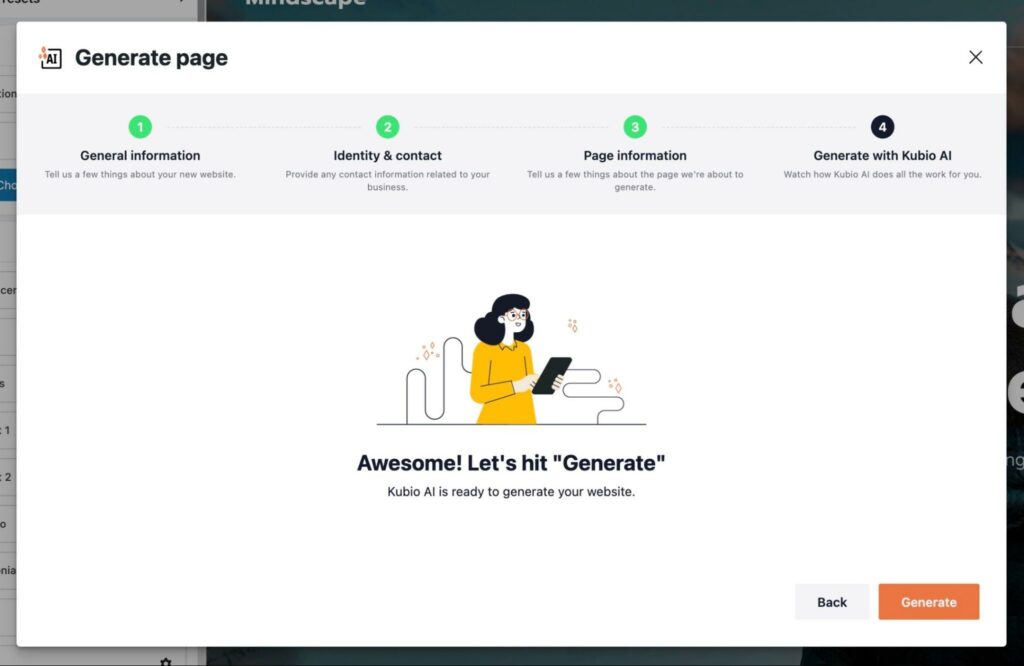
If you’re already logged in, your screen should look like the one below and you can click the “Generate” button.
Read more about how to create, delete or duplicate pages, and navigate between pages and posts in this article
Note: After configuring your website’s general information and establishing a connection to your Kubio Cloud account, rest assured you won’t need to repeat these steps. For future adjustments, simply navigate to the ‘AI Settings’ within the left editing panel, providing a hassle-free way to manage and update your preferences.
2. Generating an existing page
Use this option if you want to generate content for an empty page (while editing it) or if you want to regenerate the whole content of the current page you’re on.
The setup wizard looks the same as the one from Adding a NEW AI Page. Follow those steps and let Kubio AI do the rest.
Important! Generating a page while editing one that has already been populated with content, will overwrite the whole content.