
The WordPress admin dashboard is the heart and soul of your website. It’s one of the most critical aspects of your WordPress blog that you should be well-versed in.
It’s easier than you think to learn how to use the dashboard. WordPress admin components are all extremely user-friendly. You’ll be able to get the most out of WordPress once you know how to use these various tools and settings.
This article will introduce you to the WordPress dashboard and its components. You’ll discover how to log in to the admin area, configure your website, publish content, and more.
Ready to jump in?
What is a WordPress admin dashboard?
The WordPress admin dashboard is where you manage your WordPress site. Consider it the mission control center for your WordPress site. Every WordPress installation includes the same admin panel and tools. Consider the dashboard the “back end” of your site, where you configure and manage everything.
A typical WordPress admin dashboard looks like this:
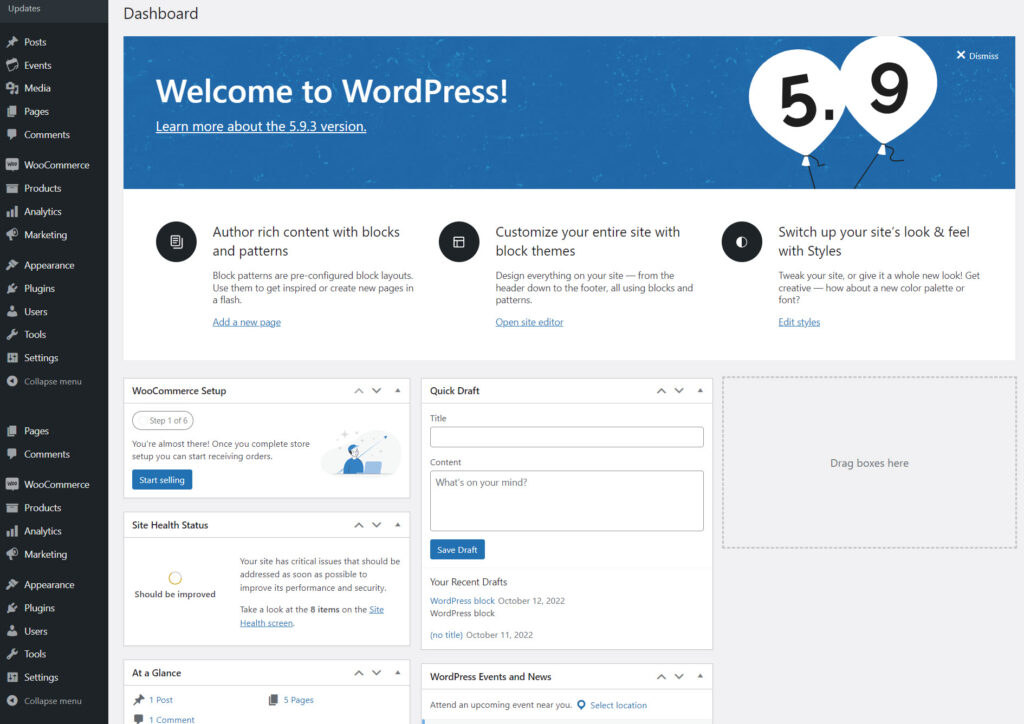
At first glance, two menus are available. The left-hand menu contains most configuration and publishing tools you’ll use daily. In addition, a navigation menu at the top of the screen allows you to switch between the front end and the dashboard.
We’ll go over each option in more detail later in the post. But first, let’s start with how to log into the WordPress admin.
How to access the WordPress admin dashboard?
When you install WordPress, the CMS automatically creates an admin area for your website. Typically, this means you can find the WordPress admin at:
You will create an admin user with a username and password during the process. These are the same credentials you’ll use to log into your website and access the WordPress administration panel.
When you first try to log in, this is what you’ll see:
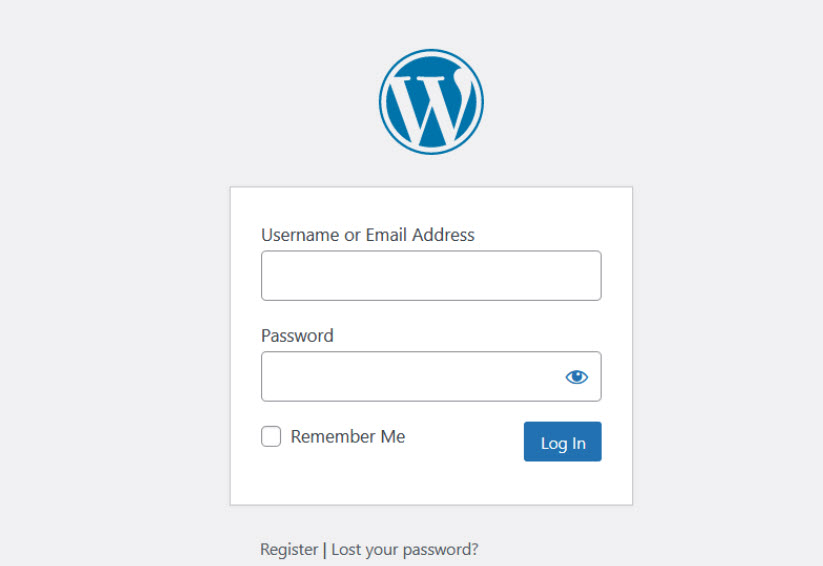
If you are not already logged in and try to access your admin dashboard by appending /wp-admin, WordPress will redirect you to the WordPress admin login page without any further action on your part. However, you can always go directly to the WordPress admin login page URL by visiting the previously mentioned URL.
We recommend that you change the default login URL. Because every bot, hacker, and script out there looks for this standard URL. Changing it to something else can reduce the number of failed login attempts on your website.
You can make yourself less of a target, better protect yourself from brute force attacks, and reduce the bandwidth used by bots that repeatedly hit this URL.
If you lose access to WordPress, you can reset your password from the login screen if you have access to the email address associated with that account.
Understanding the WordPress admin area
When you first log in to the WordPress admin dashboard, you’ll see the default screen, which includes widgets for activity, quick draft, WordPress events, and news. In addition, the WordPress admin page consists of a plethora of links and tools by default. Although you may not use all of them daily, knowing where to go for each task is critical.
You’ll see the Home screen under the Dashboard section as soon as you log into WordPress:
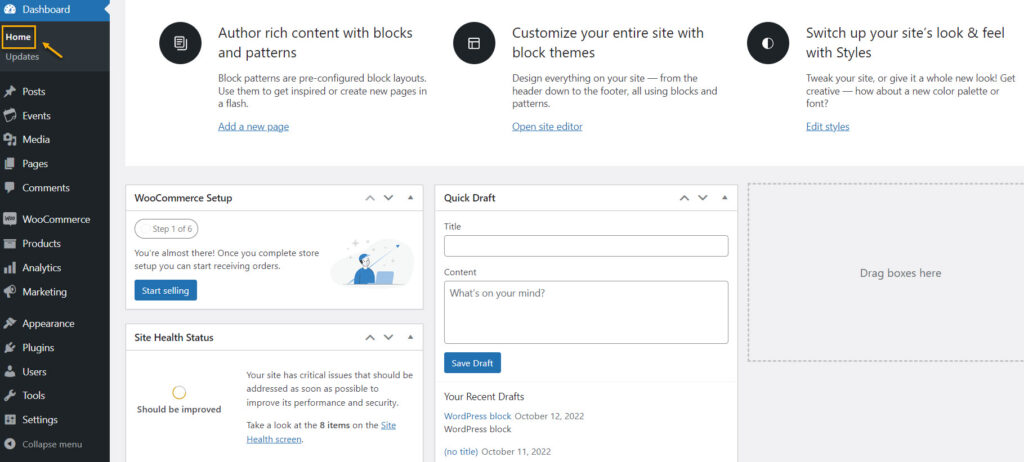
The Home page displays the number of pages, posts, and comments on your website. Notifications about site health, comment activity, and WordPress news and events will also be displayed. You can even use the Quick Draft option to create and save content without leaving the page if you want.
For most users, the Home page is merely a rest stop. You’ll spend most of your time using the menu on the left side of the screen. This menu contains options for publishing content, reviewing existing posts and pages, checking comments, managing plugins and themes, and other things.
At the top of the screen, you’ll also notice the main navigation menu. This menu can navigate to the comments queue or the WordPress editor.
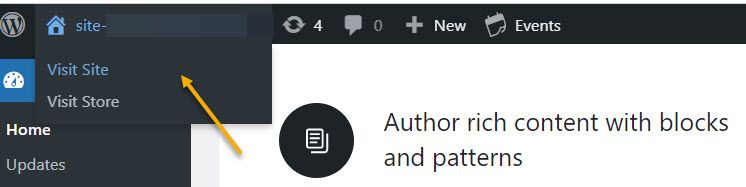
The menu’s primary function, however, is to help you navigate between the front end of your site and the WordPress admin. For example, hovering over the name of your site will reveal the Visit Site option.
Clicking on Visit Site will take you to the homepage of your site. The main navigation menu will still appear at the top of the screen if you are logged in while browsing the website.
When you hover over the name of your site, you’ll see options to return to the dashboard home or the themes screen. The Edit Site button, which opens the WordPress customizer, is also included in the menu.

Don’t worry if you’re unsure what some of those options do. In the following section, we’ll review each component within the WordPress admin.
How to use the WordPress admin panel
Because of the sheer number of options available, the WordPress dashboard can be intimidating at first. Therefore, the left-side menu will be your primary focus while using the dashboard.
In this section, we’ll walk you through the various options available on the menu. This way, when you want to take a specific action on your website, you’ll know where to begin.
How to create and manage posts and pages
One of the most important things you’ll do in WordPress is create and manage pages and posts. For example, assume you want to make your first blog post with WordPress. Here’s how the WordPress admin area can assist you:
To begin, hover over the Posts menu item to reveal a list of submenus. Then you’d press the Add New button:
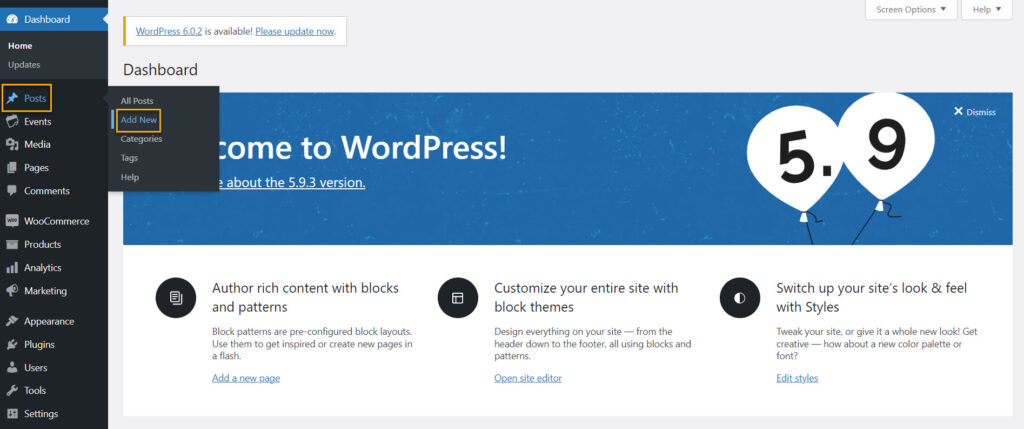
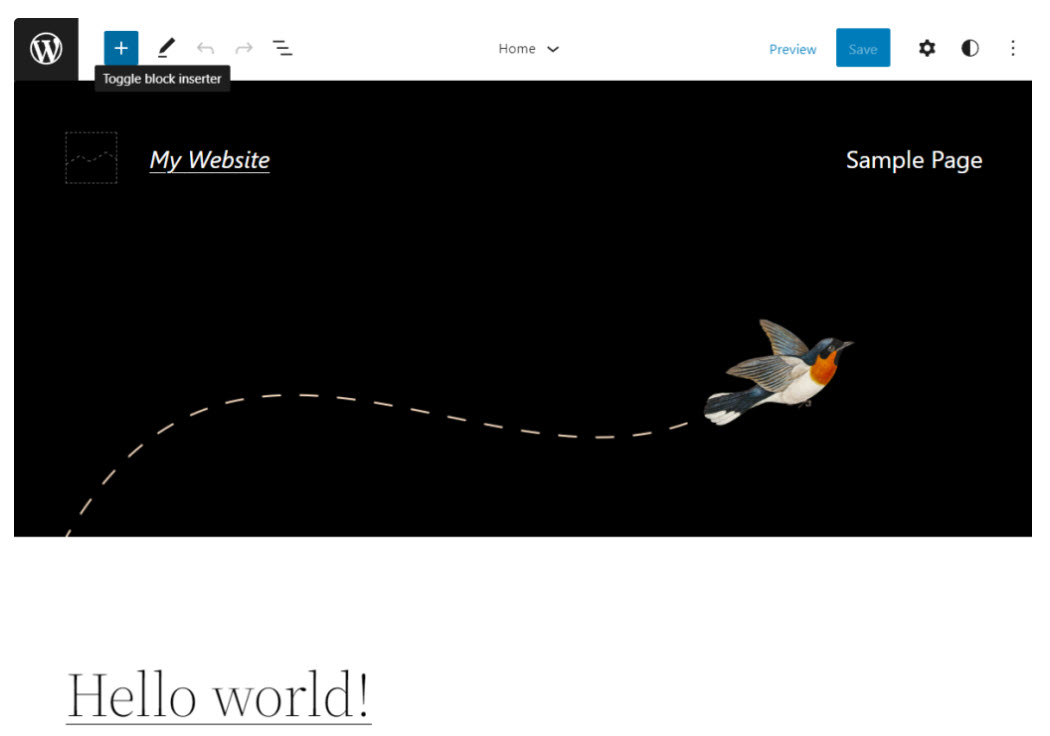
This displays the Add New Post screen, where you can enter a title, write your blog post in the text editor, upload images, assign categories, and do other things:
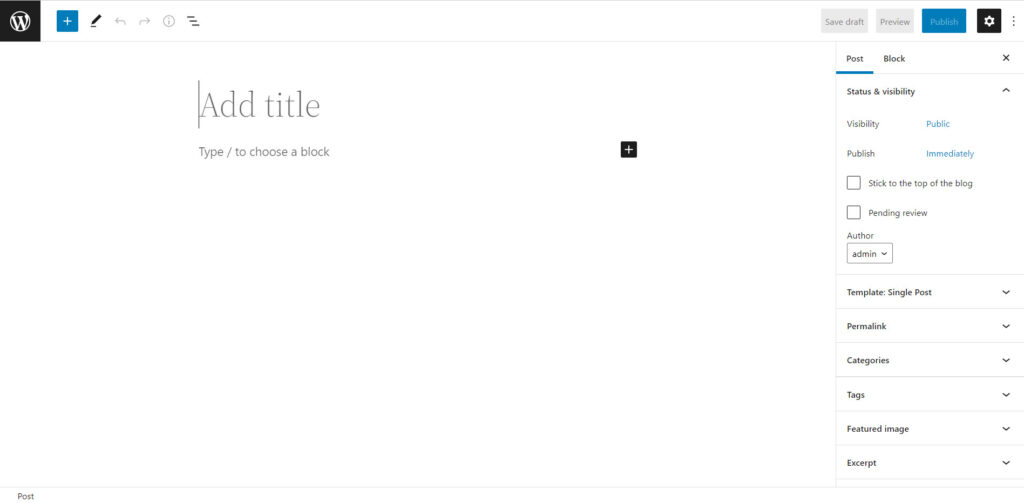
This is known as the Gutenberg editor. Gutenberg is the code name for WordPress 5’s new block-based editor. It takes the place of the traditional WordPress editor based on TinyMCE. It represents a significant shift in the way content is created. For example, you can add multiple media types to Gutenberg and arrange the layout within the editor using blocks.
Selecting All Posts instead of Add New will reveal a list of your published posts. Like this:
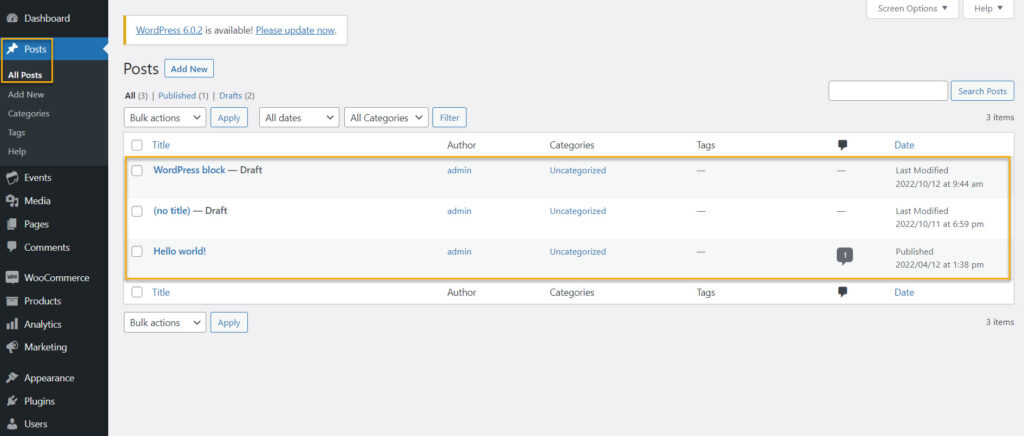
This post list includes the author, category, tags, comments, and publish date of each entry. Hovering over individual entries reveals editing options.
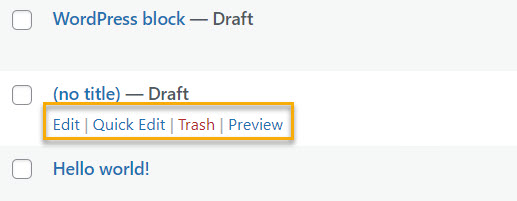
The Quick Edit option allows you to change the basic settings of a post without having to navigate to a new page.

You can use the Bulk actions menu above the list of entries if you select multiple posts. This menu provides options for editing or deleting them. To navigate an extensive content library, use the search and filter tools.
Go to Posts Add New or Pages Add New to create a new page or post on your website. Either option will launch the Block Editor. You can also go to the main Posts or Pages screen and select Add New.
How to create and manage WordPress tags and categories
You can add as many categories and tags as you want and apply them to posts in any order you like. To begin, navigate to Posts Categories. You’ll see a list of existing categories and a menu where you can add new ones.
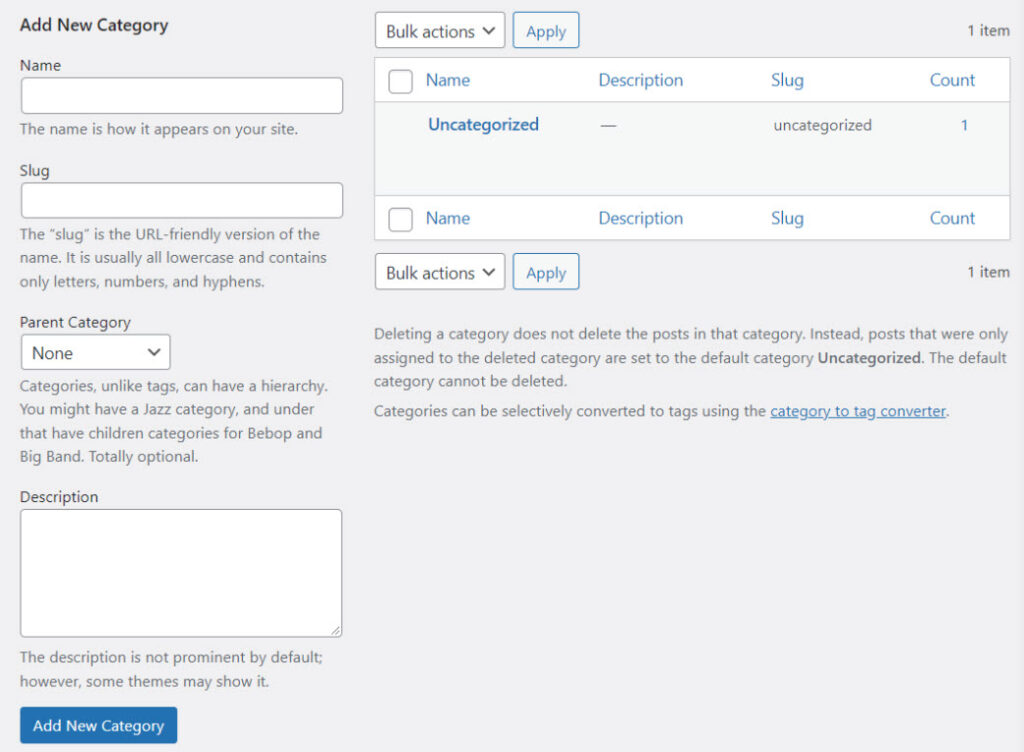
Choose a name for your new category. If desired, you can also write a brief description and assign it to a parent category.
Meanwhile, the URL-friendly version of the category name is the slug. So, for example, if you have a WordPress Tutorials category, the slug would be /WordPress-tutorials or something similar.
When you add a category, it will appear on the right-hand list. You must use the editor to assign a category to a post.
Moving on to the Tags, the procedure for creating and managing WordPress tags is identical. You can choose a name, slug, and description for each tag you add.

Tags, like categories, are assigned to posts via the editor.
Visitors will find it easier to navigate your content library and find related posts using categories and tags. The taxonomy of your website should grow in tandem with your content library.
How to upload and manage WordPress media files
Media files are an essential part of any website. WordPress accepts a wide range of media file formats. There are so many that we recommend you read the official WordPress.org entry on supported file types.
WordPress supports the most famous image, video, and audio file types for upload and display. This is possible with the WordPress media library, which can be found under Media Library.
We’ve written an article about how to deal with the WordPress media library, including how to upload images and use third-party media blocks, so check it out for an in-depth explanation.
In short, head over to Media → Library. You can upload files directly from the library by clicking on Media Add New or the Add New button.
When you upload a file, WordPress will prompt you to either drag it into an upload “area” or browse your local files using the Select Files option.

Just hit Add New, and you can go from there:

You can upload multiple files at once, but there is a file size limit. This size is determined by your web host and your site’s configuration.
After you’ve uploaded your files, you can access them through the media library by clicking on them. A details screen will appear when you click on any media file. You can change the file’s name, metadata, alt text, captions, descriptions, and URL here.
Now on to WP comments! ?
How to manage WordPress comments
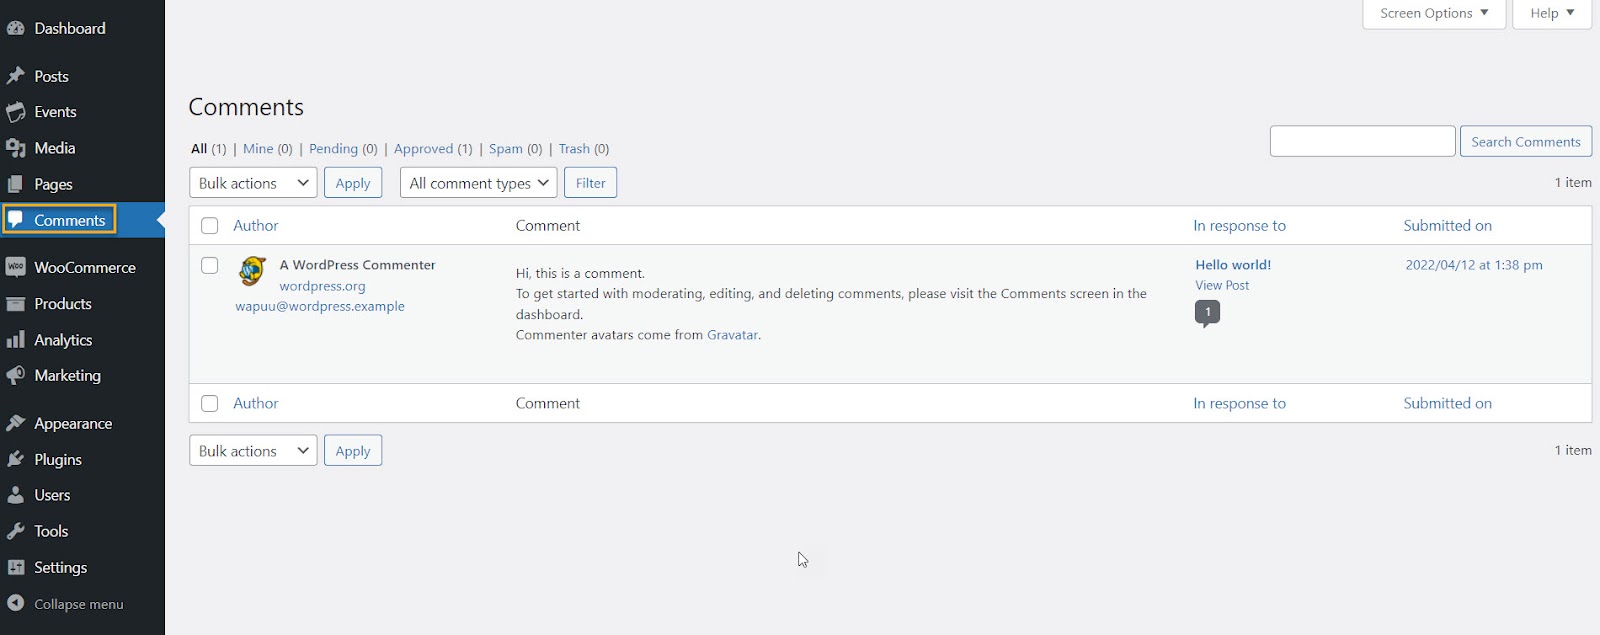
Because WordPress was created to be a blogging platform, it includes a vigorous comments system. Therefore, users can respond to posts and pages if you enable the comments feature.
WordPress comments can be approved, pending, trashed, or marked as spam. WordPress has some spam detection capabilities by default, but it is up to you to filter and approve comments.
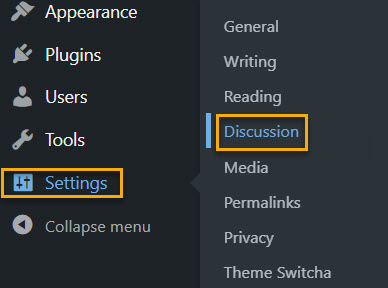
Go to Settings → Discussion to configure your site’s comment settings. This page contains several comment settings and settings for your regular posts.

Allowing people to submit comments on new posts determines whether or not visitors can leave comments at all. If you disable that setting, the entire commenting system will be disabled.
Scroll down to the Other comment settings section if you enable that setting. You can configure the information users must share to comment and whether they must register here. This section also includes options for closing comment sections automatically, controlling cookies, enabling nested comments, and adding comment pagination.

There are also options in the Discussion settings to receive notifications when visitors leave a comment or if there are entries that need to be moderated. You can configure whether comments require manual approval by visiting the Before a comment appears section.
There is also an option for users who have previously approved comments to bypass the moderation queue.

WordPress includes a feature that allows you to automatically flag comments that contain specific words or identifying data, such as usernames, emails, or IP addresses, to make moderation easier.

The default WordPress comment system is adequate, but as your site grows in popularity, it may struggle to filter spam. Consider installing a WordPress plugin to prevent spam or disable comments if the situation requires it.
How to manage your website’s looks from inside the WordPress dashboard
Another thing you can do in the WordPress admin area changes your WordPress site’s appearance by selecting and customizing “themes.”
To use WordPress themes, simply hover over the Appearance menu item to see a list of theme options:
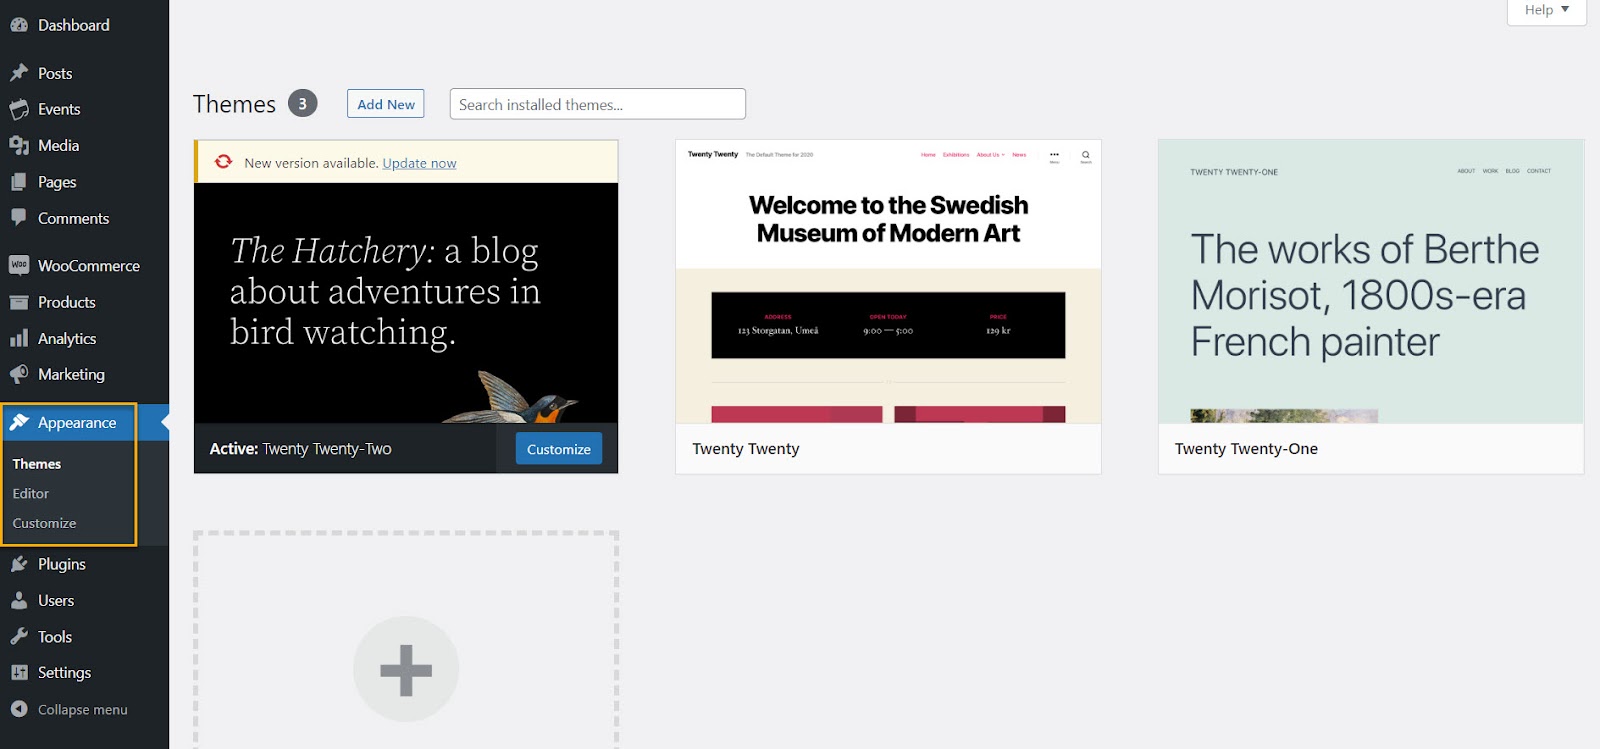
You can switch between these themes by hovering over the selection and clicking on Activate.
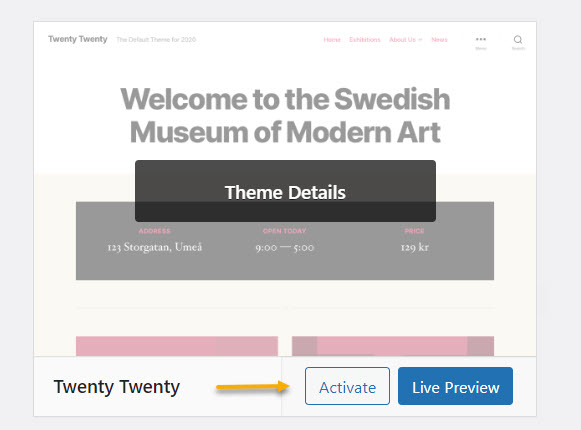
Note: Changing themes will drastically alter the appearance of your website. Keeping this in mind, we recommend using the Live Preview tool to see how the theme looks in action.
The preview feature allows you to change the theme’s style to see if it’s a good fit for your needs. Of course, you can always look for other options if a theme does not meet your requirements.
If you wish to add a new theme, return to the Themes tab and select Add New or Add New Theme to add a new theme. This will bring up the WordPress.org theme repository. The repository contains a massive collection of free themes.

You can choose any theme you want from here and then click Install or Preview. You can use the preview feature to test out the theme before installing it.
If you want to upload theme files directly, use the Upload Theme button. By selecting this option, you can upload themes in.zip format. You should go this route if you buy a premium theme elsewhere.

After you install a theme, it will be added to your collection in the Appearance Themes menu. You can install as many themes as you want, but only one can be used simultaneously.
If you select Appearance Editor, the WordPress full-site editor will be launched. WordPress’s full-site editing is a relatively new feature. You can use the Block Editor to edit your theme templates.
What about WordPress plugins and tools?
WordPress plugins abound, with thousands to choose from. WordPress is so popular because each plugin adds one (or several) new features and tools to the CMS.
Your web host may pre-install some plugins for you when you launch a new website. Go to Plugins → Installed Plugins to see what plugins you have installed.
To add new plugins, go to the top of the screen and select Add New. The WordPress admin will show the official plugin repository containing thousands of options.
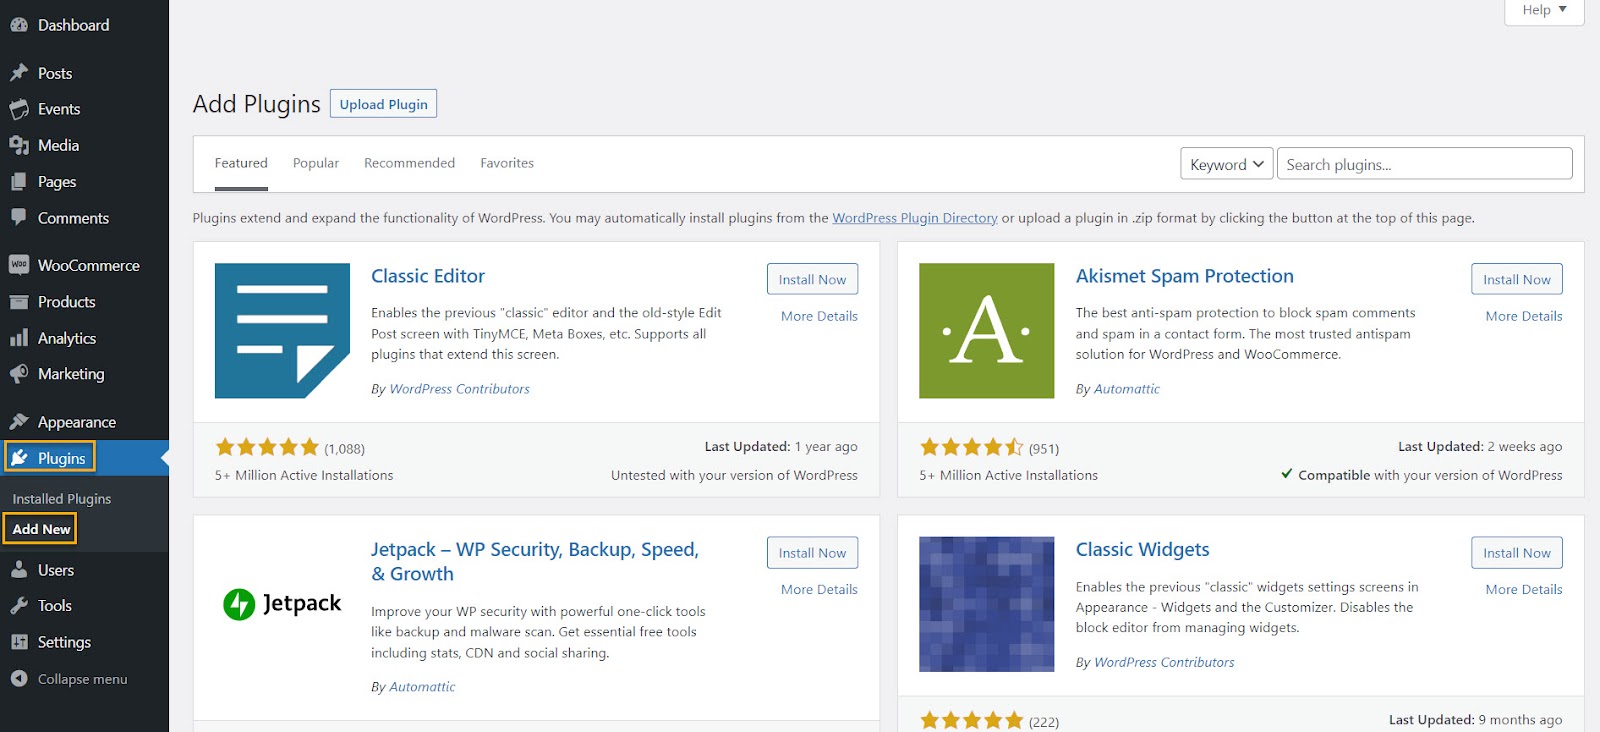
Click Install Now and wait for WordPress to download the plugin’s files. When the plugin is finished, click the Activate button to activate it.
You can also directly upload plugin files to WordPress. When you click Upload Plugin, WordPress will ask you to choose an a.zip file to upload.
When it comes to plugins, we recommend that you do your homework. It all depends on the type of website you have. For example, assume you have an eCommerce website powered by WordPress and require a checkout plugin. There are several options available, but you must thoroughly research them. For more information, please see our article on the best plugins for eCommerce business owners.
How to manage user accounts in WordPress
WordPress will automatically create an administrator account for you when you make a website. WordPress comes with a robust user system that includes a variety of roles, including:
- Administrator
- Author
- Editor
- Contributor
- Subscriber
Your user role determines the options available to you in the WordPress dashboard. As the site’s owner, you should be the only user with full access to all dashboard settings and pages.
If you go to the Users All Users page, you’ll see a list of all existing user accounts.
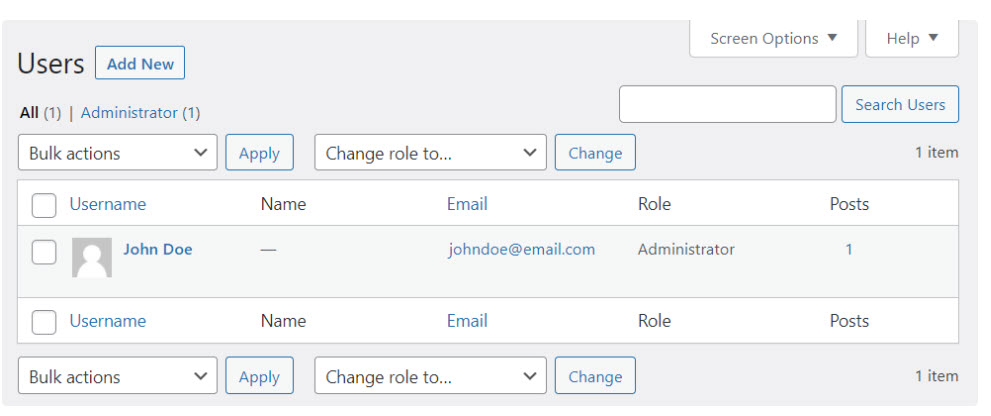
To create a new user account, go to Users Add New from the left-hand menu or click on Add New at the top of the screen. You can configure the new account’s username, email, first and last name, website, and password on the following screen.
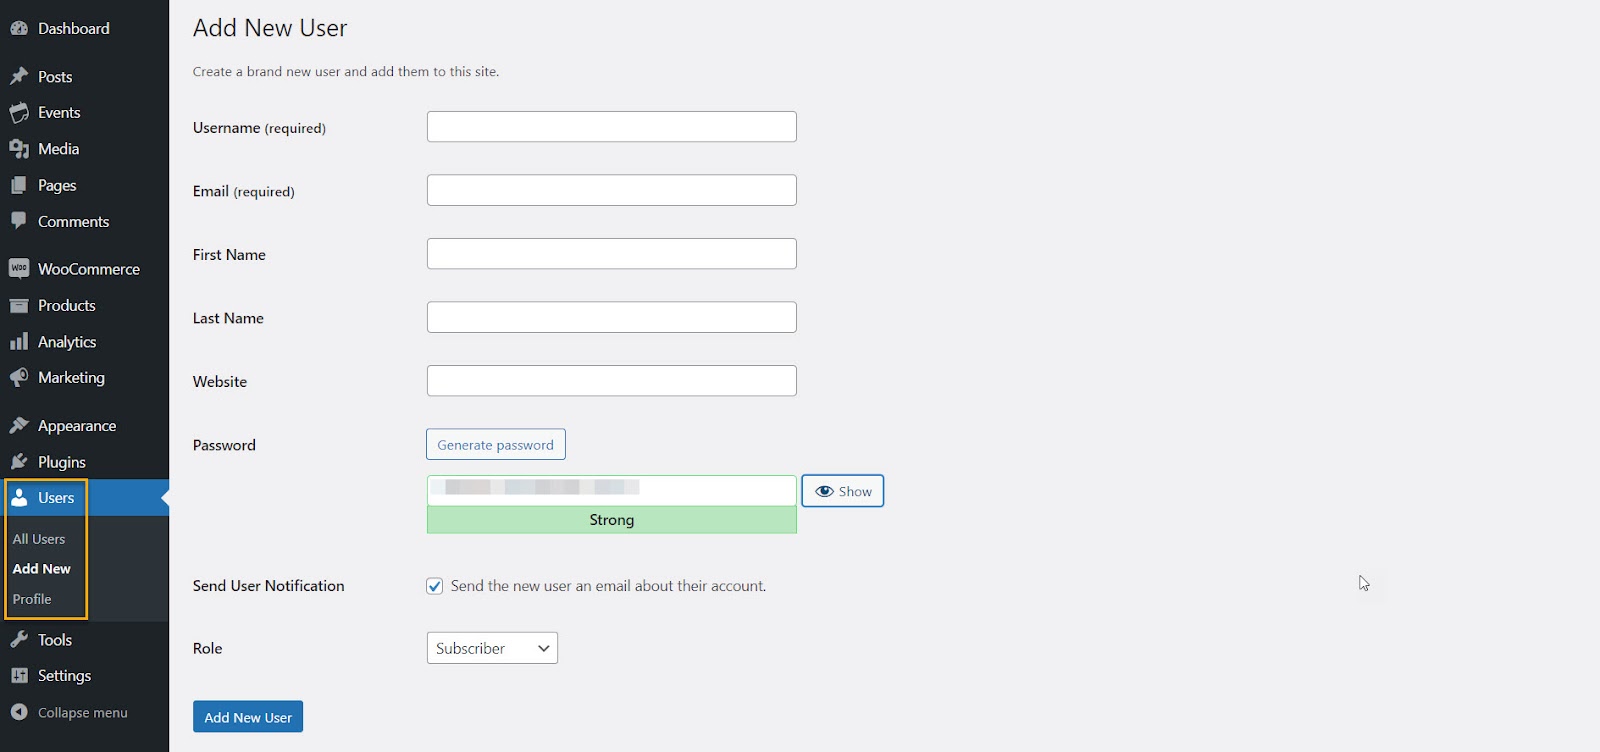
WordPress only requires a username and an email address by default. However, enabling the Send User Notification option will automatically send a notification to that email address.
For new accounts, WordPress will also generate strong passwords. If it detects a weak password, it will prompt you to confirm whether or not you want to use it.
Using the Role menu, you can assign a user role to the new account. When all of the fields are completed, click Add New User.
If you do not want to add user accounts manually, you can enable registration on your website. Visitors will be able to use a pre-built form this way.
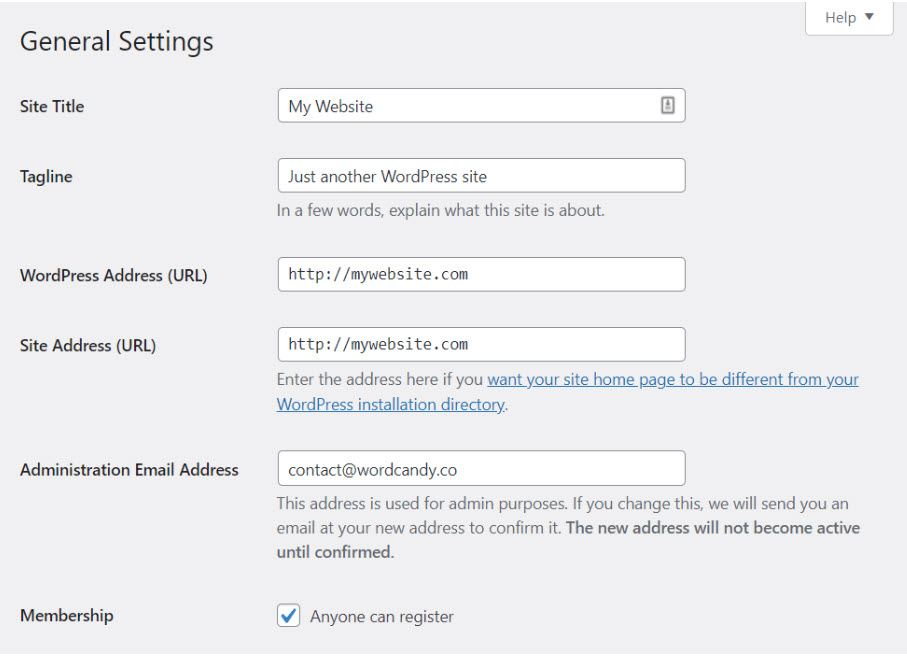
To enable it, go to Settings General and select the Anyone can register option next to Membership. You can also set a default role for new users from this page.

How to manage WordPress general settings
The WordPress General Settings screen allows you to give a website a title and configure its URLs. You can also update your admin email address and enable user registration from this page.
You can change the language of your site by scrolling down. This will change the language used by the WordPress administrator. You can also change time zones, date and time formats, and the start of the week.

When you’re satisfied with your changes, click the Save Changes button. General settings should only need to be configured once.
How to manage WordPress Permalink settings
Permalinks are an essential part of how WordPress works. A link is automatically generated when you publish a new page or post. The format of the URL is determined by the permalink structure you choose.
Go to Settings → Permalinks to select a structure. A variety of URL structures are available inside. The custom part of the URL follows the domain. In this case, yourwebsite.com is the domain.

You should select a URL format as soon as you create a new website. Changing the permalink structure of an existing website can cause errors and harm your search engine rankings.
The Post name and Month and name permalink structures are the most popular for most websites. They’re both relatively short, and you can customize the slug for each URL when you edit the blog post or page.
If you use WooCommerce, you can also change the URL structure for online products on the Permalinks page. However, it should be noted that the WooCommerce default options do not include numbers or dates.
How to manage WordPress Privacy settings
And lastly, privacy. User privacy is critical, and WordPress includes a built-in tool to assist you in creating a privacy policy page for your website.
Go to Settings → Privacy to access that tool. For example, if you choose to Create a New Privacy Policy Page, WordPress will create a new page with a template for you.
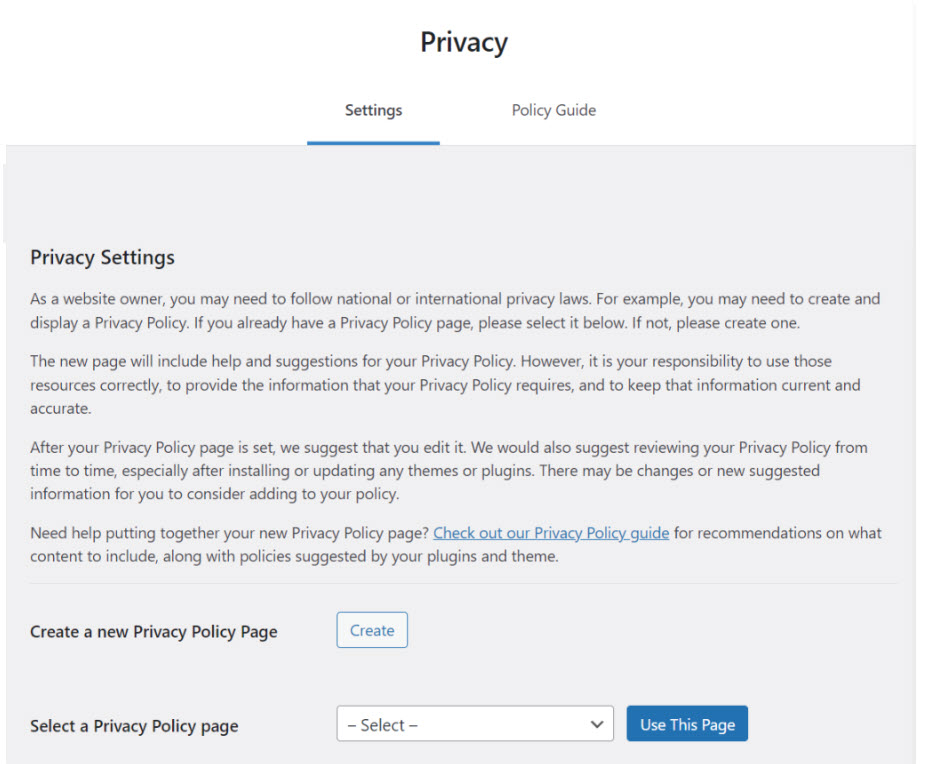
The Select a Privacy Policy page option allows you to select an existing page and make it your site’s policy. This means that you have complete control over its appearance and content.
Visitors can access your privacy policy from the login and registration screens. You can also include links to the page in other places.
Wrapping Up
Navigating the WordPress admin can be difficult at first, but after a while, you’ll understand the ins and outs of the dashboard. After reading our guide, you’ll know where to find the most important settings and how to change a specific configuration.
If you liked this article, and want to have access to similar content, make sure to subscribe to our YouTube Channel. You can also follow us on Facebook. If you want to find out how to customize your WordPress site, here‘s a great resource we’ve compiled to help you out.