By now you already know that WordPress is a very flexible website building tool. Depending on the tools you use (themes, WordPress builders, plugins, add-ons, widgets) you can play with blocks or drag and drops. No coding required.
From time to time you might want to tweak things a little bit, when you encounter theme limitations, and then some HTML knowledge might come in handy.
Usually, HTML code doesn’t come alone. You will need CSS as well. While HTML will deal with the website structure, CSS handles the styling part. Having some basic coding skills can save the day and make a website more beautiful.
Here are the resources you need to acquire some basic coding skills in a matter of weeks:
If you need some custom-made or an online store, you might need to look for a WordPress developer to lend you a hand.
Now, let’s see how you can add your own code in WordPress.
Adding custom HTML to WordPress
How to add custom HTML to the Classic WordPress Editor
Usually, you would edit a page or a post in the Visual Editor, like below.

The Visual Editor icons allow you to format text, insert lists and links, and more.
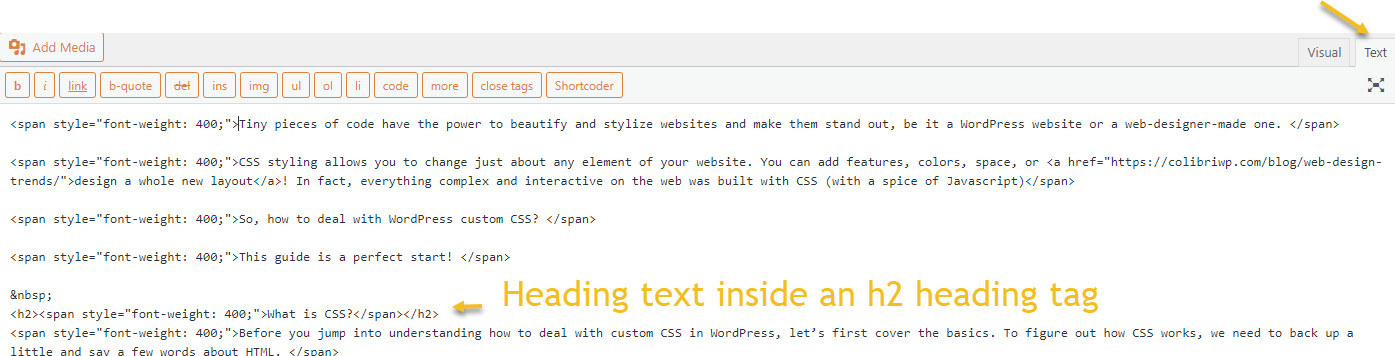
Now, every time you edit something in here, behind the scenes, there is some HTML markup happening. For example, you are adding a heading, behind it you might see a <h2> tag, links get inserted between <a> tags, and lists inside <li> tags. There aren’t many tags out there that you should know when organizing your content in HTML format.
Now, how can you access this code in WordPress? Through switching from the Visual Editor to the Text Editor (you are still working with the Classic Editor).
I usually work with the Text Editor, and whenever I need to spice things up a little bit, I place some HTML code inside the Visual Editor. For example, I used to do this when creating anchors for tables of content. Now this can be done easily in the Default Editor using blocks.
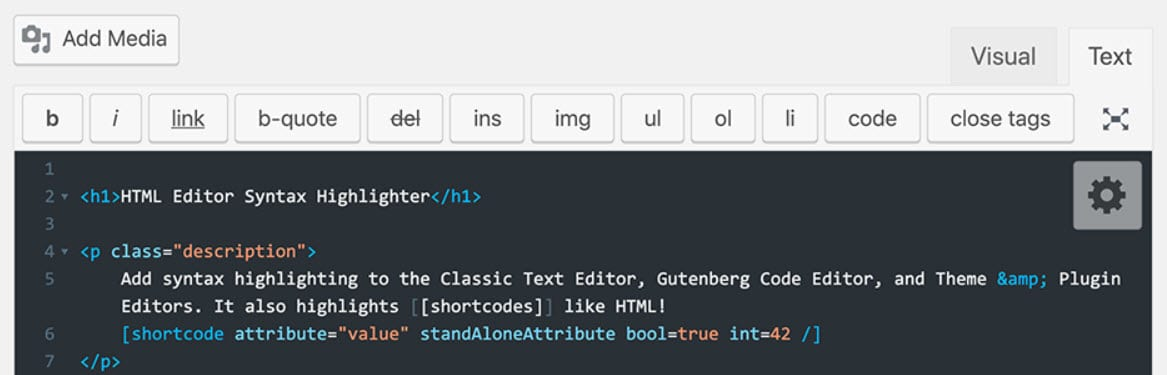
For those that are more familiar with HTML and use tools such as Sublime for coding, you can use the: HTML Editor Syntax Highlighter to have a similar view.
How to add custom HTML to the Default WordPress Editor
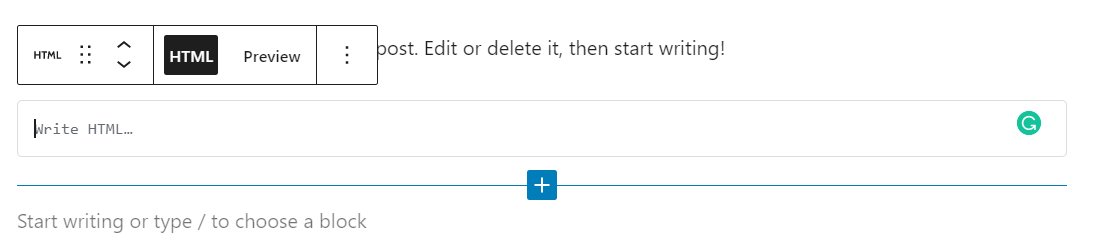
As you can already imagine, there’s a block for this called “Custom HTML”.
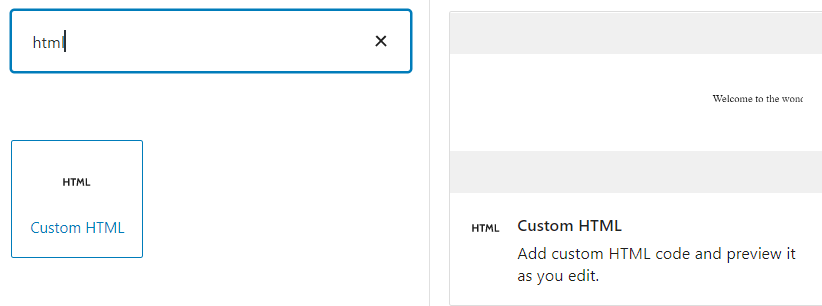
You just need to insert the block then paste your code.
Now, if you want to visualize the code for the whole page, you can switch to a code editor, similar to the one presented earlier, when talking about the Classic Editor. You can do this from selecting the three vertical dots in the upper right corner.
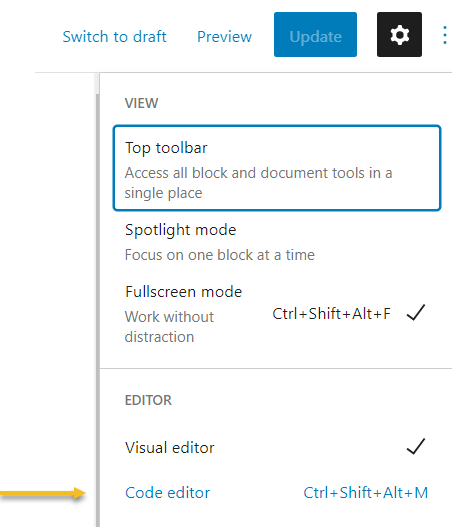
Next, just head over to the Code editor. From now on you can make HTML changes.
Adding custom CSS to WordPress
HTML defines all the content, text, images, and links of a page. But HTML alone is not capable of beautifying a website. That’s where CSS steps in. CSS and HTML always come in tandem. CSS can’t live without HTML as there would be nothing to style without it.
In web design, CSS styling can be added this way:
- Inline – by using the style attribute inside HTML elements. It would look like below where you place “style” after each HTML tag that you need to style.

What does this mean for you in WordPress? That wherever you used to place “custom HTML” you can add styling inline!
This can be done in:
- The Text editor of the Classic WordPress editor
- The “Custom HTML” block in the Default WordPress editor
- The Code editor for the Default WordPress editor
- The “Custom HTML” widget for sidebars
- Internal – by using a <style> element in the <head> section. In WordPress, you don’t usually have access to this.
- External – by using a <link> element to link to an external CSS file. In WordPress, you don’t usually have access to this.
Also, you can add CSS styling from the WordPress Customizer.
Here are the steps for this:
- From the WordPress dashboard head over to Appearance-> Customize.
- From General settings select “Additional CSS”.
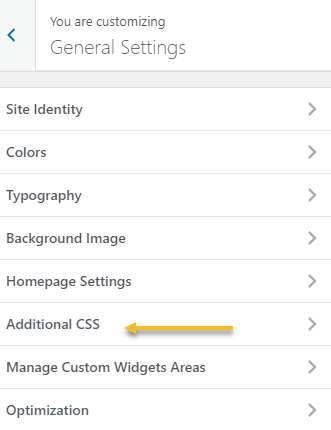
- Add here your desired CSS styling. It will look like this.
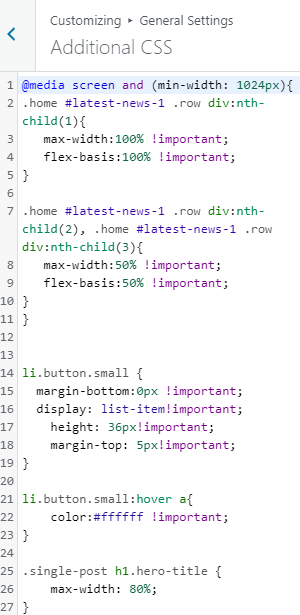
This additional CSS styling option comes in handy when you want to make your website mobile responsive. You can adjust certain elements to the width of various screens. It’s a gold mine!
Adding CSS classes from the Default WordPress Editor
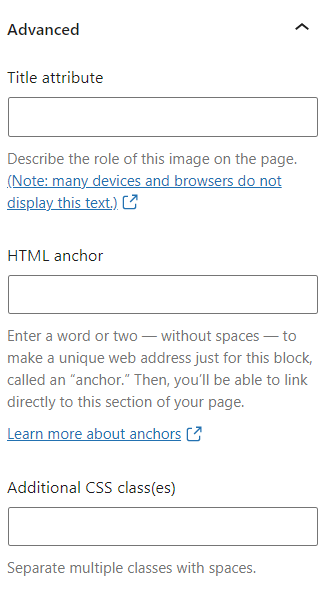
You can use CSS to style each individual block element. When selecting a block from a page, you’ll see some block editing options on the right. Just scroll down to “Advanced”, then find the section on “Additional CSS classes”. Classes help group certain HTML elements under the same styling. For example you can create a class rounded_borders for some of the images on a site. Next, you can define the type of border, its radius, and more for that class. This will be done inside the Customizer.
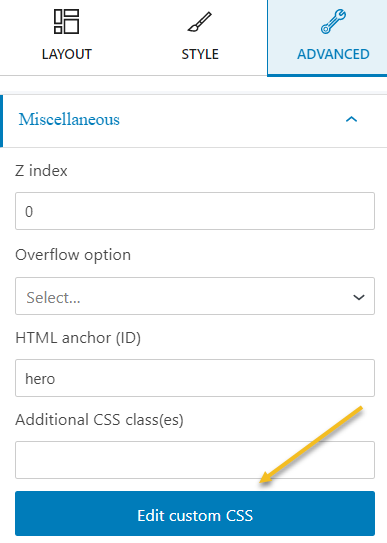
Adding CSS styling via the Kubio website builder
If you’re using the Kubio website builder, there’s another way of adding CSS styling to a block or section. Just make your selection and head over to the editing panel on the right. The last option under “Advanced” is “Edit Custom CSS”. Paste here your desired code.