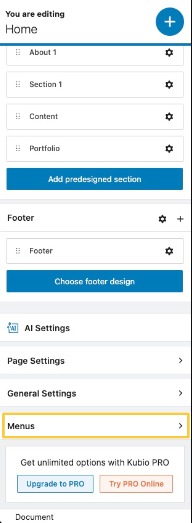
When you’re inside a page or post, go to the page editing panel (on the left-hand side), you will have access to various website settings. Scroll down until you see “Menus”.
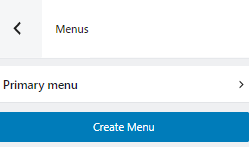
After selecting “Menus,” you will see all your available menus. If you want to create a new one, select “Create Menu.”
Next, give it a name, and select “Create menu.”
Now, let’s name the menu.

Next, after you select your menu, you can start adding menu items from the “Add menu item” button.
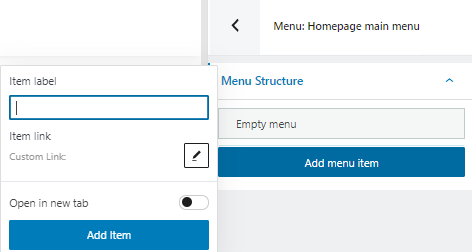
Give your menu item a label (aka name) and paste the link that it will direct to. You can add as many items (pages, posts, custom links), as you like, but make sure not to exaggerate.